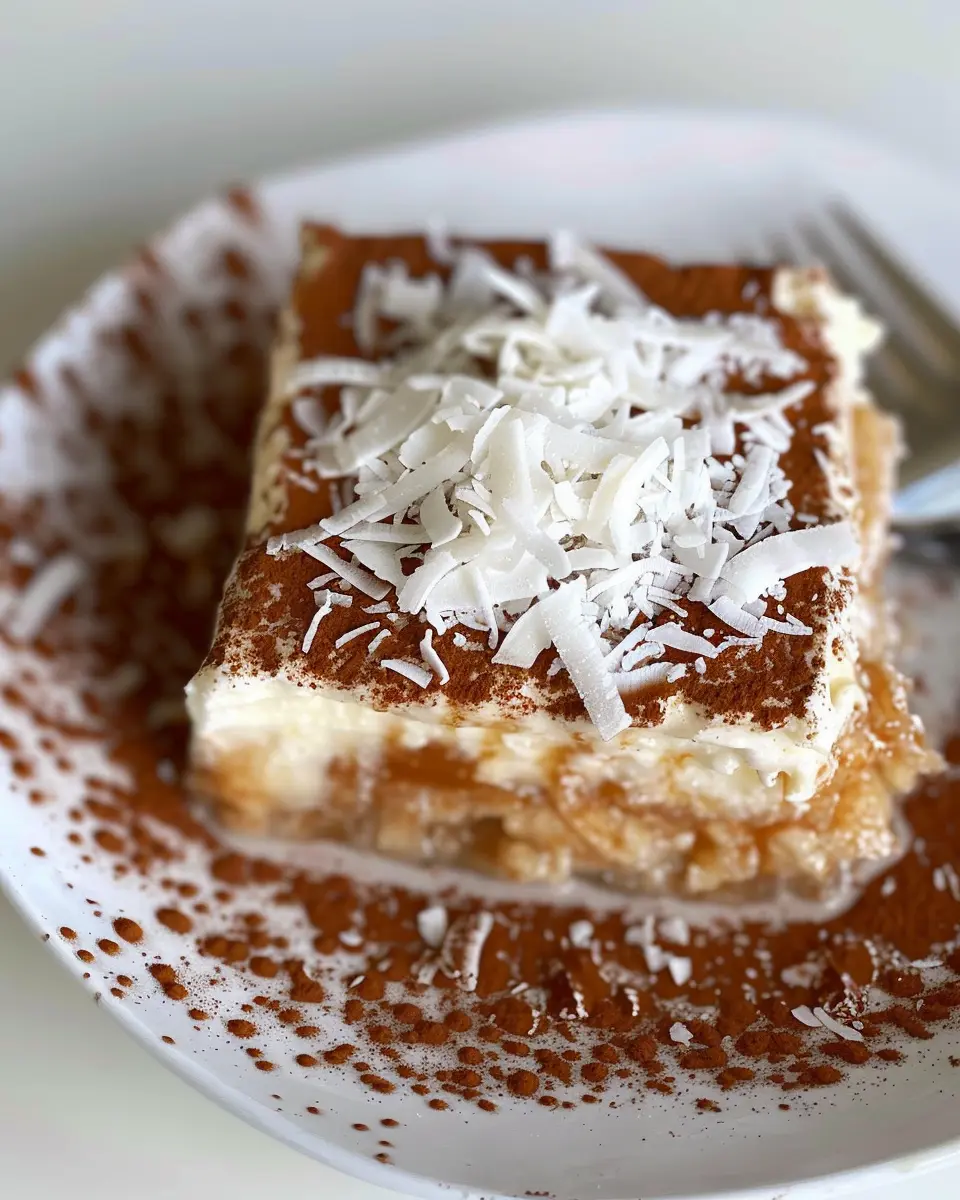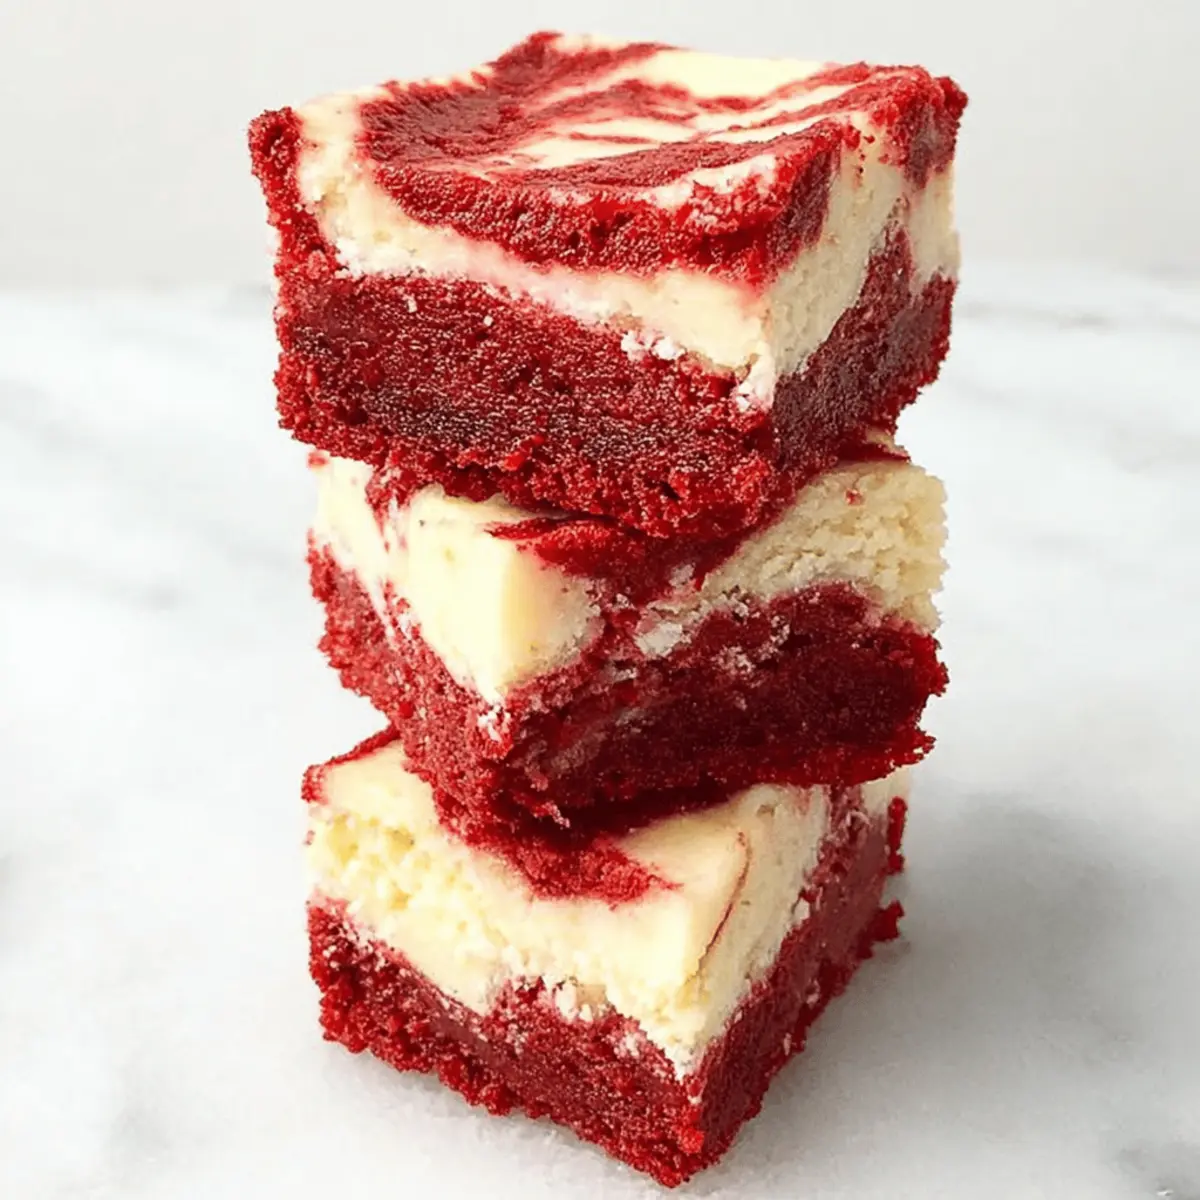
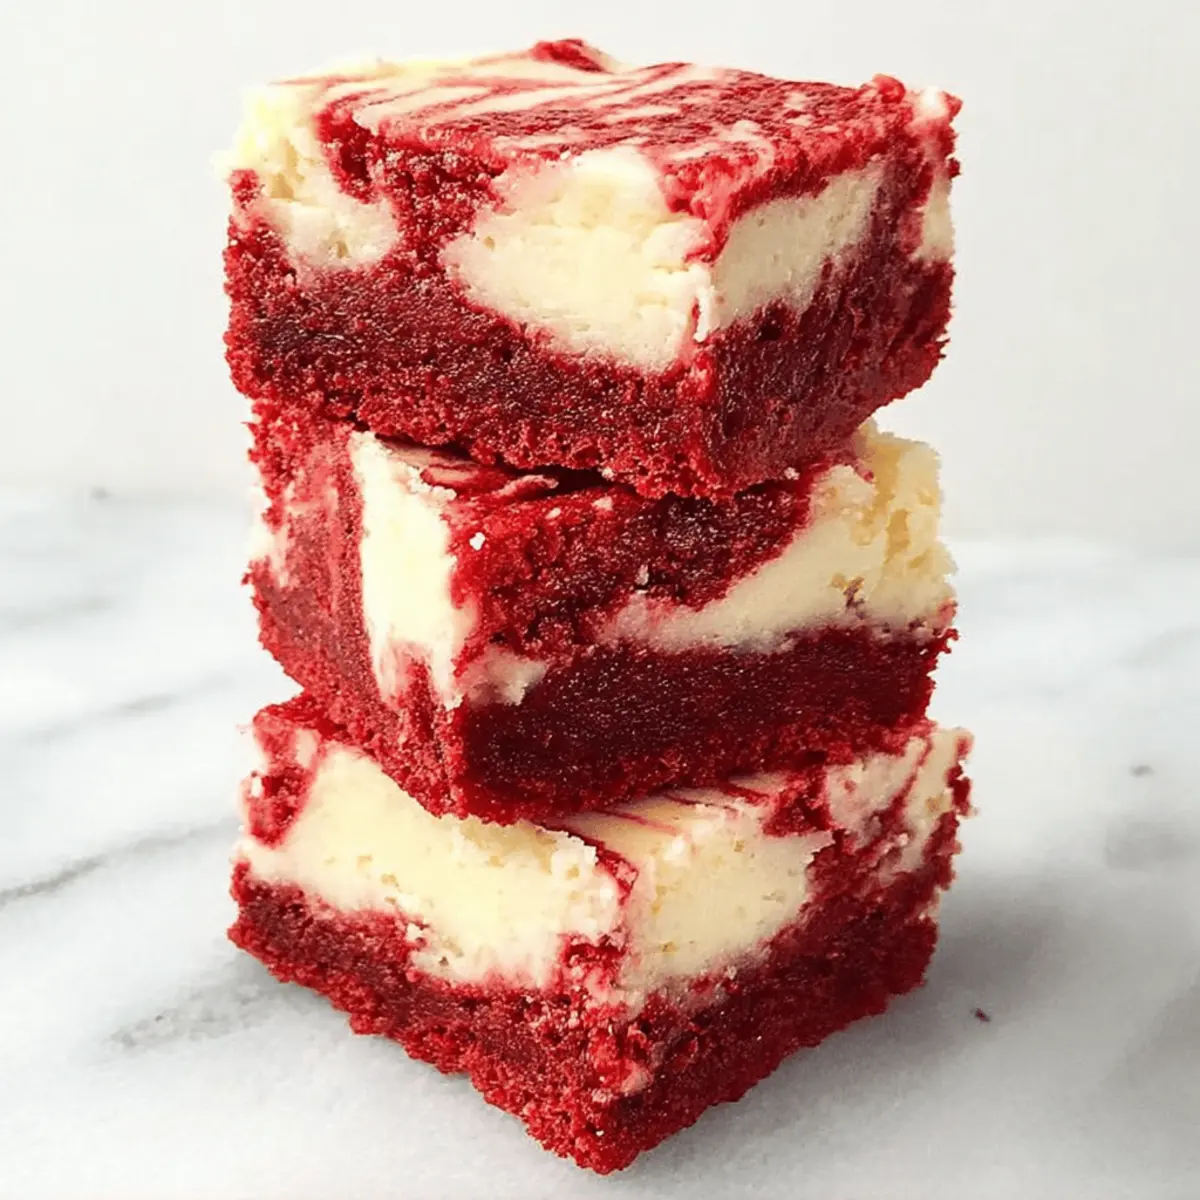
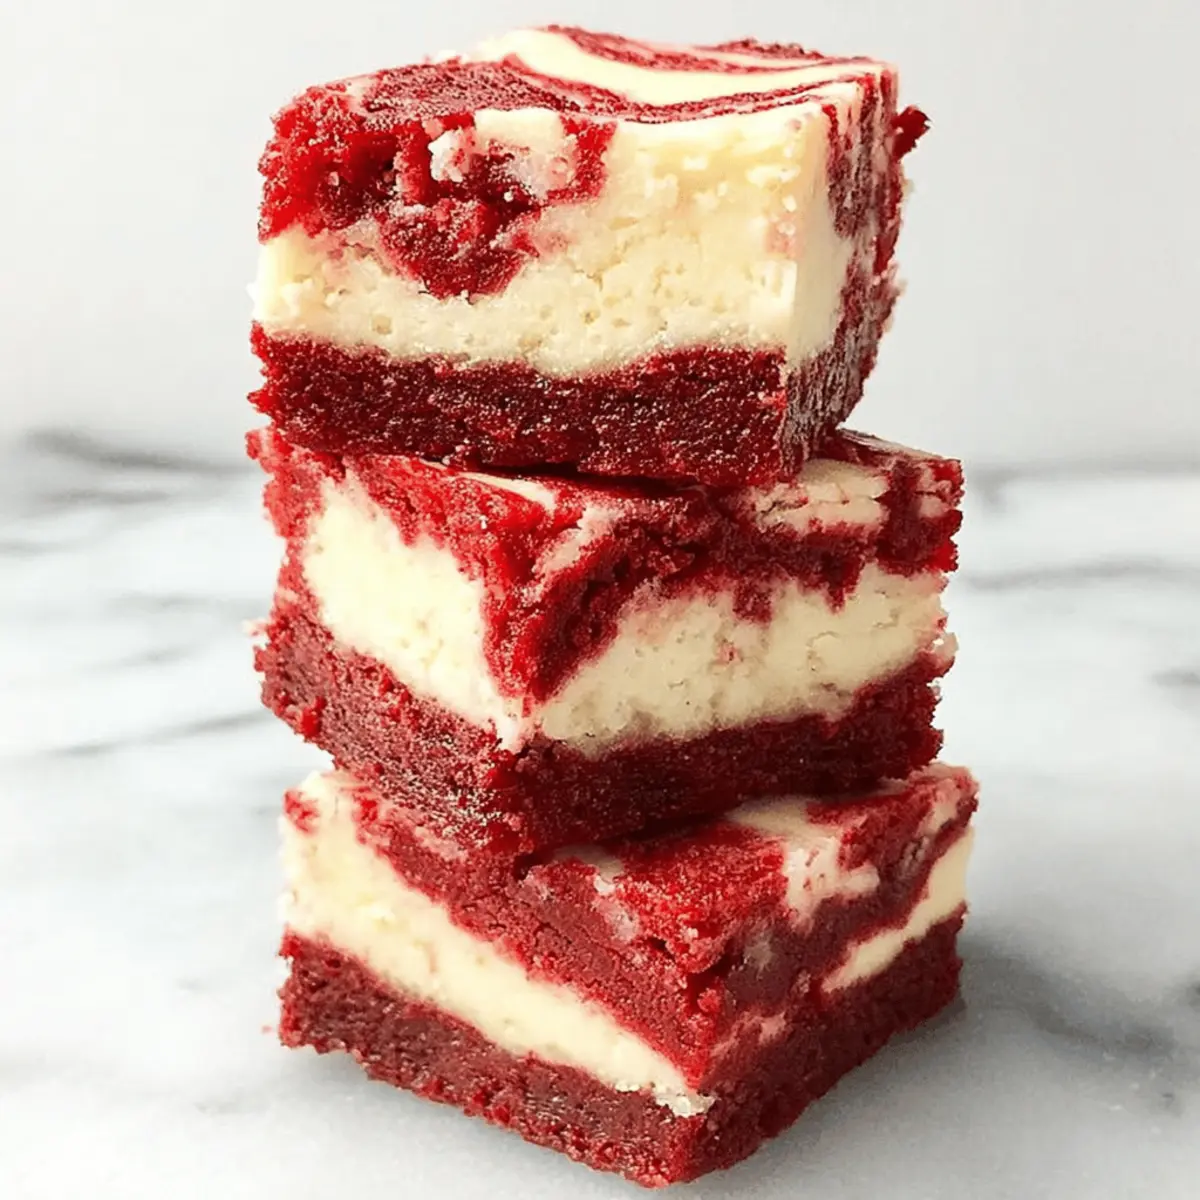
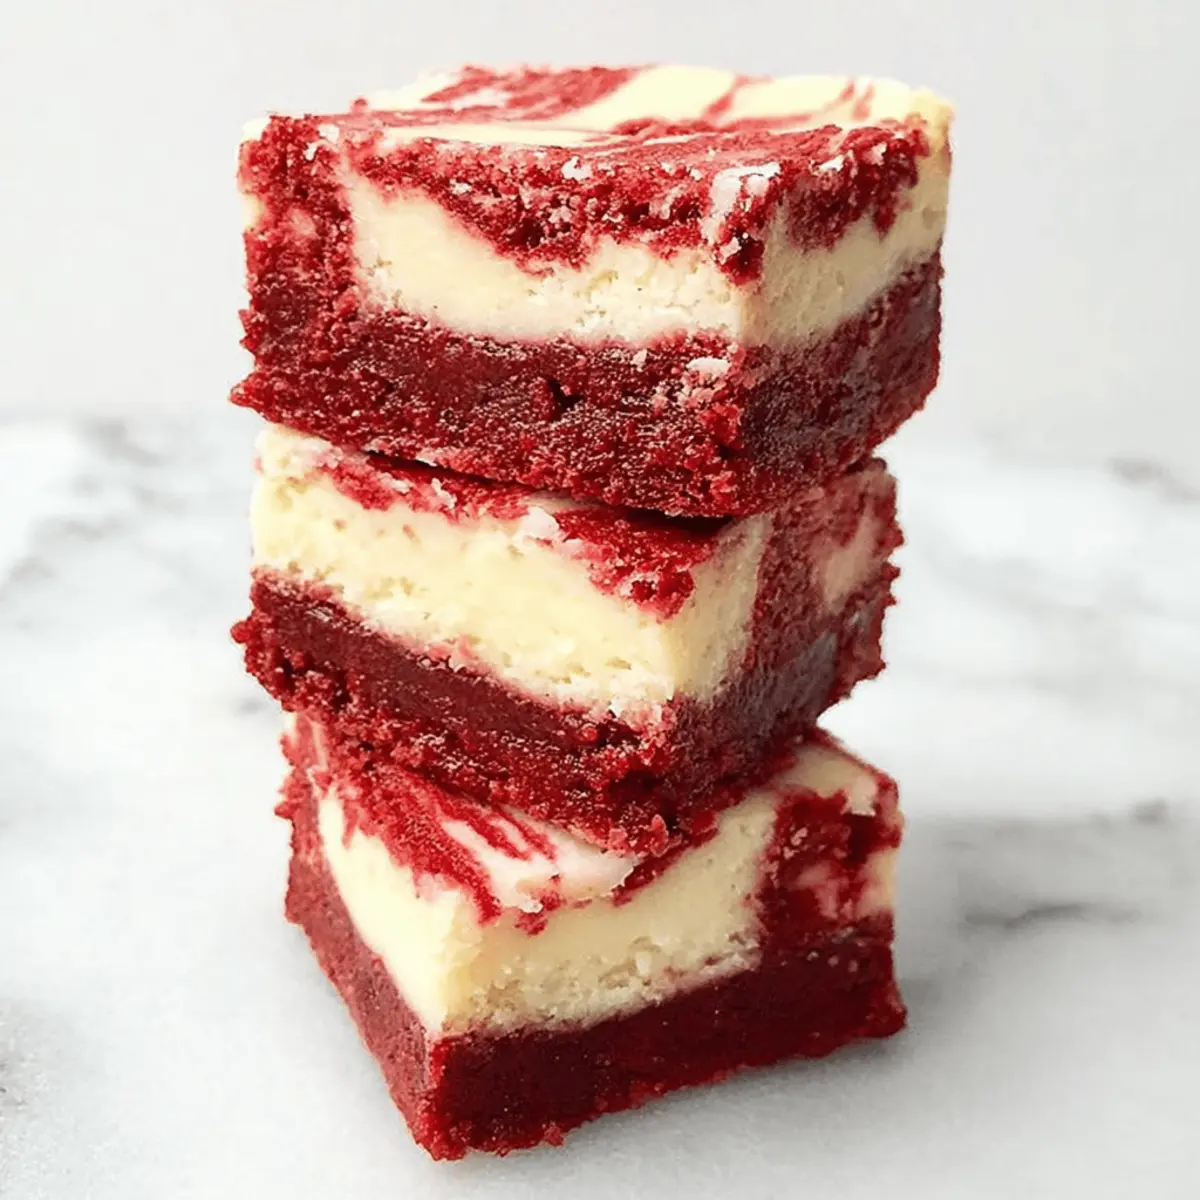
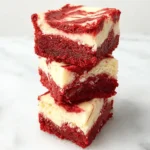
Introduction to Red Velvet Cheesecake Bars
When it comes to indulgent desserts, red velvet cheesecake bars truly take the cake—literally! Imagine a creamy cheesecake layer infused with that iconic rich flavor of red velvet cake, all nestled in a beautifully baked crust. These bars are the ultimate treat not just for their taste, but for the WOW factor they bring to any gathering.
Why Red Velvet Cheesecake Bars Are the Ultimate Treat
So, what makes these bars stand out? For starters, they combine the best qualities of both cheesecake and classic red velvet cake. The velvety texture of the cheesecake contrasts beautifully with the tender crumb of the red velvet, making each bite an experience worth savoring. According to recent studies, the visual appeal of food can heighten our enjoyment, and let’s face it—these bars are as stunning as they are delicious!
But it’s not just about looks. Red velvet, derived from a combination of cocoa and buttermilk, lends a unique flavor profile that elevates the cheesecake layer. You can learn more about the chemistry of baking through resources like Food52 to appreciate how the right ingredients work together to create magical desserts.
Now, you might be wondering about the versatility of these bars. They’re perfect for any occasion, whether it’s a cozy night in or an extravagant celebration. Because they’re portable, they make a fantastic choice for potlucks or parties. Plus, you can customize them with toppings like a drizzle of chocolate or a sprinkle of nuts for added flair.
Looking to impress your friends? Share a platter of these dazzling bars, and don’t be surprised if they start raving about them.
So grab your apron and get ready to whip up a batch of these delicious red velvet cheesecake bars. You’ll be the star of the dessert table before you know it! For more delicious dessert ideas, check out Bon Appétit or Taste of Home. Let’s dive into the recipe and unleash your inner pastry chef!
Ingredients for Red Velvet Cheesecake Bars
Creating the perfect red velvet cheesecake bars starts with the right ingredients. Don’t worry; most of them are kitchen staples!
Essential ingredients for the crust
For a delicious, buttery base, you’ll need:
- Graham cracker crumbs: about 1 ½ cups
- Unsalted butter: ½ cup, melted
- Granulated sugar: ¼ cup
This simple crust sets the stage for the creamy cheesecake filling while adding a satisfying crunch. For an even better taste, consider using chocolate graham crackers for a twist.
Key components for the cheesecake filling
Now let’s talk about what makes these bars truly decadent. Gather:
- Cream cheese: 16 oz, softened
- Granulated sugar: 1 cup
- Sour cream: ½ cup
- Eggs: 2 large
- Vanilla extract: 1 tsp
- Red food coloring: 2 tbsp (you can adjust depending on your desired intensity)
These ingredients create that luxuriously creamy cheesecake texture, while the red food coloring gives it that iconic red velvet hue.
Optional toppings and decorations
To elevate your red velvet cheesecake bars, consider adding a few delightful finishing touches:
- Whipped cream: a dollop for a light touch
- Chocolate shavings: for a touch of elegance
- Fresh berries: such as strawberries or raspberries for a pop of color
Feeling adventurous? A sprinkle of crushed nuts can add an exciting crunch as well!
By carefully selecting these ingredients, you’re on your way to impressing friends and family with your delightful red velvet cheesecake bars. Want to learn more about specific cooking techniques or ingredient substitutions? Check out Epicurious and Food Network for tips and inspiration.
Step-by-step Preparation of Red Velvet Cheesecake Bars
Creating red velvet cheesecake bars is a delightful way to impress at gatherings or simply satisfy your sweet tooth at home. With their vibrant color and creamy texture, these bars offer a delightful twist on traditional cheesecake. Let’s dive into the preparation process step by step.
Preheat the oven and prepare your baking dish
Start by preheating your oven to 350°F (175°C). This ensures that your bars bake evenly and develop that beautiful texture we all love. Next, grab a 9×9-inch baking dish and line it with parchment paper. This is key for easy removal after baking. If you don’t have parchment, you can also grease the pan with a little butter or cooking spray—just make sure it’s well-coated to avoid sticking.
Make the red velvet crust
The special red velvet crust is what sets these bars apart. In a mixing bowl, combine the following ingredients:
- 1 cup of all-purpose flour
- 1/4 cup of cocoa powder
- 1/2 cup of granulated sugar
- 1/2 teaspoon of baking powder
- 1/4 teaspoon of salt
- 1/2 cup of unsalted butter, melted
- 1 large egg
- 1 tablespoon of red food coloring (adjust based on desired color intensity)
- 1 teaspoon of vanilla extract
Mix these together until a smooth batter forms. The red food coloring is essential; it’s what gives your crust that signature hue. If you want more information on the history of red velvet desserts, check out this insightful article.
Prepare the cheesecake filling
While your crust is baking, let’s focus on the delicious cheesecake filling. In a separate bowl, blend together:
- 8 oz of cream cheese (softened)
- 1/4 cup of granulated sugar
- 1/4 cup of sour cream
- 1 teaspoon of vanilla extract
- 1 egg
Beat these ingredients together until the mixture is creamy and smooth. This is the secret to a rich, velvety filling. For those wondering about the nutritional aspects of cream cheese, you can explore specifics on WebMD.
Layer the crust and filling
Now comes the fun part—layering! Once the crust has cooled slightly, pour the cheesecake filling over it, spreading it evenly. If you’d like, you can swirl the cheesecake slightly into the crust for a marbled effect, adding a unique touch to your bars.
Bake and cool the bars
Pop your red velvet cheesecake bars into the preheated oven and let them bake for about 25-30 minutes. The edges should look set, but the center might still appear slightly jiggly. This is okay; it will firm up once cooled. After baking, remove them from the oven and allow the bars to cool to room temperature in the pan.
Chill before serving
For the best flavor and texture, refrigerate your bars for at least 2-3 hours before slicing. This chilling time allows the flavors to meld beautifully, and the bars will cut much cleaner when chilled. When you’re ready to serve, simply lift them out using the parchment paper, cut them into squares, and enjoy!
These red velvet cheesecake bars are perfect for sharing or savoring on a quiet night in. They’re a delightful treat that makes any occasion feel a bit more special. Enjoy your baking adventure!
Variations on Red Velvet Cheesecake Bars
Gluten-Free Red Velvet Cheesecake Bars
For those following a gluten-free lifestyle, fear not! You can still indulge in red velvet cheesecake bars without sacrificing taste or texture. Simply swap out regular flour for a gluten-free all-purpose blend. Many blends on the market contain xanthan gum for that perfect consistency. Plus, make sure your cream cheese and other ingredients are also gluten-free. You’d be surprised how easily you can please both gluten-free dieters and non-dieters alike!
When adjusting a recipe, you might also want to infuse some flavor with a pinch of vanilla or almond extract. This little tweak can elevate your bars and make them unforgettable!
Mini Red Velvet Cheesecake Bites
Who doesn’t love bite-sized treats that pack a flavorful punch? Mini red velvet cheesecake bites are a fantastic option for parties or gatherings. You can use a mini muffin tin to create these adorable treats. Simply pour the red velvet batter into the wells, add a dollop of cheesecake filling, and bake until they’re perfectly set.
These mini bites not only present beautifully on a platter but also allow everyone to enjoy a guilt-free indulgence without overcommitting to a full slice. Think of them as the perfect sweet treat at a cocktail party or a fun addition to a holiday spread.
Feeling inspired? Check out food blogs like Minimalist Baker for more creative variations on classic desserts. Let’s be real: life’s too short for plain treats, so why not explore new flavors with your red velvet cheesecake bars?
Cooking Tips and Notes for Red Velvet Cheesecake Bars
Tips for Achieving the Perfect Crust Texture
When making red velvet cheesecake bars, the crust sets the foundation for the entire treat, so it’s crucial to get it just right. For a perfectly textured crust, use:
- Graham cracker crumbs: They provide a nice, sweet crunch. You can even mix in some cocoa powder for an extra chocolatey flavor.
- Butter: Melted butter helps bind the crumbs together. Be sure to use unsalted butter for a balanced flavor.
- Press firmly: Make sure to press the crust mixture firmly into the bottom of the pan. A firm base will give you that satisfying crunch when you take a bite!
Notes on Cheesecake Consistency
The heart of red velvet cheesecake bars lies in the creamy filling. Here’s how to achieve that perfect consistency:
- Room temperature ingredients: Allow your cream cheese and eggs to come to room temperature. This ensures a smoother batter with no lumps.
- Don’t overmix: Mix just until combined. Overmixing can introduce too much air, leading to cracks as the bars bake and cool.
- Baking time: Remember, the bars will continue to set as they cool. It’s better to underbake slightly than overbake!
For more tips on baking with cream cheese, check out this helpful guide that dives deeper into techniques.
Serving Suggestions for Red Velvet Cheesecake Bars
Ideal Garnishes and Accompaniments
When it comes to serving your red velvet cheesecake bars, thoughtful garnishes can elevate the overall experience. Consider these delicious ideas:
- Whipped cream: A dollop on top adds a light, airy touch.
- Fresh raspberries or strawberries: Their tartness beautifully balances the richness of the cheesecake.
- Chocolate shavings or curls: For a touch of sophistication, sprinkle some on top.
- Mint leaves: A few fresh leaves can bring a pop of color and a refreshing flavor.
Pair your bars with a cup of rich coffee or a glass of dessert wine to enhance the flavors even more. For more ideas on dessert pairings, check out this article on pairing desserts with wine.
Presentation Ideas for Special Occasions
For birthdays or anniversaries, make your red velvet cheesecake bars truly stand out.
- Serve on a stylish platter: A beautiful serving dish can transform your dessert into the centerpiece.
- Add edible glitter: A light sprinkle gives a festive feel perfect for celebrations.
- Create individual servings: Cut bars into smaller pieces, and plate them with a personalized name tag for each guest.
With these ideas, your red velvet cheesecake bars will not just taste divine, but will also look stunning, tempting everyone to indulge!
Time Breakdown for Red Velvet Cheesecake Bars
Preparation time
Making red velvet cheesecake bars is easier than you might think! You’ll need about 20 minutes to gather your ingredients and mix the luscious cheesecake and velvety red cake layers. This is your chance to become a mini pastry chef!
Baking time
Once you’ve prepped your mixture, it’s time to bake. The bars will need approximately 30-35 minutes in the oven. Keep an eye on them; the perfect balance between firm and moist is key!
Chilling time
After they’re baked to perfection, these bars require at least 2 hours to chill. This step is essential, allowing the flavors to marry and providing that divine texture we all love.
Total time
In total, you’re looking at about 2 hours and 55 minutes from start to finish. But hey, that’s just an investment in deliciousness! While the cheesecake bars are chilling, why not explore some fun serving ideas or check out decorating tips? You’ll find that making red velvet cheesecake bars is well worth the wait!
Nutritional Facts for Red Velvet Cheesecake Bars
When indulging in red velvet cheesecake bars, it’s essential to know what you’re treating yourself to. Here’s a quick overview of their nutritional value:
Calories per serving
Each delightful serving of these bars typically contains around 250 calories. While this is a sweet treat, it’s manageable if enjoyed in moderation, especially alongside a balanced diet.
Key nutrients
These bars are not just about calories; they pack important nutrients, including:
- Protein: Approximately 4 grams, thanks to the cream cheese and eggs.
- Carbohydrates: About 30 grams, providing energy.
- Fats: Nearly 12 grams, offering a rich, creamy texture.
Moreover, cream cheese provides calcium, while the cocoa adds antioxidants. For more about the benefits of cream cheese, you can visit Healthline. So, while enjoying a treat, you’re also getting a tiny bit of nutrition!
As with any dessert, moderation is key. Consider balancing your diet with more nutrient-dense options, and remember that life’s too short not to enjoy occasional delights like these red velvet cheesecake bars!
FAQs about Red Velvet Cheesecake Bars
Can I make these bars ahead of time?
Absolutely! You can prepare red velvet cheesecake bars a day or two in advance, making them an ideal treat for gatherings or busy weeknights. Once you’ve prepared them, cover the dish with plastic wrap and refrigerate. Just be sure to let them chill fully before cutting into them; this helps the flavors meld beautifully and makes for cleaner cuts.
What’s the best way to store leftovers?
If you find yourself with leftovers (which is a rarity!), storing them properly is key to maintaining their deliciousness. Here’s how to do it:
- Refrigerate: Place individual bars in an airtight container with a layer of parchment paper between them. This helps prevent sticking.
- Freezing: If you want to keep them longer, wrap each bar tightly in plastic wrap and then place them in a freezer-safe bag. They can last in the freezer for about 2-3 months.
Just remember, before enjoying those frozen gems, let them thaw in the fridge overnight for best results.
Can I substitute cream cheese?
While cream cheese is a classic choice for these cheesecake bars, you can definitely explore alternatives! Some folks opt for Greek yogurt for a lighter twist or vegan cream cheese for a dairy-free rendition. Just keep in mind that the texture and richness may vary, so adjust your expectations and perhaps throw in a little extra sugar if needed to keep that sweetness intact.
If you’re curious about other substitutes or want to dive deeper, you might also find the insights from nutritionists at Healthline and EatingWell to be quite helpful!
Conclusion on Red Velvet Cheesecake Bars
Recap of Why These Bars Are a Must-Try
If you’re in the mood for a dessert that perfectly blends rich flavors and eye-catching presentation, red velvet cheesecake bars are your answer. These bars are not only visually stunning with their striking red color, but their combination of creamy cheesecake and soft, cake-like layers offers a texture experience that’s simply irresistible.
- Flavorful: The hint of cocoa, tangy cream cheese, and subtle vanilla makes every bite a delight.
- Versatile: Whether it’s for a special occasion or just a weeknight treat, they are sure to impress.
- Easy to Make: With simple ingredients and straightforward steps, even the busiest professionals can whip these up.
So, why wait? Grab your baking supplies today and treat yourself to a slice (or two)! For more tips on enhancing your baking game or diving deeper into dessert decoration, check out sources like Food52 or Bon Appétit for inspiration.
PrintRed Velvet Cheesecake Bars: Indulgent Bliss in Every Bite
These Red Velvet Cheesecake Bars are the perfect dessert to satisfy your sweet tooth, combining the rich flavors of red velvet cake with creamy cheesecake.
- Prep Time: 15 minutes
- Cook Time: 35 minutes
- Total Time: 50 minutes
- Yield: 12 bars 1x
- Category: Dessert
- Method: Baking
- Cuisine: American
- Diet: Vegetarian
Ingredients
- 2 cups all-purpose flour
- 1 cup sugar
- 1 teaspoon baking soda
- 1 teaspoon salt
- 1 teaspoon cocoa powder
- 1 cup vegetable oil
- 1 cup buttermilk
- 2 large eggs
- 2 tablespoons red food coloring
- 1 teaspoon vanilla extract
- 8 oz cream cheese
- 1/2 cup powdered sugar
- 1 egg
Instructions
- Preheat the oven to 350°F (175°C) and grease a baking dish.
- In a bowl, mix flour, sugar, baking soda, salt, and cocoa powder.
- In another bowl, combine oil, buttermilk, eggs, food coloring, and vanilla extract.
- Mix the dry ingredients with the wet ingredients until just combined.
- In a separate bowl, beat cream cheese and powdered sugar until smooth, then add the egg and mix until well combined.
- Pour half of the red velvet batter into the prepared dish, spread it evenly, then top with the cheesecake mixture.
- Finally, pour the remaining red velvet batter on top.
- Bake for 30-35 minutes or until a toothpick comes out clean.
- Let cool before slicing into bars.
Notes
- For a richer flavor, add more cocoa powder to the red velvet batter.
- These bars are best served chilled.
Nutrition
- Serving Size: 1 bar
- Calories: 250
- Sugar: 20g
- Sodium: 200mg
- Fat: 15g
- Saturated Fat: 8g
- Unsaturated Fat: 5g
- Trans Fat: 0g
- Carbohydrates: 30g
- Fiber: 1g
- Protein: 3g
- Cholesterol: 50mg
Keywords: Red Velvet Cheesecake Bars, dessert, cheesecake