Introduction to Melopita Recipe
A Taste of Tradition: What is Melopita?
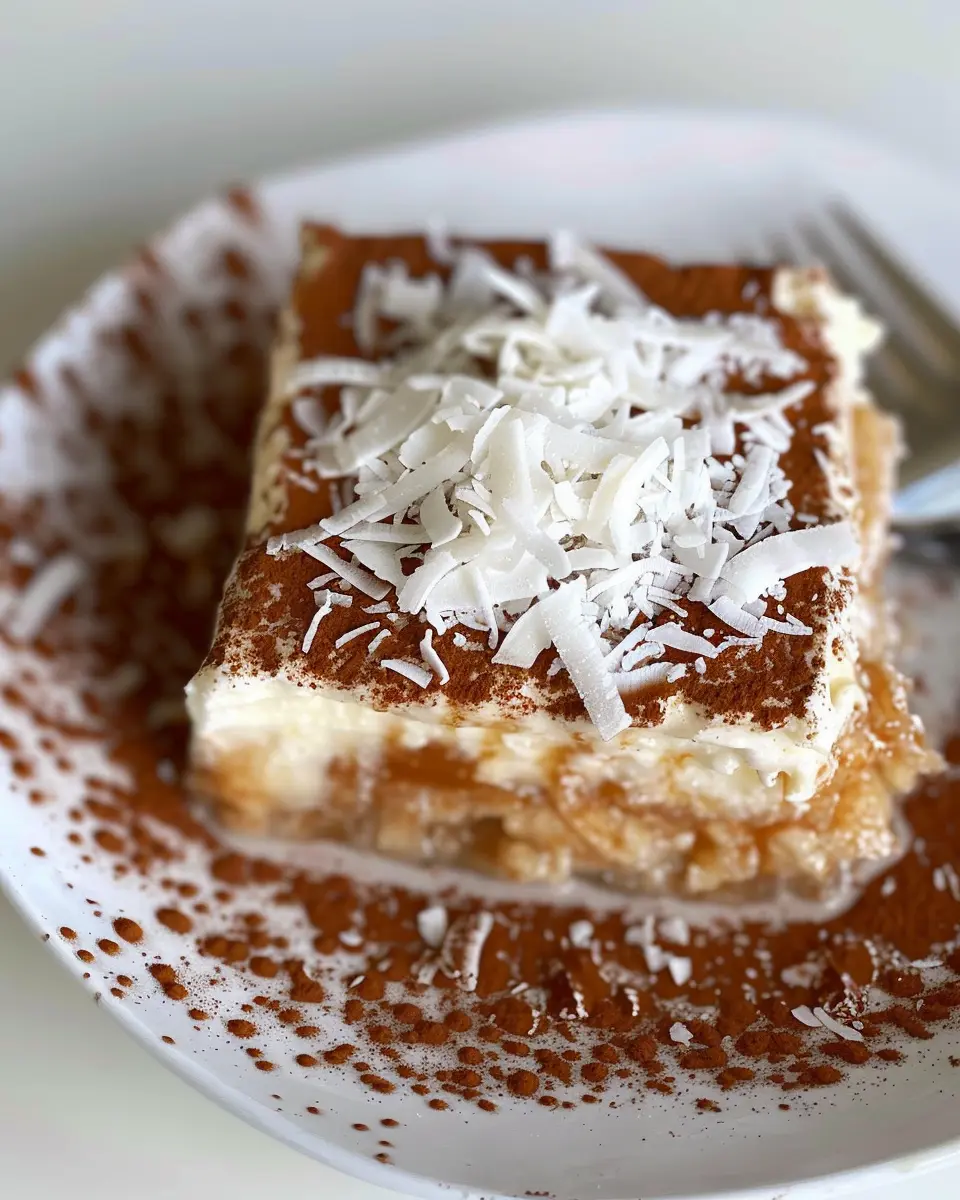
Imagine a sweet, creamy dessert that embodies the spirit of Greek heritage; that’s melopita for you. This delightful honey pie hails from the beautiful islands of Greece, particularly from Chios, where it has stood the test of time as both a cherished dessert and a celebration of local ingredients. The core of any good melopita recipe lies in its simplicity. Traditionally, it combines everyday ingredients like honey, feta cheese, and fresh eggs, which means it has deep roots in the agricultural practices of the region.
Since manipulating flavors and textures can bring such joy, this dish allows creativity in both its preparation and presentation. Did you know that the use of honey in Greek cuisine dates back to ancient times? It’s a staple ingredient not just for its sweetness but also for its health benefits, making it a perfect complement for melopita. If you’re curious about honey’s nutritional virtues, you might want to check out some expert articles from Healthline that explain how it promotes heart health and boosts your immune system.
Melopita doesn’t just satisfy your sweet tooth; it connects you to the cultural stories behind Greek recipes. Think of it as a tangible piece of history, often made for special occasions, family gatherings, and even celebrations of the harvest. This dessert captures the essence of home and warmth, making it perfect for sharing with friends. So, why not gather around with your loved ones and try making this comforting dish together?
The beauty of a melopita recipe is its flexibility—some variations include adding a hint of lemon or a dash of cinnamon to enhance the flavor. That said, whether you stick with the classic version or modify it, you’ll find a balance of sweetness and savory elements that will leave everyone wanting more. Get ready for a culinary adventure that promises not just great taste but also a delightful experience steeped in history and culture.

Ingredients for Melopita
Essential Ingredients for Melopita
To create this delicious Greek honey pie, also known as melopita, you’ll need a few key ingredients that blend perfectly to capture the essence of traditional flavors. Here’s what to gather:
- Fresh Feta Cheese: About 200 grams for that creamy texture.
- Ricotta or Greek Yogurt: 250 grams will provide a light, fluffy base.
- Honey: Around 150-200 grams sweetens the pie naturally.
- Eggs: Two large eggs to bind everything together.
- Milk: 200 ml adds moisture and richness.
- All-Purpose Flour: 100 grams helps create structure.
- Lemon Zest: The zest of one lemon brings out freshness.
Check out this comprehensive guide on cheese types for more insight on choosing the right feta!
Optional Ingredients for Enhanced Flavor
To make your melopita recipe even more special, consider adding a few optional ingredients:
- Cinnamon: A sprinkle can elevate the flavor profile.
- Almonds: Sliced or crushed for a delightful crunch.
- Vanilla Extract: Just a teaspoon can enhance the aroma.
Using these thoughtful additions helps tailor the dish to your taste preferences while staying true to its rustic roots. Classic Greek recipes often incorporate regional ingredients, so feel free to experiment with what you have on hand!
Step-by-Step Preparation of Melopita
Making a scrumptious melopita is not just about following a recipe; it’s about immersing yourself in a delightful culinary journey. From gathering your ingredients to that satisfying moment when you take the first bite, each step is essential. Let’s dive into the process of creating this delicious Greek honey pie!
Gather Your Ingredients
Before you start whipping up your melopita, it’s crucial to have all your ingredients ready. Here’s what you will need for a traditional melopita:
- 1 cup all-purpose flour
- 1/4 cup cold butter, cubed
- 1/4 cup sugar
- 1/2 teaspoon salt
- Ice water (as needed)
- 2 cups ricotta cheese (or soft Greek cheese)
- 1/2 cup honey
- 3 large eggs
- 1 teaspoon vanilla extract
- Zest of 1 lemon (optional)
- Additional honey or syrup for serving
Having everything at hand not only makes the cooking process smoother but also adds to the excitement of making this delightful dish. You can find high-quality ingredients at your local grocery store or specialty shops focused on Mediterranean cuisine, which adds authenticity to your melopita recipe.
Prepare the Crust
The crust is a foundation for your melopita. Here’s how to create a buttery, flaky layer:
-
Mix the dry ingredients: In a mixing bowl, combine the flour, sugar, and salt.
-
Incorporate the butter: Add the cold, cubed butter to the dry ingredients. Use a pastry cutter or your fingers to blend the mixture until it resembles coarse crumbs.
-
Moisten the dough: Gradually add ice water, one tablespoon at a time, just until the dough starts to come together. Try not to overwork it!
-
Chill the dough: Wrap the dough in plastic wrap and refrigerate for about 30 minutes. This step is essential for achieving that perfect crust texture.
Remember, the right crust will provide a lovely contrast to the creamy filling of your melopita.
Mix the Filling
While the dough is chilling, it’s time to prepare that irresistibly creamy filling. Follow these steps:
-
Combine ingredients: In a large mixing bowl, add the ricotta cheese, honey, eggs, vanilla extract, and lemon zest if you’re using it.
-
Blend until smooth: Whisk the mixture until creamy and well combined. You want a silky consistency, which will create a lovely texture in your pie.
Feel free to taste your mixture to see if you need more honey or flavor! Adjusting the sweetness can make all the difference in your melopita recipe.
Assemble the Melopita
Once your crust and filling are ready, it’s time to bring everything together:
-
Preheat your oven: Set it to 350°F (175°C).
-
Roll out the dough: On a floured surface, roll out your chilled dough into a round shape. Aim to fit it into a 9-inch pie dish.
-
Fill the crust: Pour the cheese mixture into the prepared pie crust. Spread it evenly, making sure it’s well distributed.
-
Optional toppings: If you like, sprinkle some ground cinnamon or nuts over the top for added texture and flavor.
Bake the Melopita
Now comes the exciting part—baking!
-
Bake in the preheated oven: Place your assembled melopita in the oven and bake for about 30–40 minutes, or until the filling is set and the crust is golden brown.
-
Check for doneness: You can gently shake the pie; if the center is slightly wobbly, it’s perfect! It will firm up as it cools.
Cool and Serve
Patience is key here! Once your melopita is out of the oven, allow it to cool on a wire rack:
-
Let it cool: Allow the pie to cool for at least 20 minutes before slicing. This helps the filling to set completely.
-
Serve with a drizzle of honey: Enjoy it on its own or with a drizzle of honey or syrup on top. A dollop of Greek yogurt can also elevate the flavors!
So there you have it—a step-by-step guide to creating a delicious melopita. It’s not just food; it’s an experience. Are you ready to take on this delightful Greek treat?

Variations of Melopita
Melopita with Honey
One of the simplest ways to elevate your melopita recipe is by drizzling it with honey before serving. Honey not only enhances the natural sweetness of the cheese but also adds a delightful floral note. Choose a good quality, local honey for the best flavor impact. You can also warm the honey slightly for a syrupy consistency that soaks into the melopita, creating a deliciously gooey texture. For an added twist, you might consider sprinkling some chopped nuts, such as walnuts or pistachios, on top for a delightful crunch.
Melopita with Fruits
Adding fresh fruits to your melopita can take this classic dessert to new heights. Seasonal fruits like berries, peaches, or even figs pair beautifully with the creamy cheese filling. Imagine the vibrant rubies of raspberries or sweet slices of peaches gracefully layered alongside the melopita—gorgeous and delicious! Serve with a side of whipped cream or a fruit compote for an even more indulgent experience. Plus, it’s a great way to incorporate healthy elements into your dessert routine. If you’re curious about pairing suggestions, check out this extensive guide on fitting fruits into traditional Greek cuisines.
Gluten-Free Melopita Options
For those avoiding gluten, fear not! You can adapt the melopita recipe using gluten-free alternatives. Almond flour or a gluten-free all-purpose blend works wonderfully as a substitute for traditional flour, ensuring that you still achieve that satisfying crust. Many recipes even suggest using ground oats if you’re keen on a rustic flavor. Feel free to explore these nutritious substitutes while maintaining the original charm of this beloved Greek dessert. Be sure to check out certified gluten-free brands for your baking needs to ensure safety and quality.
Exploring these variations not only broadens your culinary repertoire but also creates a fun experience in the kitchen. Why not invite some friends over to share in the melopita making adventure?
Cooking Tips and Notes for Melopita
Key Tips for Perfecting Your Melopita
To truly master this melopita recipe, you’ll want to keep a few essential tips in mind:
- Quality Ingredients: Using fresh ricotta and high-quality honey can elevate the flavor. Check out local artisan cheese shops or Mediterranean markets for the best options.
- Consistency Matters: Ensure that your mixture has a smooth and creamy texture; this will give your pie that melt-in-your-mouth consistency we love.
- Tasting as You Go: Don’t shy away from adjusting sweetness. Taste your filling before pouring it into the crust, and feel free to tweak the honey to your liking.
How to Handle Leftovers
Melopita is delightful even the next day! Here’s how to store it:
- Refrigerate Properly: Cover it tightly with plastic wrap or keep it in an airtight container to maintain freshness. It’ll last for about 3-4 days in the fridge.
- Reheat or Enjoy Cold: Some prefer eating their melopita cold, but if you’re in the mood for a warm slice, pop it in the oven at a low temperature until heated through.
For more tips on storing desserts, consider checking resources like Eat Well for expert advice. Happy baking!

Serving Suggestions for Melopita
Pairing Melopita with Beverages
When indulging in a slice of melopita, it’s essential to consider complementary beverages that enhance its delightful flavors. A glass of Greek coffee or a rich herbal tea, like chamomile or mint, serves as an excellent match. The natural sweetness of melopita pairs gloriously with a chilled glass of white wine, while a light Mediterranean beer can also balance the tartness of the honey.
Feel free to explore sparkling water with lemon as a refreshing non-alcoholic option. Not only does it cleanse your palate, but it also keeps you hydrated while enjoying your dessert!
Creative Serving Ideas
As you present your melopita, consider unique ways to elevate its appeal. Here are a few creative ideas:
- Transform it into a parfait: Layer slices of melopita with Greek yogurt and fresh fruits for a delightful twist.
- Use it as a filling: Cut melopita into cubes and use them as a sweet filling in crepes or pastries.
- Garnish with nuts: Sprinkle crushed almonds or walnuts on top to add a crunchy texture.
These ideas can certainly make your melopita recipe an extraordinary culinary experience! Curious about more Greek desserts? Check out Greek Food About for inspiration!
Time Breakdown for Melopita
Preparation Time
Getting started with your melopita recipe is easy! You’ll need about 15 minutes to gather your ingredients and whip up the mixture. This includes measuring out your honey, cheese, and spices, making sure everything is prepped for smooth mixing.
Baking Time
Once you’ve poured the mixture into your baking dish, it’s time for the oven! Bake your melopita for about 30-40 minutes at 350°F (175°C). You’ll know it’s done when the top is golden brown, and a toothpick comes out clean.
Cooling Time
Allow the cake to cool for about 15-20 minutes before cutting into it. This helps the flavors meld beautifully and makes slicing easier, perfect for serving to friends or enjoying yourself!
Total Time Needed
In total, you’re looking at roughly an hour and a half to enjoy this delicious dessert from start to finish. So why wait? Dive into this fabulous melopita recipe and treat yourself today! For tips on perfecting your baking techniques, check out resources from The Spruce Eats and BBC Good Food.
Nutritional Facts for Melopita
Calories and Macronutrients
When indulging in a delightful melopita, it’s essential to be mindful of its nutritional profile. A typical slice contains approximately 250 to 300 calories, primarily sourced from:
- Carbohydrates: 35-40g
- Protein: 8-10g
- Fat: 10-15g
These numbers can vary depending on the specific melopita recipe you use and the ingredients you choose. The balance of flavors and nutrients makes it not just a treat but also a wholesome choice when watched in moderation.
Dietary Considerations
Are you wondering how melopita fits into various diets? Thankfully, it’s a versatile option:
- Vegetarian-Friendly: Most recipes omit meat ingredients, making it suitable for vegetarians.
- Gluten-Free Alternatives: If you’re gluten-sensitive, consider using almond or coconut flour as substitutes.
- Sugar Alternatives: You can opt for honey or stevia for a healthier sweetener.
For more on healthy baking alternatives, check out Healthline’s article on sugar substitutes.
Ultimately, enjoying melopita doesn’t mean compromising on your dietary goals; it’s all about balance and making mindful choices!
FAQ About Melopita
How can I store leftover Melopita?
If you find yourself with leftover melopita, you’ve probably tasted just how delicious this honey-infused cheesecake can be! To keep your dessert fresh, wrap it tightly in plastic wrap or aluminum foil. Alternatively, you can place it in an airtight container to maintain its moisture. Stored this way, your melopita should stay good in the fridge for about 3 to 5 days. If you have a larger portion, consider freezing it! Just slice the cake into pieces and separate them with parchment paper before placing them in a freezer-safe container. This way, you can enjoy a slice whenever you want.
What is the best way to reheat Melopita?
When you’re ready to enjoy your chilled melopita, reheating it is straightforward. Preheat your oven to 300°F (150°C) and place your slice on a baking sheet. Cover it lightly with foil to prevent it from drying out. Warm it for about 10-15 minutes, or until it’s pleasantly warm but not hot all the way through. If you’re in a hurry, a microwave works too! Just warm it in 15-second intervals, checking frequently to ensure it doesn’t dry out.
Can I make Melopita ahead of time?
Absolutely! Making melopita ahead of time can actually enhance its flavors as they have time to mingle. You can prepare the cake up to two days in advance and store it in the fridge. Or, if you prefer to keep it longer, freeze it after it has cooled completely. Thaw it overnight in the fridge when you’re ready to serve. This melopita recipe makes it easy to plan and still have that delicious taste you’ve come to love.
For more tips on cheesecake storage and reheating, you can check out resources from The Kitchn or EatingWell. Enjoy!
Conclusion on Melopita
Final Thoughts and Encouragement to Try the Recipe
As we wrap up our exploration of the delightful melopita recipe, I hope you feel inspired to give this traditional Greek dessert a try. With its harmonious blend of honey, cheese, and a subtle hint of spice, melopita is not just a treat for the taste buds but also a piece of cultural heritage.
Whether you’re hosting friends or simply craving a sweet indulgence, this recipe is accessible and rewarding. Trust me—the aroma of baking melopita will fill your kitchen with warmth and invite memories. So why not surprise yourself and your loved ones with this unique dish? Visit [Greek Food] for more inspiring recipes, and dive into this delicious journey!
PrintMelopita Recipe: The Irresistibly Creamy Greek Delight

Melopita is a traditional Greek pie known for its creamy filling and delightful flavors, perfect for dessert lovers.
- Prep Time: 15 minutes
- Cook Time: 45 minutes
- Total Time: 1 hour
- Yield: 8 servings 1x
- Category: Dessert
- Method: Bake
- Cuisine: Greek
- Diet: Vegetarian
Ingredients
- 1 cup honey
- 3 cups ricotta cheese
- 4 eggs
- 1 cup milk
- 1 teaspoon vanilla extract
- 1 tablespoon lemon zest
- 2 cups phyllo dough
Instructions
- Preheat the oven to 350°F (175°C).
- In a bowl, mix ricotta cheese, honey, eggs, milk, vanilla extract, and lemon zest until smooth.
- Layer the phyllo dough in a greased baking dish, adding melted butter between layers.
- Pour the ricotta mixture over the phyllo layers.
- Bake for 40-45 minutes or until the top is golden brown.
- Allow to cool before slicing and serving.
Notes
- Serve chilled or at room temperature for best flavor.
- Can be garnished with additional honey or nuts if desired.
Nutrition
- Serving Size: 1 slice
- Calories: 300
- Sugar: 20g
- Sodium: 150mg
- Fat: 15g
- Saturated Fat: 9g
- Unsaturated Fat: 5g
- Trans Fat: 0g
- Carbohydrates: 30g
- Fiber: 1g
- Protein: 8g
- Cholesterol: 150mg
Keywords: Melopita, Greek dessert, creamy pie