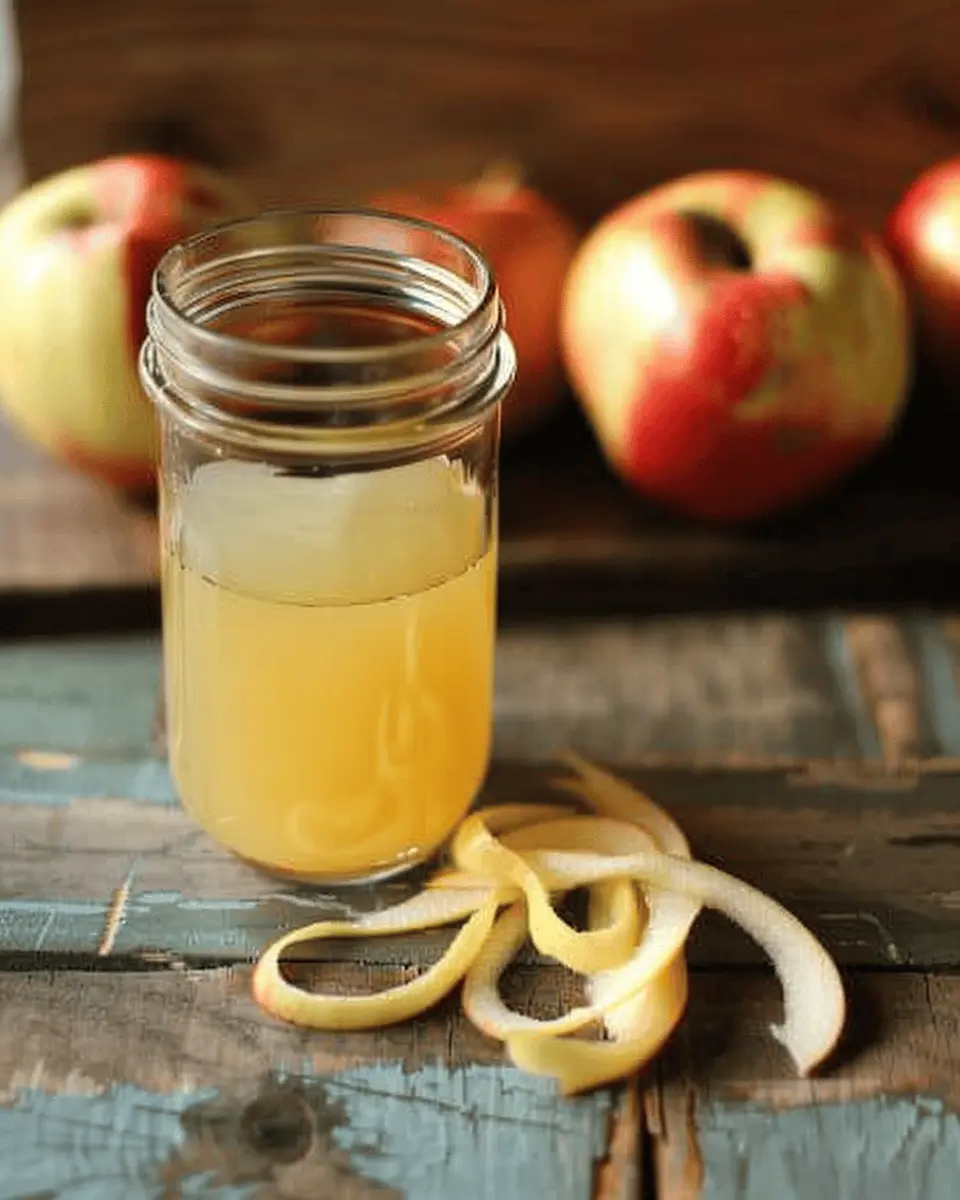
Introduction to Making Apple Cider Vinegar from Scraps
Apple cider vinegar is more than just a staple in your kitchen; it’s a kitchen hero! Known for its tangy flavor and numerous health benefits, it can be used in salad dressings, marinades, and even as a natural remedy for various ailments. But did you know that you can easily create your own apple cider vinegar right at home, using what might otherwise be kitchen scraps? This not only makes a delicious and economical product but also reduces food waste. By learning how to make apple cider vinegar from scraps, you can turn leftover apple cores and peels into something truly extraordinary.
What is apple cider vinegar and why make it from scraps?
At its core, apple cider vinegar is produced through the fermentation of apple juice—essentially, it’s apples in liquid form. The nice part is, you don’t need a full batch of apples to start brewing your vinegar; that’s where the scraps come in! Instead of tossing those leftover peels and cores after making a pie, you can repurpose them for a new culinary adventure. Not only does this reduce waste, but it also allows you to harness the nutrition found in the whole apple.
By opting to make apple cider vinegar from scraps, you are engaging in a sustainable practice that many in the eco-conscious community even advocate for. Composting is great, but turning scraps into something edible elevates your sustainability game. According to Food and Agriculture Organization (FAO), around a third of food produced globally is wasted. Why not take this chance to cut down on your own food waste?
Not to mention, homemade apple cider vinegar has the potential to be richer in flavor and health benefits compared to many store-bought varieties. Imagine infusing it with herbs from your garden or adding your own spices! You’ll be amazed at the unique flavor variations you can create.
So, are you ready to dive into this fun DIY project? Buckle up as we explore the simple steps to make apple cider vinegar from scraps and transform your kitchen waste into a tangy, flavorful treasure!
Ingredients for Homemade Apple Cider Vinegar
Creating apple cider vinegar from scraps is a delightful way to reduce waste and embrace sustainability in your kitchen! Here’s a look at the key ingredients you’ll need.
Essential ingredients
To get started, gather the following essential items:
- Apple Scraps: Use cores, peels, and any leftover bits from your favorite apple recipes. The more variety, the better the flavor!
- Sugar: Approximately 1 cup of sugar per quart of water. This helps the fermentation process, feeding the natural yeasts.
- Water: Filtered or distilled water is ideal to avoid chlorine and other unwanted additives that might hinder fermentation.
Optional ingredients for flavor
Once you know how to make apple cider vinegar from scraps, you can amp up the flavor profile of your vinegar with optional ingredients:
- Spices: Think cinnamon sticks, cloves, or star anise for a warm, aromatic touch.
- Herbs: Fresh herbs like mint or basil can add a refreshing twist!
By experimenting with these ingredients, you’ll create unique blends that suit your personal taste. If you’re curious about how fermentation works, check out this guide about the process. Happy fermenting!
Step-by-Step Preparation of Apple Cider Vinegar
Making your own apple cider vinegar from scraps is not only a sustainable practice but is also incredibly rewarding. You’d be surprised at how easy it is to transform those leftovers into a tangy, versatile condiment. Let’s walk through the steps together!
Gather your apple scraps
Start by collecting your apple scraps. This can include:
- Apple cores
- Skin peels
- Any bits that you might typically throw away
Remember, the more variety in your apple scraps, the richer the flavor of your eventual vinegar will be. If you don’t have enough scraps on hand, consider saving them over a few days, or even ask friends or family if they have any since many people toss these parts out. Plus, you could explore local farmers’ markets where discarded apples may be available at a discount, offering perfect candidates for your vinegar-making endeavor.
Prepare the jars for fermentation
Once you have your scraps ready, the next step is to prepare your fermentation containers. You’ll need:
- Clean glass jars (quart-sized work well)
- A lid (or a cloth to cover the jar)
Make sure to sterilize these jars to prevent unwanted bacteria from interfering with the fermentation process. A simple wash with hot, soapy water followed by a rinse with boiling water will do the trick. This is where the magic happens, so cleanliness is crucial!
Create the sugar-water mixture
Now, it’s time to create a sugar-water mixture that will aid in fermentation. You will need:
- 1 cup of sugar (white or brown)
- 1 quart of water (filtered or distilled)
Dissolve the sugar in the water completely. This solution acts as food for the naturally occurring yeast that will transform your apple scraps into vinegar. A common question is whether you can skip this step. The answer is no; the sugar is essential for fermentation, so don’t overlook it!
Combine the scraps and mixture
With your sugar-water mixture ready, it’s time to mix everything.
- Fill your jar with the apple scraps until it’s about halfway full.
- Pour the sugar-water solution over the scraps, making sure they are fully submerged.
A common tip is to use a weight (like a clean rock or a sealed baggie filled with water) to keep the scraps submerged. This is important because exposure to air can lead to mold rather than healthy fermentation.
Cover and store the mixture
Now that everything is nicely combined, it’s time to cover the jar. You can use a lid or a cloth secured with a rubber band. If using a lid, make sure it’s loose to allow gases to escape during fermentation.
Store the jar in a dark, warm place, like a pantry or cupboard. Ideal temperatures for fermentation range from 60°F to 80°F.
Stir and wait
During the fermentation process, it’s vital to check on your mixture regularly. About once a day, give it a good stir to ensure all the scraps are mixed and submerged.
You’ll want to let this sit for about 3-4 weeks, so patience is key! As the days go by, you’ll start to notice some bubbling; this is a sign that fermentation is taking place.
Strain and bottle your apple cider vinegar
After 3-4 weeks, it’s time to strain your mixture. Use a fine mesh strainer or cheesecloth to separate the liquid from the solids.
- The strained liquid is your apple cider vinegar!
- Transfer it to a clean bottle with a proper lid.
If you prefer a stronger flavor, let it ferment for another 3-4 weeks. You can then use this delicious homemade vinegar in countless recipes or as a natural remedy.
Learning how to make apple cider vinegar from scraps is a small step towards reducing waste and promoting sustainable living. Plus, you’ll have a unique, home-prepared product to share with friends and family—you can even inspire them to try making their own! For more tips on cooking with vinegar or the benefits of fermentation, check out resources like the National Center for Home Food Preservation or Fermentation Association.
Variations on Apple Cider Vinegar
Infused Apple Cider Vinegar Recipes
Once you’ve mastered how to make apple cider vinegar from scraps, you can elevate your creation by infusing it with exciting flavors. Infused apple cider vinegars are fantastic for salad dressings, marinades, or even just a splash in your sparkling water. Here are a few inspiring ideas:
- Herb-Infused: Add fresh herbs like rosemary, thyme, or basil to your cider vinegar. Let it steep for about a week for a vibrant flavor burst.
- Fruit Fusion: Combine your homemade apple cider vinegar with citrus peels, berries, or stone fruits. This not only adds flavor but can also bring a lovely natural color.
- Spicy Kick: For those who love heat, consider infusing your vinegar with jalapeños or crushed red pepper flakes.
Experimenting with flavors can turn an everyday pantry staple into a culinary delight.
Creative Uses of Different Fruit Scraps
Did you know that a variety of fruits can contribute to your vinegar-making adventure? Think beyond just apples. Other fruit scraps, such as:
- Pineapple peels: Add a tropical twist.
- Citrus rinds: Lemon or orange peels can enhance acidity and freshness.
- Berry bits: Strawberries or blueberries bring rich colors and unique tastes.
Feel free to combine scraps from various fruits to create unique and delicious blends. This is not only a fun way to make your vinegar special but also a great way to minimize waste and maximize flavor. For more ideas on repurposing kitchen scraps, check out resources like Zero Waste Home or Food52.
With these variations, you’re well on your way to crafting not just apple cider vinegar but a whole range of flavorful concoctions that showcase ingenuity while being eco-friendly!
Cooking Tips and Notes for Apple Cider Vinegar
Tips for Selecting the Best Apple Scraps
When learning how to make apple cider vinegar from scraps, choosing good apple scraps is crucial. Look for scraps from organic apples, as they tend to be free from pesticides. You should focus on:
- Freshness: Ensure the scraps are recent; avoid any with mold or significant bruising.
- Variety: A mix of sweet and tart apple varieties can create a more complex flavor profile. Consider using Granny Smith for tartness and Fuji for sweetness.
- Quality Over Quantity: Even a small amount of quality scraps can yield excellent vinegar.
Common Mistakes to Avoid
Making vinegar at home is straightforward, but certain pitfalls can hinder your success. Here are a few common mistakes to steer clear of:
- Using Too Many Scraps: More doesn’t always mean better. Too many scraps can lead to over-saturation and fermentation issues.
- Neglecting the Sugar: Don’t forget to add sugar to kickstart fermentation. This is vital for the process!
- Poor Ventilation: Ensure your fermentation vessel is covered loosely. It allows air to flow while keeping out harmful pests.
For more detailed tips on fermentation, check out the Food Lab! Remember, patience is key in the vinegar-making process.
Serving Suggestions for Apple Cider Vinegar
Flavorful Salad Dressings and Marinades
One of the best ways to enjoy your homemade apple cider vinegar (ACV) is by incorporating it into dressings and marinades. It’s a game-changer for salads! Combine 1 part ACV with 3 parts olive oil, a touch of mustard, honey, salt, and pepper; shake it up and you have a creamy, tangy dressing. Drizzle it over mixed greens with cherry tomatoes, nuts, and grilled chicken or turkey bacon for a refreshing meal. Experiment with different herbs and spices to find your favorite combination!
Daily Health-Tonic Uses
Did you know that apple cider vinegar can also be a beneficial part of your daily routine? Many health enthusiasts swear by its detoxifying properties. Adding a tablespoon of ACV to a glass of water is a simple health tonic that may help with digestion and may even contribute to weight management. Looking for more information? Check out sources like Healthline to dive into the science behind it.
By exploring these simple serving suggestions, you’ll see just how versatile your homemade apple cider vinegar from scraps can be!
Time Breakdown for Making Apple Cider Vinegar
Preparation Time
Getting started with how to make apple cider vinegar from scraps is a breeze! You’ll need about 15-20 minutes to collect your apple scraps (cores and peels work wonders), chop them if necessary, and place them in a jar with sugar and water. It’s a quick task that can easily fit into a busy schedule. Don’t forget to add a bit of patience to this recipe!
Fermentation Time
Now for the magic to happen. The fermentation process will take anywhere from 3 to 4 weeks. During this time, the natural yeasts will work their magic, turning those apple scraps into apple cider goodness. Make sure to check on your jar occasionally; give it a gentle stir to aerate the mixture!
Total Time Until Ready
In total, you’re looking at about 4 to 6 weeks to make your own delicious apple cider vinegar. The wait might test your patience, but the homemade flavor is worth every moment. Once you taste it, you’ll never want to go back to store-bought! Looking for more tips? Check out The Kitchn’s fermentation guide for additional insights.
Each moment spent creating this is a step towards a healthier you. Enjoy the process!
Nutritional Facts for Apple Cider Vinegar
Calories
Apple cider vinegar is low in calories, containing about 3 calories per tablespoon. So, if you’re watching your caloric intake while learning how to make apple cider vinegar from scraps, you’re in luck! It’s a guilt-free addition to your meals.
Health Benefits
Many people use apple cider vinegar for its potential health perks. It may help regulate blood sugar levels, support digestive health, and even promote weight loss. A study from the Journal of Functional Foods suggests that it might also help reduce cholesterol levels. Adding apple cider vinegar to your diet could enhance your overall wellness routine.
Nutrient Content
While it’s primarily acetic acid, apple cider vinegar also contains trace amounts of vitamins and minerals, including potassium and magnesium. It retains some beneficial compounds from the apples, making it more than just a tangy flavor enhancer. Studies indicate that antioxidants found in apple-derived products may boost your health as well.
So, whether you’re drizzling it over salads or incorporating it into marinades, remember: apple cider vinegar can be a small yet mighty player in your culinary adventures!
FAQs about Making Apple Cider Vinegar from Scraps
How long does it take to make apple cider vinegar from scraps?
When you’re diving into how to make apple cider vinegar from scraps, patience is key! Generally, the fermentation process can take anywhere from 3 to 6 weeks. This timeframe allows for the natural sugars in the apple scraps to convert into vinegar. The first fermentation phase typically takes about 2 to 3 weeks, followed by a secondary fermentation that can last another couple of weeks. You know it’s ready when it smells tangy and the color deepens.
Can I use any type of apple?
Absolutely! While any type of apple can work for your homemade cider vinegar, using a mix of sweet and tart varieties can enhance the flavor. Granny Smith, Fuji, or Honeycrisp are fantastic options. If you have any bruised or leftover scraps from baking that pie, don’t toss them! They can definitely contribute to your vinegar-making journey.
What should I do if my vinegar doesn’t ferment?
If you find that your mixture isn’t fermenting after a few weeks, don’t panic! Here are a few troubleshooting tips:
- Check the Temperature: Ensure your mixture is in a warm, dark place (about 60°F to 80°F works best).
- Add Sugar: A bit of sugar can jumpstart fermentation. A tablespoon or two may do the trick!
- Inspect Your Scraps: If the scraps aren’t fresh or perhaps too few, they might not have enough nutrients to initiate fermentation.
Feel free to check out this guide for more detailed tips on troubleshooting your vinegar-making process. Remember, every batch is a learning experience, and soon you’ll be a cider vinegar pro!
Conclusion on Making Apple Cider Vinegar from Scraps
Recap of the process and encouragement to try it at home
Creating your own apple cider vinegar from scraps is not only a sustainable choice but also a fun and rewarding kitchen experiment. By collecting apple peels and cores, you can craft a deliciously tangy vinegar that enhances your recipes and health routines.
Start by soaking your scraps in water with a little sugar, then wait patiently as nature does its job over the following weeks. Have you ever wondered how much money you could save while reducing food waste? By making vinegar at home, you not only enjoy a homemade product but also contribute to a greener planet!
So why not give it a try? Join the homemade vinegar community and share your experiences. If you’re looking for more inspiration, check out sites like Food Network or BBC Good Food for tips. Happy fermenting!
PrintHow to Make Apple Cider Vinegar from Scraps: Easy & Delicious
Learn how to make apple cider vinegar using kitchen scraps for a delicious and healthy addition to your recipes.
- Prep Time: 10 minutes
- Cook Time: 0 minutes
- Total Time: 2-4 weeks
- Yield: 4 cups of vinegar 1x
- Category: Condiment
- Method: Fermentation
- Cuisine: American
- Diet: Vegan
Ingredients
- 4 cups apple scraps
- 4 cups water
- 1 cup sugar
Instructions
- Combine apple scraps and sugar in a large jar.
- Add water to cover the scraps.
- Cover with a cloth and secure with a rubber band.
- Leave in a dark place for 2-4 weeks, stirring daily.
- Taste and strain once desired acidity is reached.
- Transfer to a clean jar and cover again for more fermentation.
Notes
- Use organic apples for the best flavor.
- Be sure to keep the mixture stirred.
Nutrition
- Serving Size: 1 tablespoon
- Calories: 3
- Sugar: 1g
- Sodium: 0mg
- Fat: 0g
- Saturated Fat: 0g
- Unsaturated Fat: 0g
- Trans Fat: 0g
- Carbohydrates: 1g
- Fiber: 0g
- Protein: 0g
- Cholesterol: 0mg
Keywords: apple cider vinegar, homemade vinegar, kitchen scraps