Introduction to Homemade Chocolate Turtles
What are Chocolate Turtles and Why You’ll Love Them?
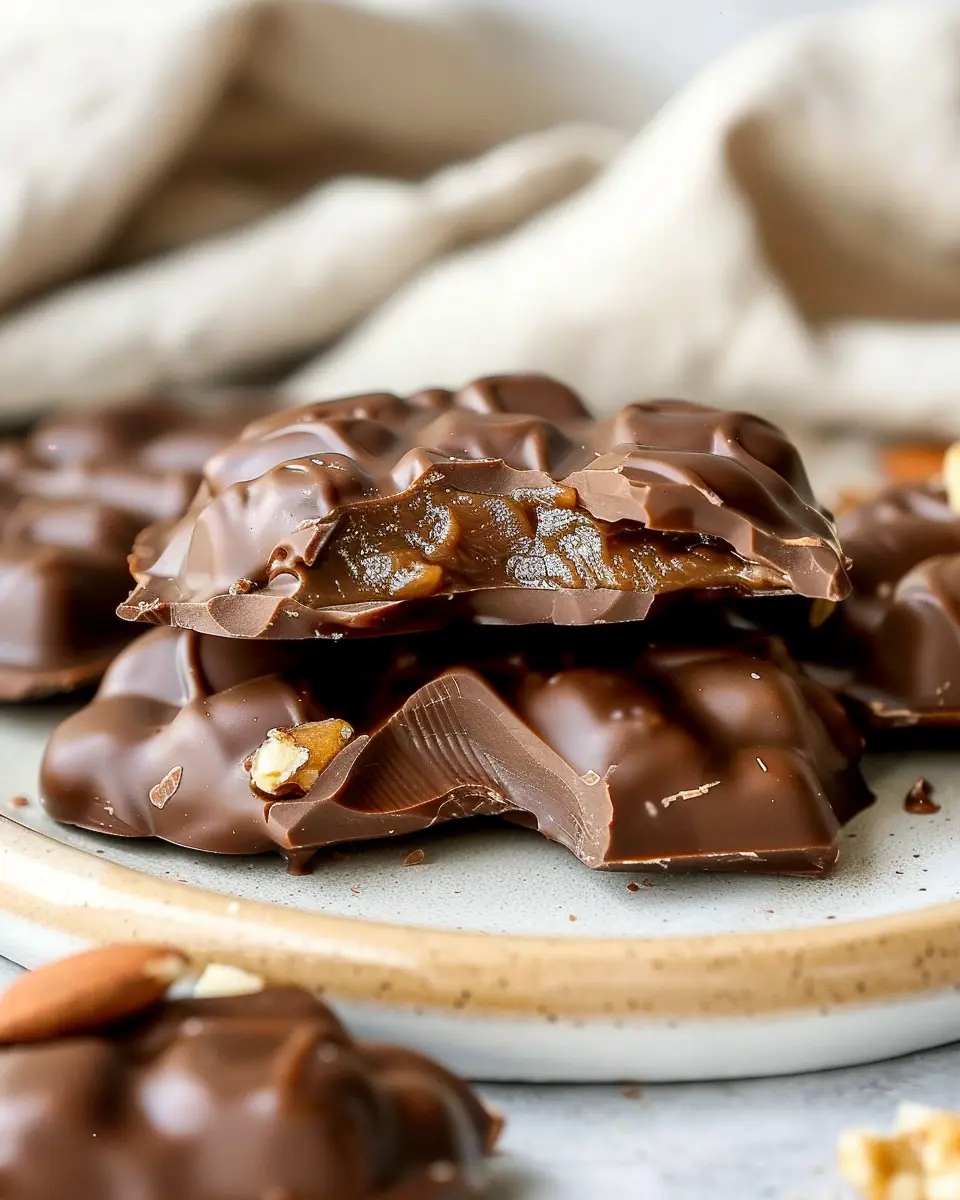
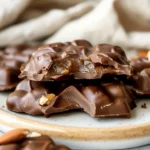
If you haven’t yet had the pleasure of tasting chocolate turtles, you’re in for a real treat! These delightful candies meld the rich sweetness of chocolate with the satisfying crunch of nuts and the gooey goodness of caramel. Traditionally, they feature pecans, but feel free to swap in your favorite nut for that personal touch.
Imagine biting into a smooth layer of melted chocolate that envelops a chewy caramel center, perfectly paired with the nuttiness of the pecans. It’s no wonder these treats are a well-loved classic! You can find them at most candy shops, but making your own at home allows you to customize every component to suit your taste. Plus, homemade versions often taste fresher and more decadent.
Not only are chocolate turtles a delightful indulgence, but they’re also surprisingly simple to make. With just a handful of ingredients and a little time, you can whip up a batch that might just become a hallmark of your parties or an impressive gift for friends. Did you know that creating your own candies can also be a fun weekend project to unwind and explore your culinary creativity? According to experts, cooking and baking can boost your mood and even decrease stress (check out Psychology Today for more on that).
When you make chocolate turtles at home, you get to control both the ingredients and the quality. Opt for organic chocolate or locally sourced nuts to elevate your treats. Plus, there’s something immensely satisfying about crafting something from scratch, especially when it turns out beautifully!
So why not embrace your inner chocolatier? Gather your ingredients, invite a friend over, and transform your kitchen into a sweet paradise. Whether you’re treating yourself or creating a batch for a special occasion, you’ll find that homemade chocolate turtles are sure to delight and impress. Follow the recipe below for an easy-to-follow guide that will lead you to candy heaven!
Ingredients for Homemade Chocolate Turtles
When creating delicious chocolate turtles, it’s key to gather the right ingredients for that perfect combination of flavors and textures. Here’s what you’ll need:
Essential Ingredients for Homemade Chocolate Turtles
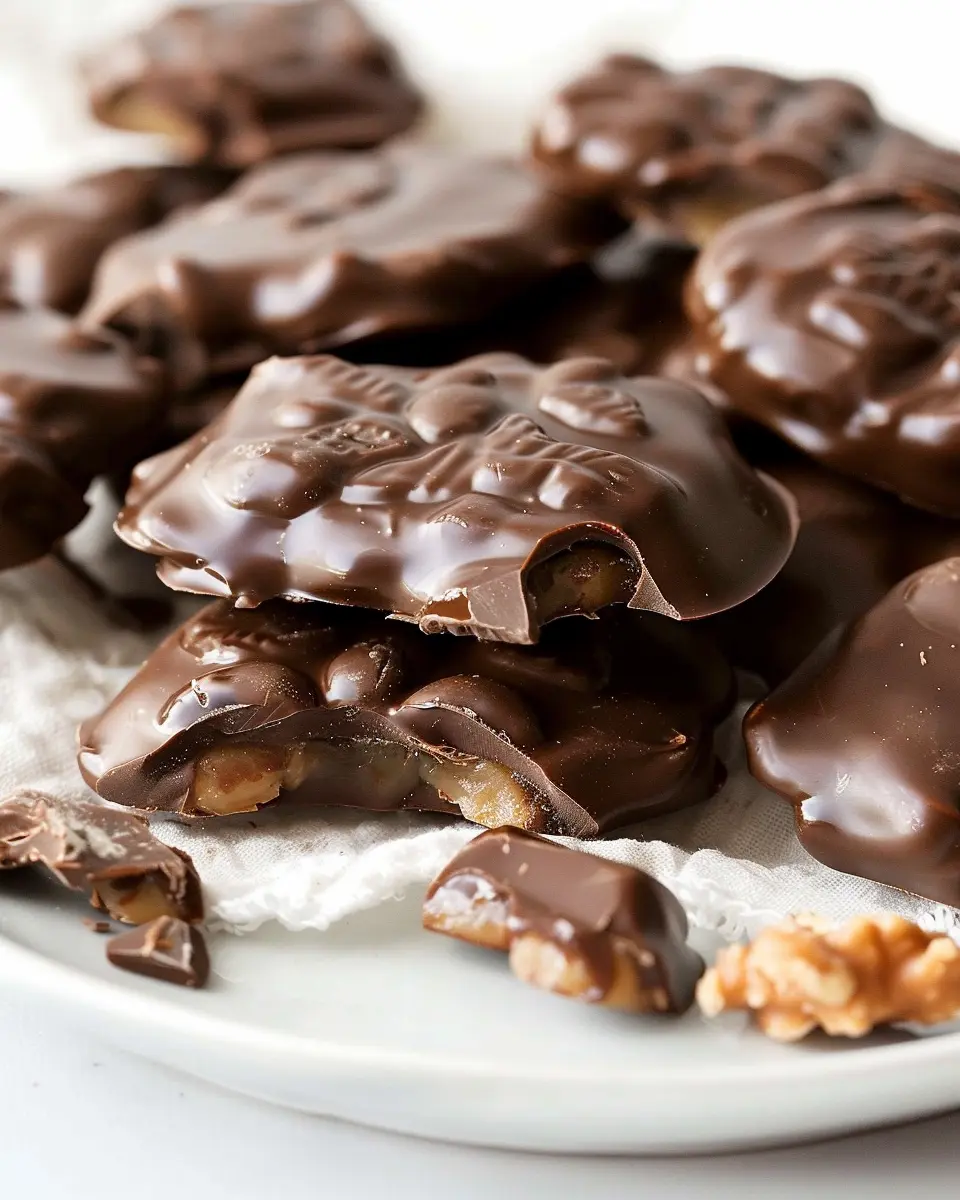
- Pecans or Walnuts: These nuts give the turtles their signature crunch and nutty flavor. Choose your favorite!
- Caramel: Homemade or store-bought, caramel is essential for that gooey filling. It’s what makes these treats irresistibly decadent.
- Chocolate Chips: Semi-sweet chocolate chips are a classic, but you can also explore dark or milk chocolate varieties for a different taste.
- Sea Salt (optional): A sprinkle of sea salt can elevate the chocolate turtles into a whole new dimension of flavor, balancing the sweetness beautifully.
Substitutions and Variations for Dietary Needs
Let’s face it; dietary needs can vary! For those avoiding certain ingredients, here are some tips for making your chocolate turtles accessible:
- Nut-Free: Use sunflower seeds or pumpkin seeds instead of nuts.
- Dairy-Free: Opt for non-dairy chocolate chips and coconut cream for the caramel.
- Vegan: Use plant-based butter and maple syrup as a caramel alternative.
Feel free to adapt these suggestions according to what works for you!
Looking for a great caramel recipe to use? Check out Serious Eats’ guide for some expert tips.
Making chocolate turtles at home is fun, and with the right ingredients, you’ll impress your friends and family! Enjoy the process, and happy cooking!
Preparing Homemade Chocolate Turtles
Creating your own chocolate turtles at home is a delightful treat that blends the creamy goodness of chocolate, the crunch of pecans, and the sweet decadence of caramel. This homemade version is not only satisfying but also a wonderful way to impress your friends. Let’s dive into the preparations step by step!
Gather Your Equipment
Before you start crafting your delicious chocolate turtles, it’s essential to have all your tools and ingredients ready at hand. Here’s what you’ll need:
- Baking sheet lined with parchment paper
- Mixing bowls
- Microwave-safe bowl
- Cooking thermometer (optional)
- Rubber spatula
- Knife for chopping pecans
Having everything organized allows for a smooth process, helping you stay focused on making your turtles turn out perfectly. You can find parchment paper and mixing bowls at any local kitchen supply store or order them online if you’re busy.
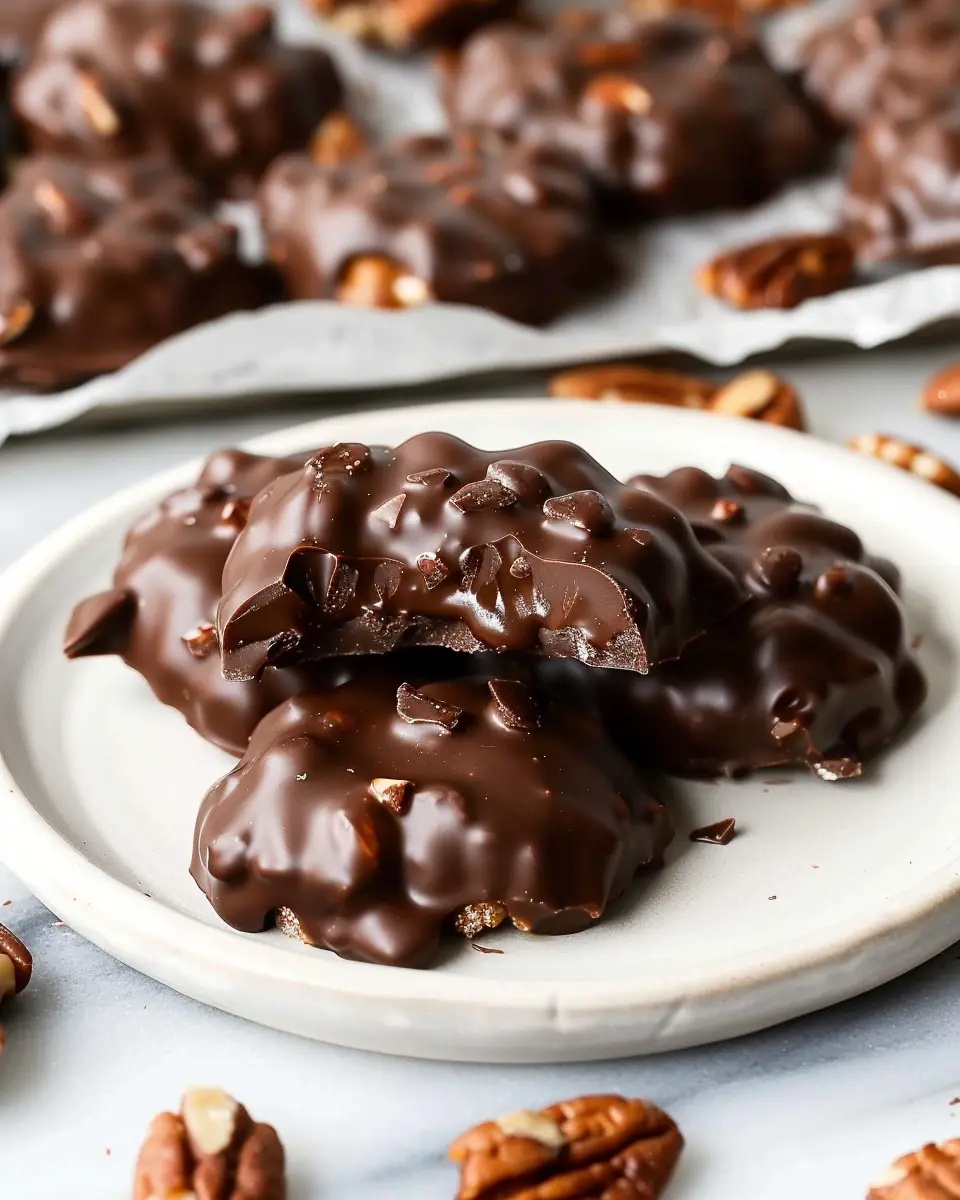
Toasting and Chopping the Pecans
Pecans are the star of the show in chocolate turtles, so let’s give them the attention they deserve. Start by preheating your oven to 350°F (175°C). Spread the pecans across a baking sheet and toast them in the oven for about 8-10 minutes, or until they’re golden brown and fragrant. Keep an eye on them, though! Pecans can go from perfectly toasted to burnt in a flash.
Once toasted, allow them to cool. Then, chop them coarsely, ensuring each piece has enough surface area for the caramel to adhere. Not only do these crispy bites add flavor, but they also provide that satisfying crunch.
Making the Microwave Caramel
Creating the caramel is the easiest part of the process! In a microwave-safe bowl, combine:
- 1 cup of granulated sugar
- 6 tablespoons of unsalted butter
- 1/4 cup of heavy cream
- A dash of salt
Mix these ingredients and microwave on high for about 3-5 minutes. Stir it every minute to ensure even melting. You want it to reach a golden hue. If you have a cooking thermometer, aim for 245°F (118°C). If you don’t have one, a good rule of thumb is that it should bubble relentlessly and start to turn color.
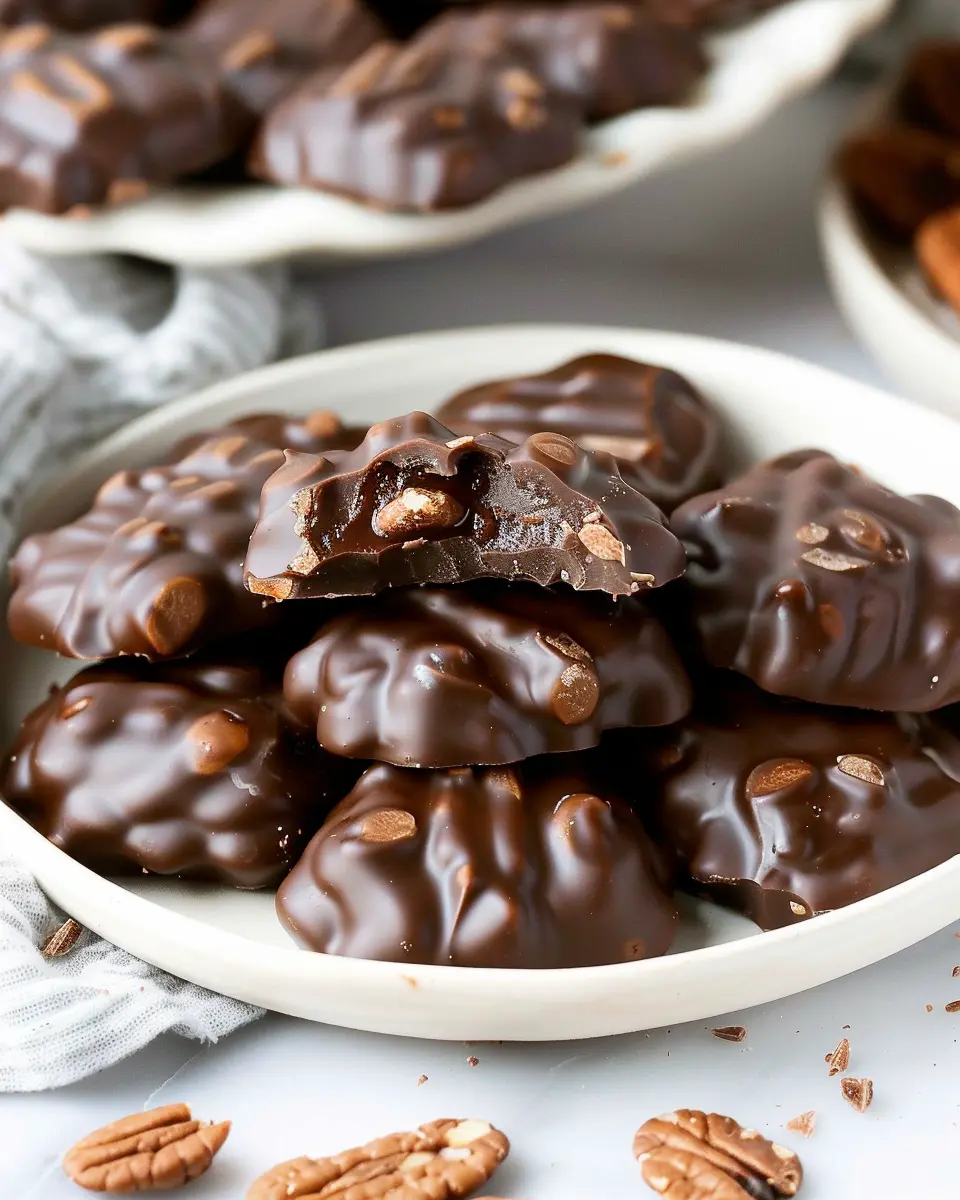
Forming the Turtles
With the pecans toasted and caramel gooey, it’s time to form your chocolate turtles. On your parchment-lined baking sheet, create little clusters of pecans—about 4 or 5 pecans per cluster. Drizzle the homemade caramel over each cluster, ensuring it captures all the pecans. Let these sit at room temperature while you prepare to dip them in chocolate, which makes the wait even sweeter.
Melting the Chocolate
Now, let’s get to the chocolate! You can use either semisweet or dark chocolate, depending on your personal preference. Chop the chocolate into small, even pieces and place it in a microwave-safe bowl. Microwave it in 30-second intervals, stirring in between until it’s fully melted and smooth. Be careful not to overheat, as chocolate can seize up.
Dipping and Coating the Turtles
Finally, it’s time to dip your delectable creations. Take each pecan-caramel cluster and use a fork or a toothpick to dip it into the melted chocolate, ensuring it’s fully covered. Allow the excess chocolate to drip off and place it back on the parchment paper.
Once all the chocolate turtles are dipped, let them cool at room temperature until the chocolate hardens or pop them into the fridge for a quicker set. They’ll be a delightful surprise for anyone who gets to enjoy them!
Making your own chocolate turtles can easily become a new beloved tradition. Not only are they delicious, but they also make for great gifts! For more culinary inspiration, explore [this amazing guide on chocolate] (insert your link) or share your own recipes in the comments!
Variations on Homemade Chocolate Turtles
When it comes to making chocolate turtles, the classic combination of caramel, nuts, and chocolate is hard to beat. However, there are plenty of creative variations to satisfy different cravings or dietary needs. Let’s explore two delicious alternatives!
Dark Chocolate Turtles
If you’re a fan of rich flavors, consider swapping out regular chocolate for dark chocolate in your chocolate turtles recipe. Dark chocolate adds a sophisticated bitterness that balances wonderfully with the sweetness of caramel. Here’s how to do it:
- Choose high-quality dark chocolate with at least 70% cocoa for an intense chocolate experience.
- Melt the chocolate just like you would with milk chocolate, ensuring it’s smooth and velvety.
- Drizzle or dip your caramel and nut-covered treats for that elegant finish.
The antioxidants in dark chocolate can also give you a health boost, making this variation a guilt-free indulgence. According to Healthline, dark chocolate is packed with minerals like iron and magnesium, further justifying your treat.
Nut-Free Turtles
For those with nut allergies or a preference for something different, nut-free chocolate turtles can still be a delightful treat! Here are some ideas:
- Use seeds: Substitute nuts with sunflower or pumpkin seeds for a crunchy texture without the allergens.
- Add pretzels: Incorporating crushed pretzels adds a savory twist and a satisfying crunch.
- Experiment with flavors: Try adding flavors like sea salt or a sprinkle of cinnamon to elevate your caramel flavor.
Many enjoy nut-free alternatives for their versatility. Plus, you can build your recipe around the flavors you and your friends enjoy!
With these variations, your homemade chocolate turtles can cater to any palate or dietary restriction. Happy indulging!
Cooking Tips and Notes for Homemade Chocolate Turtles
Avoiding Common Mistakes
Creating perfect chocolate turtles can be an art. One common mistake is rushing the caramel. Allow it to bubble gently until it reaches a golden color—this ensures a rich flavor. If it’s undercooked, it may be too sticky and won’t hold its shape. Always use a candy thermometer for precision! Another tip is to let the chocolate cool slightly before dipping; this prevents the caramel from melting into the chocolate, ruining that gorgeous layered effect.
Storage Tips for Freshness
To keep your chocolate turtles fresh and delicious, store them in an airtight container at room temperature. But what if they won’t be eaten right away? You can also freeze them. Just place them in a single layer on a parchment-lined tray, freeze for an hour, then transfer them to a container. This locks in that delightful taste without compromising texture. Remember, they’ll stay fresh in the freezer for up to three months!
For more tips on candy making, check out the guides at The Spruce Eats. Happy cooking!
Serving Suggestions for Homemade Chocolate Turtles
Best Ways to Present Your Chocolate Turtles
When it comes to presenting your chocolate turtles, the key is to make them as inviting as possible. Start by arranging them on a beautiful platter, maybe in a circular formation, which adds a touch of elegance to any gathering. For a festive touch, consider using decorative parchment paper or a bed of sea salt to enhance that gourmet feel. Tying a simple ribbon around your platter can brighten it up, making your homemade treats striking additions at parties or gifts for special occasions.
Pairing Ideas for Unique Flavor Combinations
Looking to elevate your savoring experience? Try pairing your chocolate turtles with:
- Fresh Fruit: Strawberries or tart cherries complement the sweetness beautifully.
- Nuts: Add a crunchy texture by serving alongside candied pecans or almonds.
- Coffee Alternatives: Enhance the flavors with a steaming cup of herbal tea or rich hot chocolate.
By experimenting with these combinations, you not only enhance the taste but also introduce delightful textures. The possibilities are endless, so don’t hesitate to get creative! Want to dive deeper into pairing nuances? Check out this guide from Food & Wine for inspiration.
These simple tips will transform your homemade chocolate turtles into a culinary experience!
Time Breakdown for Homemade Chocolate Turtles
Making chocolate turtles at home is a delightful experience that doesn’t take too long! Here’s a simple breakdown of the time you’ll need to indulge in these sweet treats.
Preparation Time
Getting everything ready for your chocolate turtles takes about 20 minutes. This includes gathering your ingredients, melting the chocolate, and assembling the tasty layers of caramel and nuts. Pro tip: have your ingredients prepped and measured out to make this process even smoother!
Cooking Time
The actual cooking time is approximately 10 minutes. This is when your chocolate and caramel come together beautifully. You’ll be melting and drizzling, which is the fun part!
Total Time
In total, you’ll need around 30 minutes from start to finish. Perfect for a quick snack or a last-minute dessert to impress your friends. With each step, you’ll see how easy it is to create these turtles at home, and soon enough, you’ll want to make them again! For additional tips on melting chocolate, check out this resource to enhance your skills.
Are you tempted to try making these delectable treats? They’re worth every second!
Nutritional Facts for Homemade Chocolate Turtles
When you’re indulging in homemade chocolate turtles, it’s nice to know what you’re treating yourself to. Here’s a breakdown of the nutritional facts to keep your sweet tooth in check.
Calories
Each chocolate turtle generally contains around 90 to 120 calories. This can vary depending on your specific ingredients and portion sizes. If you’re watching your calorie intake, consider enjoying just one or two at a time!
Sugar Content
A typical serving of chocolate turtles can have about 8 to 12 grams of sugar. While it’s a delightful treat, be mindful of the sugar content, especially if you’re monitoring your daily intake. For alternatives, check out some ideas on reducing sugar in sweets here.
Health Benefits
Believe it or not, chocolate turtles can offer a few benefits! Nuts provide healthy fats and protein, contributing to satiety. Dark chocolate can also be rich in antioxidants, which may support heart health. Just remember, moderation is vital. For a deeper dive into the benefits of dark chocolate, visit this article.
So next time you whip up a batch of these delicious treats, you can enjoy them even more knowing the nutritional facts!
FAQs about Homemade Chocolate Turtles
Can I use different nuts in my turtles?
Absolutely! While traditional chocolate turtles typically feature pecans, feel free to get creative and substitute with nuts like almonds, cashews, or macadamia nuts. Each nut will give a unique flavor and texture to your treats, ensuring they cater to your personal taste. According to a 2019 study by the American Journal of Clinical Nutrition, nuts are not only delicious but are also packed with beneficial nutrients. So go ahead, mix it up!
How should I store leftover turtles?
To keep your homemade chocolate turtles fresh, store them in an airtight container at room temperature. If you want to prolong their shelf life, you can refrigerate them. Just be aware that refrigeration might change their texture slightly. They can last for about a week at room temperature or up to two weeks in the refrigerator. For long-term storage, consider freezing them—just layer parchment paper between the turtles to prevent sticking.
For more in-depth storage tips, check out this article on chocolate storage.
What’s the best chocolate to use?
When it comes to the chocolate for your chocolate turtles, quality is key! Choose high-quality milk chocolate for a creamy and sweet finish, or opt for dark chocolate if you prefer a richer taste. If you’re feeling adventurous, semi-sweet chocolate can also add a delicious complexity to your turtles. Look for chocolate with a cocoa content of at least 60% for that gourmet touch. The better the chocolate, the better your turtles will taste!
Incorporating these tips will not only enhance your eating experience but also impress your friends and family. Happy turtle-making!
Conclusion on Homemade Chocolate Turtles
Final Thoughts and Encouragement to Try This Recipe
Making your own chocolate turtles is not just a rewarding culinary adventure; it’s also a delightful way to impress your friends and family. With simple ingredients like pecans, caramel, and chocolate, you can create a treat that rivals any store-bought version. Plus, customizing these delectable candies allows you to infuse your personality into each piece!
So why not grab your apron and give this recipe a whirl? Experiment with different nuts or add a sprinkle of sea salt for a modern twist. The joy of creating your own chocolate turtles is something you simply can’t miss! For more inspiration, check out resources like the National Confectioners Association on candy-making techniques. Happy cooking!
PrintChocolate Turtles: The Indulgent Treat You Can Make at Home
Learn how to make delicious chocolate turtles right at home!
- Prep Time: 15 minutes
- Cook Time: 15 minutes
- Total Time: 30 minutes
- Yield: 12 servings 1x
- Category: Dessert
- Method: Baking
- Cuisine: American
- Diet: Vegetarian
Ingredients
- 1 cup pecans
- 2 cups chocolate chips
- 1 cup caramel candies
Instructions
- Preheat your oven to 350°F (175°C).
- Arrange pecans on a baking sheet and toast for about 5-7 minutes.
- Melt caramel candies in a saucepan over low heat.
- Place a scoop of caramel on each pecan and top with melted chocolate.
- Let the turtles cool completely before serving.
Notes
- For a more decadent treat, use dark chocolate.
- Store in an airtight container for up to a week.
Nutrition
- Serving Size: 2 turtles
- Calories: 150
- Sugar: 20g
- Sodium: 50mg
- Fat: 8g
- Saturated Fat: 4g
- Unsaturated Fat: 2g
- Trans Fat: 0g
- Carbohydrates: 18g
- Fiber: 1g
- Protein: 2g
- Cholesterol: 0mg
Keywords: Chocolate Turtles, homemade treats, dessert recipes