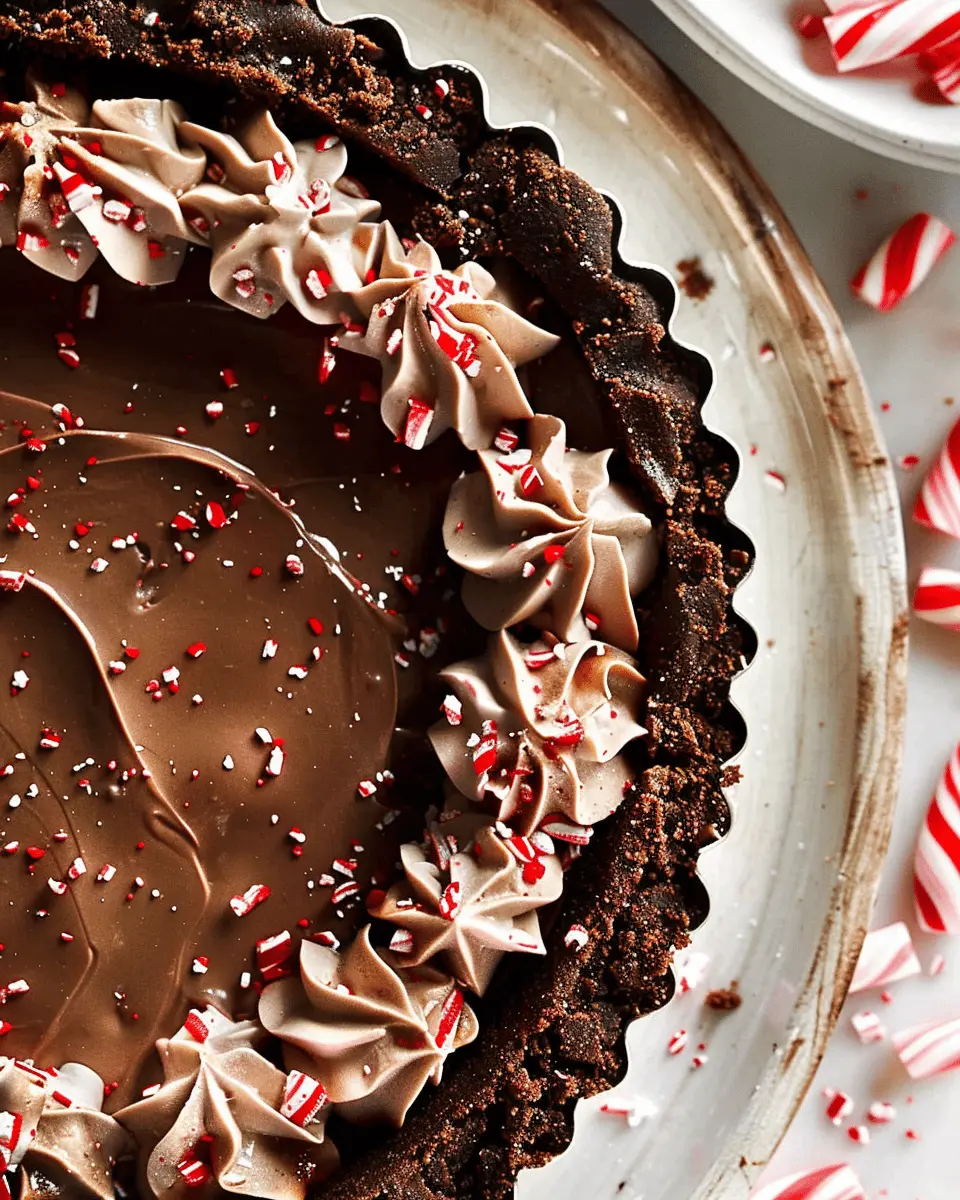
Introduction to Chocolate Peppermint Pie
Ever found yourself dreaming of a dessert that combines rich chocolate with a refreshing twist? That’s exactly what chocolate peppermint pie delivers! This indulgent treat is not only visually appealing but also an explosion of flavors that will make your taste buds dance with joy. The blend of velvety chocolate and invigorating peppermint creates a harmonious balance that captures the essence of the holiday season (or any time you crave something delightful).
Why You’ll Fall in Love with Chocolate Peppermint Pie
Let’s dive into why chocolate peppermint pie should be on your dessert radar. First and foremost, the texture is nothing short of divine. The smooth chocolate ganache filling pairs beautifully with a crunchy crust, typically made from crushed chocolate cookies. It’s a delightful contrast that adds depth to each bite.
-
Impressive Yet Easy: One of the best parts? You can impress your friends and family without spending all day in the kitchen. With a few key ingredients and straightforward steps, you’ll whip up a dessert that looks like it came from a gourmet bakery. Just think of the compliments you’ll receive!
-
Versatile for Any Occasion: While chocolate peppermint pie is often associated with the festive holidays, it’s a versatile dessert that works wonderfully for birthdays, dinner parties, or simply as a sweet treat after a long week. Trust me, its unique flavor profile keeps things exciting, no matter the event.
-
A Touch of Nostalgia: If you grew up enjoying peppermint treats during the holidays, this pie is like a walk down memory lane. The familiar taste of peppermint combined with luscious chocolate is sure to evoke fond memories of cozy gatherings and laughter-filled evenings.
For an extra kick, consider serving it with a dollop of whipped cream or a scoop of vanilla ice cream, enhancing the experience even further. Interested in even more culinary inspiration? Check out Food & Wine’s take on holiday desserts for unique pairings and ideas!
In conclusion, chocolate peppermint pie is more than just a dessert; it’s a celebration of flavors and cherished memories wrapped up in a beautiful slice. So gather your ingredients and let’s get started on making this irresistible treat!
Ingredients for Chocolate Peppermint Pie
Essential ingredients for a classic chocolate peppermint pie
Creating a delightful chocolate peppermint pie begins with a few staple ingredients that come together to create an indulgent dessert. Here’s what you’ll need:
- Chocolate crust: You can opt for a store-bought version or whip up a homemade graham cracker crust.
- Dark chocolate: Choose high-quality dark chocolate for the filling; it makes all the difference in flavor.
- Heavy cream: This adds the necessary creaminess to your filling.
- Peppermint extract: A few drops go a long way in giving that refreshing holiday spirit.
- Sugar: For sweetness to balance the richness.
- Eggs: Essential for a smooth and velvety consistency.
Considering health and ingredient sourcing? Check out resources like the Food Network for tips on quality ingredients.
Optional add-ins for a personalized twist
Making your chocolate peppermint pie even more special is easy with some optional add-ins. How about:
- Whipped cream: Top it off with fresh whipped cream for added texture.
- Mint leaves: Garnish with mint for a fresh look and flavor.
- Crushed peppermint candy: Perfect for that crunchy topping and added holiday cheer.
These enhancements can elevate your pie and impress your guests. What will you choose to personalize your chocolate peppermint pie?
Step-by-step Preparation of Chocolate Peppermint Pie
Creating a mouthwatering chocolate peppermint pie is a delightful process that combines rich chocolate flavor with a refreshing hint of peppermint. Whether you’re planning a holiday gathering or simply treating yourself, this step-by-step guide will help ensure your pie turns out perfectly. Let’s dive right in!
Gather All Your Ingredients
Before you start baking, it’s essential to have everything you need within arm’s reach. Here’s your shopping list:
- 1 ¾ cups chocolate cookie crumbs (about 20 cookies)
- ½ cup unsalted butter, melted
- 1 cup heavy cream
- 1 cup semisweet chocolate chips
- 1 teaspoon peppermint extract
- 1 cup powdered sugar
- ½ cup cream cheese, softened
- Additional whipped cream for topping
- Crushed peppermint candies, for garnish
Make sure to choose high-quality ingredients for the best flavor. For tips on selecting the finest chocolate, you can check out this guide on chocolate quality.
Prepare the Crust
The crust is the foundation of any great chocolate peppermint pie. Here’s how you do it:
-
Preheat your oven: Set your oven to 350°F (175°C). This ensures even cooking.
-
Mix the crumbs: In a large bowl, combine the chocolate cookie crumbs and melted butter. Stir until the mixture resembles wet sand.
-
Shape the crust: Press the mixture firmly into the bottom and up the sides of a 9-inch pie plate. This helps create a sturdy crust that won’t crumble.
-
Bake the crust: Place it in the oven for about 8-10 minutes or until it looks set. Remove it from the oven and let it cool. This step is crucial; a well-baked crust will hold up under the luscious filling.
Make the Chocolate Peppermint Filling
Now, onto the fun part—creating that rich and creamy filling!
-
Melt the chocolate: In a microwave-safe bowl, add the chocolate chips. Microwave them in 30-second intervals, stirring in between, until all the chocolate is melted and smooth. This is where you get that decadent base!
-
Whip the cream: In a separate bowl, whip the heavy cream until soft peaks form. Be careful not to overwhip; we want it light and fluffy.
-
Combine mixtures: In another bowl, blend the softened cream cheese and powdered sugar until smooth. Slowly fold in the melted chocolate and peppermint extract. Finally, gently fold the whipped cream into the chocolate mixture. This builds an airy texture that melts in your mouth.
Pour and Chill the Pie
With your chocolate peppermint pie filling ready, it’s time to bring it all together.
- Fill the crust: Pour the filling into the cooled crust, spreading it evenly with a spatula.
- Chill: Cover the pie with plastic wrap, and place it in the refrigerator for at least 4 hours, preferably overnight. This allows the flavors to meld beautifully and helps the filling set properly.
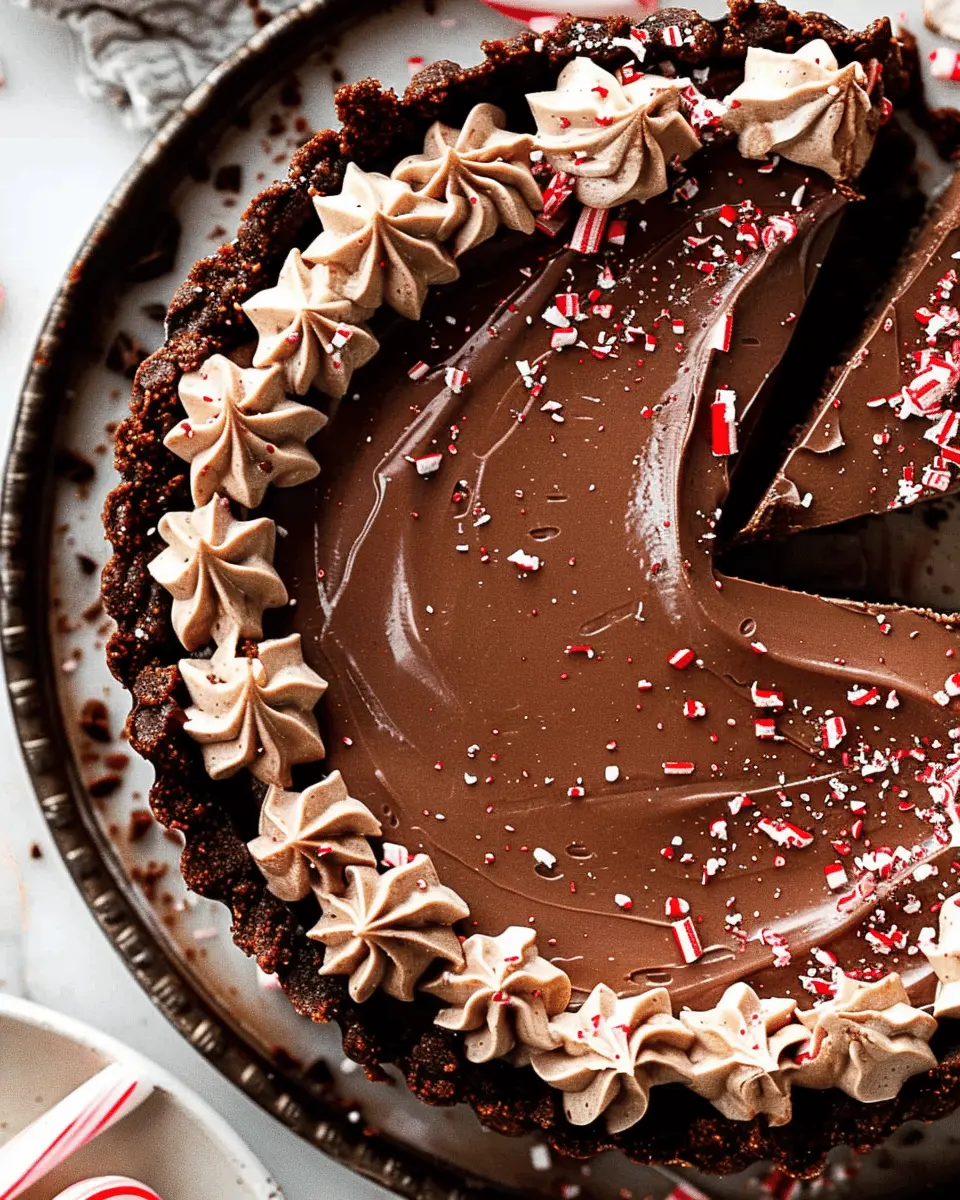
Add the Finishing Touches
Once your pie has chilled, it’s time to whip it into shape visually!
- Top with whipped cream: Before serving, adorn your pie with a generous dollop of whipped cream—because who doesn’t love a little extra creaminess?
- Garnish: Sprinkle crushed peppermint candies on top for a festive, crunchy texture. Not only does this add visual appeal, but it also enhances the peppermint flavor, turning your pie into a showstopper.
Now that you’ve put together your fabulous chocolate peppermint pie, consider serving it alongside a cup of hot cocoa or a seasonal non-alcoholic beverage to create the perfect pairing. Enjoy every last bite, and don’t forget to share your pie with friends and family—it’s too delicious to keep all to yourself!
Variations on Chocolate Peppermint Pie
Mint Chocolate Chip Pie
If you’re a fan of the classic mint chocolate chip ice cream flavor, then this variation of chocolate peppermint pie is for you! Imagine a rich chocolate base, beautifully topped with swirls of mint green filling and sprinkled with chocolate chips. To create this delightful pie, simply mix crushed mint chocolate chip cookies into your crust for added flavor and texture. The combination of the creamy, minty layer and the crunchy topping will remind you of your favorite childhood ice cream.
Plus, you can easily customize it further by adding a layer of whipped cream or a sprinkle of crushed peppermint candies. A slice of this pie will transport you straight back to summer nights!
Dairy-Free Chocolate Peppermint Pie
For those looking to enjoy chocolate peppermint pie without dairy, don’t fret! This version is just as decadent and satisfying. Start with a dairy-free chocolate crust made from crushed gluten-free cookies or almond flour mixed with coconut oil. For the filling, use coconut cream or cashew cream blended with cocoa powder and peppermint extract. Not only is this pie a great alternative for lactose-intolerant friends, but it also packs a delicious flavor punch.
You can enhance this dairy-free delight with a vegan whipped topping—just be sure to check out brands that use coconut or almond milk for the fluffiest results. This version allows everyone to enjoy a slice of joy during the holiday season.
By trying out these variations, you can surprise your guests and treat yourself to something special, all while celebrating the bright flavors of chocolate peppermint pie. If you want to learn more about baking tips, I recommend checking out The Spruce Eats for excellent resources. Enjoy!
Cooking Tips and Notes for Chocolate Peppermint Pie
How to perfectly chill your pie
To achieve that creamy, delightful texture in your chocolate peppermint pie, chilling is key! Once your pie is assembled, cover it with plastic wrap and set it in the refrigerator for at least 4 hours, or overnight if you can. This not only helps it set properly, but it also allows the flavors to meld beautifully. If you’re in a hurry, a quick chill in the freezer for 30–45 minutes can work, but watch it closely to avoid freezing!
Avoiding common pitfalls when making the filling
Creating the perfect filling for your chocolate peppermint pie can be tricky. Here are a few tips to ensure your success:
- Use high-quality chocolate: Opt for semi-sweet or dark chocolate for maximum richness. Brands like Ghirardelli or Callebaut are highly recommended.
- Don’t overmix: When combining your ingredients, mix just until they’re well incorporated to maintain a smooth texture.
- Temperature matters: Make sure your cream cheese and other dairy are room temperature; this helps to prevent lumps.
If you’re looking for more comprehensive guidance, consider checking out this expert baking guide for tips and tricks! Remember, the journey to a perfect pie is just as enjoyable as the pie itself.

Serving Suggestions for Chocolate Peppermint Pie
What to serve alongside your pie
When you’re ready to indulge in your chocolate peppermint pie, consider pairing it with some delightful accompaniments that complement its rich flavors. Here are a few ideas:
- Whipped Cream: A dollop of freshly whipped cream adds a fluffy contrast to your pie’s creaminess.
- Hot Cocoa: Serve a warm mug of hot cocoa with a hint of peppermint for a cozy touch.
- Fresh Berries: Sweet and tart berries—like raspberries or strawberries—provide a fresh balance to the pie’s decadence.
- Mint Tea: A soothing cup of mint tea can cleanse the palate and enhance the pie’s flavor profile.
Creative serving ideas for special occasions
Elevate your dessert game with these fun serving ideas for your chocolate peppermint pie:
- Mini Pies: Make individual mini pies using muffin tins for a cute twist at gatherings.
- Dessert Bar: Create a dessert bar featuring your pie alongside other treats like brownies or cookies, allowing guests to mix and match.
- Themed Parties: For holiday gatherings, consider a hot chocolate bar where guests can top their drinks with crushed peppermint and chocolate shavings.
For more inspiration on introducing flavors, check out Bon Appétit’s dessert ideas. Try these suggestions and make your chocolate peppermint pie the centerpiece of your next celebration!
Time Breakdown for Chocolate Peppermint Pie
Preparation Time
Getting started on your chocolate peppermint pie is a breeze! You’ll need about 20 minutes for gathering ingredients and assembling your pie crust and filling. Consider playing some of your favorite music to set the mood, making the prep feel like less of a chore.
Chilling Time
After pouring your luscious filling into the crust, allow your pie to chill in the refrigerator for at least 4 hours. This step is crucial as it helps the flavors meld together beautifully. You might even want to whip up some festive drinks to enjoy while the pie sets!
Total Time
In total, from preparation to chilling, you’re looking at around 4 hours and 20 minutes. Trust me, the wait is worth it! Your chocolate peppermint pie will be a show-stopper at any gathering. For tips on how to serve or garnish, check out this handy guide on pie presentations.
Nutritional Facts for Chocolate Peppermint Pie
When indulging in the delightful layers of chocolate peppermint pie, it’s important to know what you’re savoring. Here’s a quick breakdown of the nutritional content:
Calories
A typical slice of chocolate peppermint pie contains around 350-450 calories. While it’s a treat, moderation is key to enjoying this festive dessert without going overboard.
Sugar Content
Expect a sugar content ranging from 25-30 grams per slice. This sweetness is what makes it feel special during the holidays, but pairing it with a robust cup of coffee can balance that sugary kick.
Fat Content
With about 20-25 grams of fat per slice, this pie derives its creamy texture from rich ingredients like chocolate and whipped topping. Remember, not all fats are created equal, so choose quality ingredients to feel good about your treat!
For more information on dietary choices, consider checking out the American Heart Association for guidance on maintaining a balanced diet. Remember, savoring a slice of your favorite treats in moderation is a delicious way to celebrate!
FAQs about Chocolate Peppermint Pie
Can I make this pie ahead of time?
Absolutely! In fact, making your chocolate peppermint pie a day ahead can enhance its flavors as they have more time to meld together. Simply prepare the pie according to the recipe, let it cool completely, and then cover it tightly with plastic wrap or foil. It can be stored in the refrigerator for up to three days. This makes it an excellent option for entertaining, as you can focus on other preparations the day of your gathering.
How can I make my pie filling richer?
To elevate the richness of your chocolate peppermint pie filling, consider a few simple tweaks:
- Use high-quality chocolate: Opt for semi-sweet or dark chocolate with a higher cacao content, which can deepen the flavor profile.
- Include cream cheese: Mixing in a bit of softened cream cheese can add a velvety texture and enhance the pie’s richness.
- Add a splash of coffee: A small amount of brewed coffee – just a tablespoon or so – can intensify the chocolate flavor without adding a coffee taste.
For more ideas on ingredient swaps, click here for inspiration.
What’s the best way to store leftover pie?
Leftover chocolate peppermint pie should be stored in the refrigerator, where it will stay fresh for about four to five days. Make sure to keep it covered to prevent it from absorbing other odors in the fridge. If you have a larger quantity, you can also freeze slices. Wrap each slice tightly in plastic wrap and then place it in an airtight container. Just remember to thaw it in the refrigerator before enjoying again!
By addressing these common questions, you can ensure your chocolate peppermint pie experience is delightful from start to finish. Happy baking!
Conclusion on Chocolate Peppermint Pie
Recap of why chocolate peppermint pie is a must-try
Chocolate peppermint pie is the ultimate indulgence that beautifully marries the rich, creamy texture of chocolate with the refreshing zing of peppermint. This dessert isn’t just visually stunning; it’s a crowd-pleaser that will impress your friends and family at any gathering. Whether you’re celebrating a holiday or just want to treat yourself, this pie brings a sense of joy and decadence with every bite.
- Versatile: Perfect for any occasion, from holiday feasts to casual get-togethers.
- Easy to make: With simple ingredients, it’s accessible for bakers of all skill levels.
Don’t just take our word for it—try making your own chocolate peppermint pie and experience the delightful balance of flavors yourself. For more inspiration, check out The Spruce Eats for similar festive treats and desserts. Happy baking!
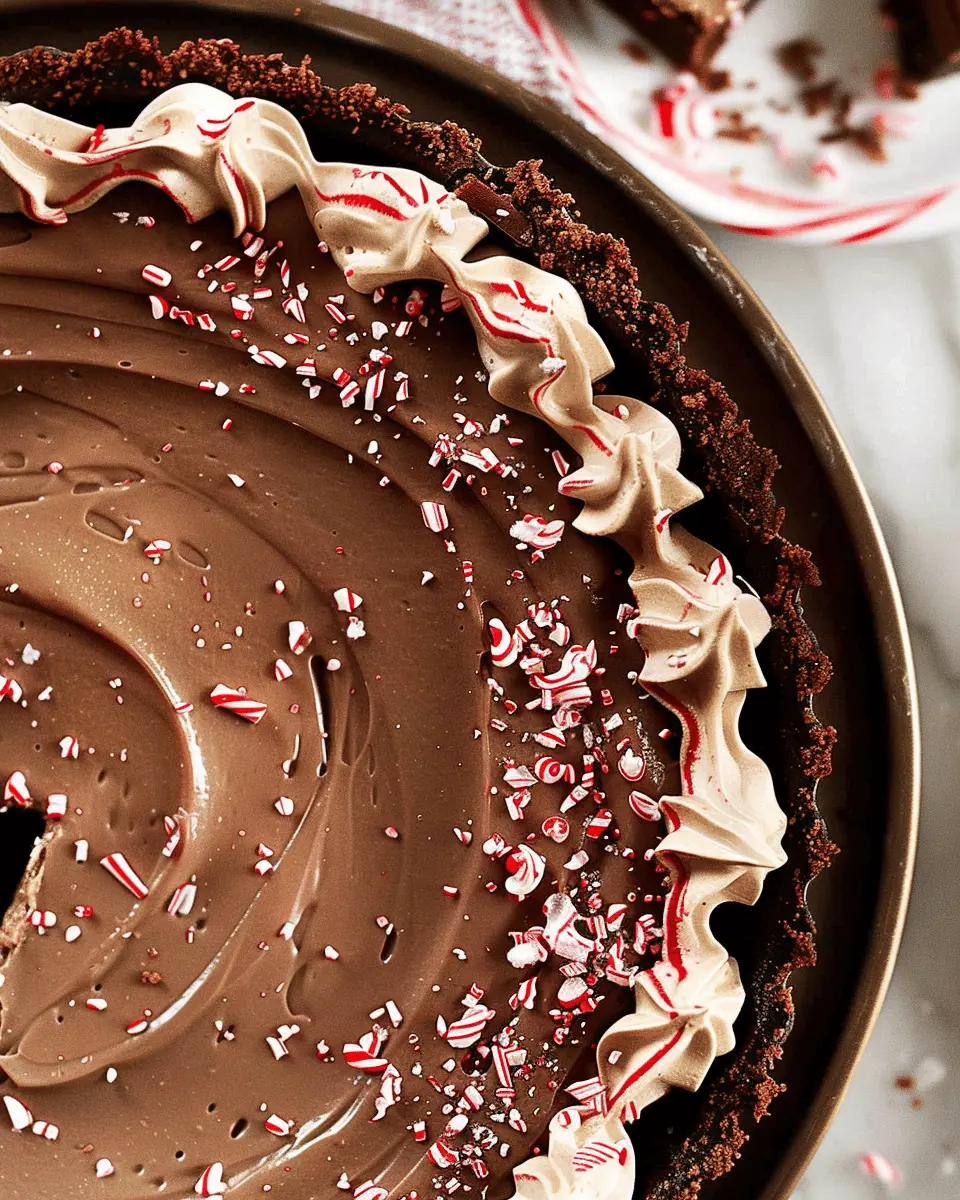
PrintChocolate Peppermint Pie: The Best Festive Treat for Everyone
A rich and creamy chocolate peppermint pie that’s perfect for the festive season.
- Prep Time: 20 minutes
- Total Time: 2 hours 20 minutes
- Yield: 8 servings 1x
- Category: Desserts
- Method: No-Bake
- Cuisine: American
- Diet: Vegetarian
Ingredients
- 1 pre-made chocolate pie crust
- 8 ounces cream cheese, softened
- 1 cup powdered sugar
- 1 teaspoon peppermint extract
- 1 cup whipped cream
- 1/2 cup chocolate ganache, cooled
- 2 tablespoons crushed candy canes
Instructions
- In a mixing bowl, combine softened cream cheese and powdered sugar until smooth.
- Add peppermint extract and mix well.
- Fold in whipped cream until fully incorporated.
- Spread the cream mixture into the chocolate pie crust.
- Drizzle with chocolate ganache and sprinkle crushed candy canes on top.
- Chill in the refrigerator for at least 2 hours before serving.
Notes
- For a stronger peppermint flavor, increase the peppermint extract.
- Ensure to let the pie set fully for better slicing.
Nutrition
- Serving Size: 1 slice
- Calories: 320
- Sugar: 24g
- Sodium: 150mg
- Fat: 22g
- Saturated Fat: 10g
- Unsaturated Fat: 9g
- Trans Fat: 0g
- Carbohydrates: 30g
- Fiber: 1g
- Protein: 3g
- Cholesterol: 45mg
Keywords: Chocolate Peppermint Pie, festive dessert, holiday treats