Outline for Classic No-Bake Cookies
Creating the perfect batch of classic no-bake cookies can feel like a lost art in today’s fast-paced world. Do you remember gathering around your grandma’s kitchen as the kitchen filled with the sweet aroma of melted chocolate and oats? The joy of mixing ingredients without worrying about preheating the oven is a delightful experience that deserves to be shared! In this section, we’ll outline everything you need to know to make your own batch of these nostalgic treats.
The Essential Ingredients You’ll Need
Before diving into the preparation, it’s important to gather the right ingredients. This is a fail-proof recipe, so let’s ensure you have everything on hand!
- Granulated Sugar: A sweet staple that forms the base of your cookies.
- Unsweetened Cocoa Powder: This will give your cookies that rich chocolate flavor.
- Butter: Adds richness and contributes to the texture.
- Milk: Essential for creating a smooth, gooey mixture.
- Quick Oats: These oats will give your cookies that delightful chewiness.
- Peanut Butter: A key ingredient that not only enhances flavor but also binds the cookies together.
- Vanilla Extract: A little touch of flavor that makes a big difference.
Have you ever wondered what makes a cookie recipe stand the test of time? The right balance of these ingredients is essential. According to The Spruce Eats, classic no-bake cookies have stood the test of time due to their simplicity and deliciousness, perfect for the busy 25-35 age group!
Steps to Crafting Your No-Bake Masterpieces
Now that you’ve got your ingredients lined up like soldiers, it’s time to combine them. Follow these simple steps for a successful outcome:
- Prepare Your Workspace: Clear your counter, grab a saucepan and a mixing bowl to keep things organized.
- Combine the Dry Ingredients: In your saucepan, mix together the sugar, cocoa powder, and a pinch of salt. This ensures an even distribution of flavors.
- Add Wet Ingredients: Pour in the milk and add the butter. Stir gently over medium heat until the mixture comes to a boil.
- Boil It Up: Once boiling, let it cook for one minute. This is crucial for that perfect chewy texture.
- Mix It Up: Remove from heat and stir in the peanut butter and vanilla extract until smooth.
- Fold in the Oats: Add the quick oats, combining everything until well-coated.
- Scoop and Cool: Drop spoonfuls onto wax paper, and let them cool completely.
Can you already smell the deliciousness? According to an article from Food Network, cooking for just a minute at this step is crucial, as it allows the sugar to dissolve and gives your cookies that perfect firm-but-chewy consistency.
Common Mistakes and Troubleshooting Tips
Even the most seasoned bakers can make mistakes — it happens! Here’s a list of common pitfalls and how to avoid them:
- Cookies Falling Apart: If your cookies crumble instead of holding form, this could be due to not cooking the mixture long enough. Ensure that you boil for at least a minute.
- Too Sticky: If your cookies are too sticky to handle, it could be that you haven’t allowed enough cooling time. Patience is key!
- Excessively Dry: This might occur if you add too much oats or if they were cooked for too long. Make sure to measure accurately!
Think about it this way: cooking is about learning from experiences. The first time I tried no-bake cookies, they fell apart. But each attempt brought me closer to perfection, and that’s the joy of making classic no-bake cookies.
Customizations and Variations to Consider
One of the best parts of making these cookies is the ability to customize them. Feeling adventurous? Try out some of these variations:
- Add ins: Toss in some chocolate chips, nuts, or dried fruit for extra flavor and texture.
- Nut Butters: Swap peanut butter for almond butter or sunflower seed butter if you prefer.
- Flavor Twists: Consider adding a dash of cinnamon or coconut for a unique twist.
Being creative in the kitchen can ignite a new level of joy, don’t you think? According to a study from Harvard Health, engaging with your food can lead to a more fulfilling eating experience, especially when you make it your own!
Tips for Enjoying Your Classic Treats
Once your cookies have cooled, it’s time to enjoy them! Here are a few ideas that can take your experience to the next level:
- Perfect Pairings: Enjoy a batch of no-bake cookies with a glass of cold milk, hot tea, or coffee—it’s a delightful contrast.
- Presentation Matters: Consider serving these cookies on a beautiful platter, maybe topped with a sprinkle of sea salt to enhance sweetness.
- Storing Your Cookies: These cookies can be kept in an airtight container for up to one week. However, I bet they won’t last that long!
Sharing these moments with friends and family can turn an ordinary treat into a cherished memory. According to Psychology Today, sharing food is a great way to bond.
Nutritional Considerations of Classic No-Bake Cookies
Let’s talk about the nutritional side of this delectable treat. While they are sweet and delicious, it’s always good to enjoy in moderation. Here’s a quick breakdown of the nutrients typically found in these cookies:
- Energy Boosting: The sugar and oats provide quick energy, perfect for a busy afternoon.
- Protein Packed: Peanut butter adds a good source of protein, which is essential for muscle repair and overall health.
As busy professionals, knowing what we consume helps us feel better in our daily lives. Websites like Healthline provide insightful breakdowns of macronutrients.
Final Thoughts on Your No-Bake Adventure
Now that you have everything you need to make your classic no-bake cookies like grandma used to make, it’s time to roll up your sleeves and get started. Remember, creating these delicious bites is as much about the journey as it is about the destination. Each cookie that you create carries a little bit of your story, loaded with fond memories and maybe a few mishaps along the way.
So, grab your ingredients and let’s get baking! You’ll not only be satisfying your sweet tooth, but you’ll also be making wonderful memories along the way. Don’t forget to share your experience; who knows, you might inspire someone else to recreate these timeless treats!
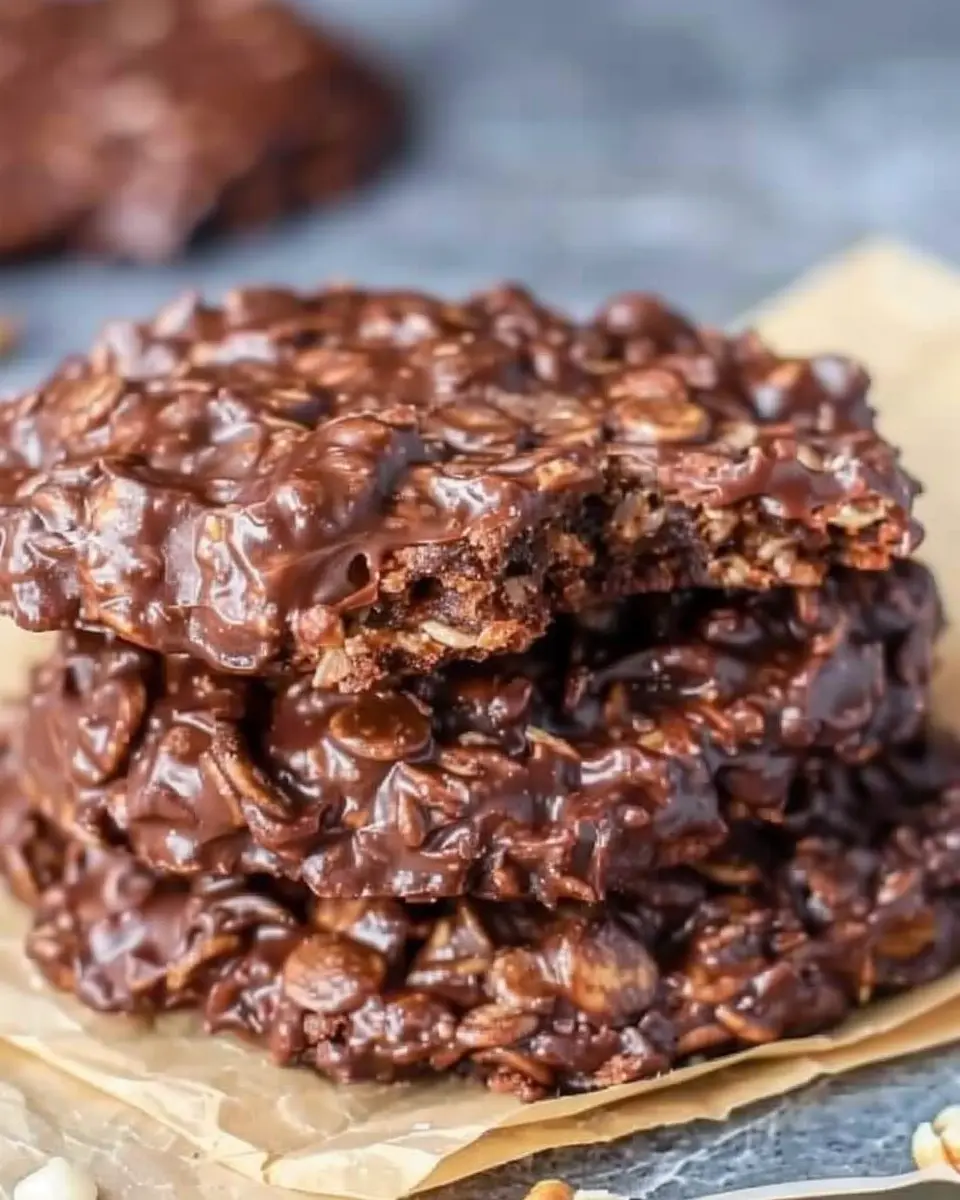
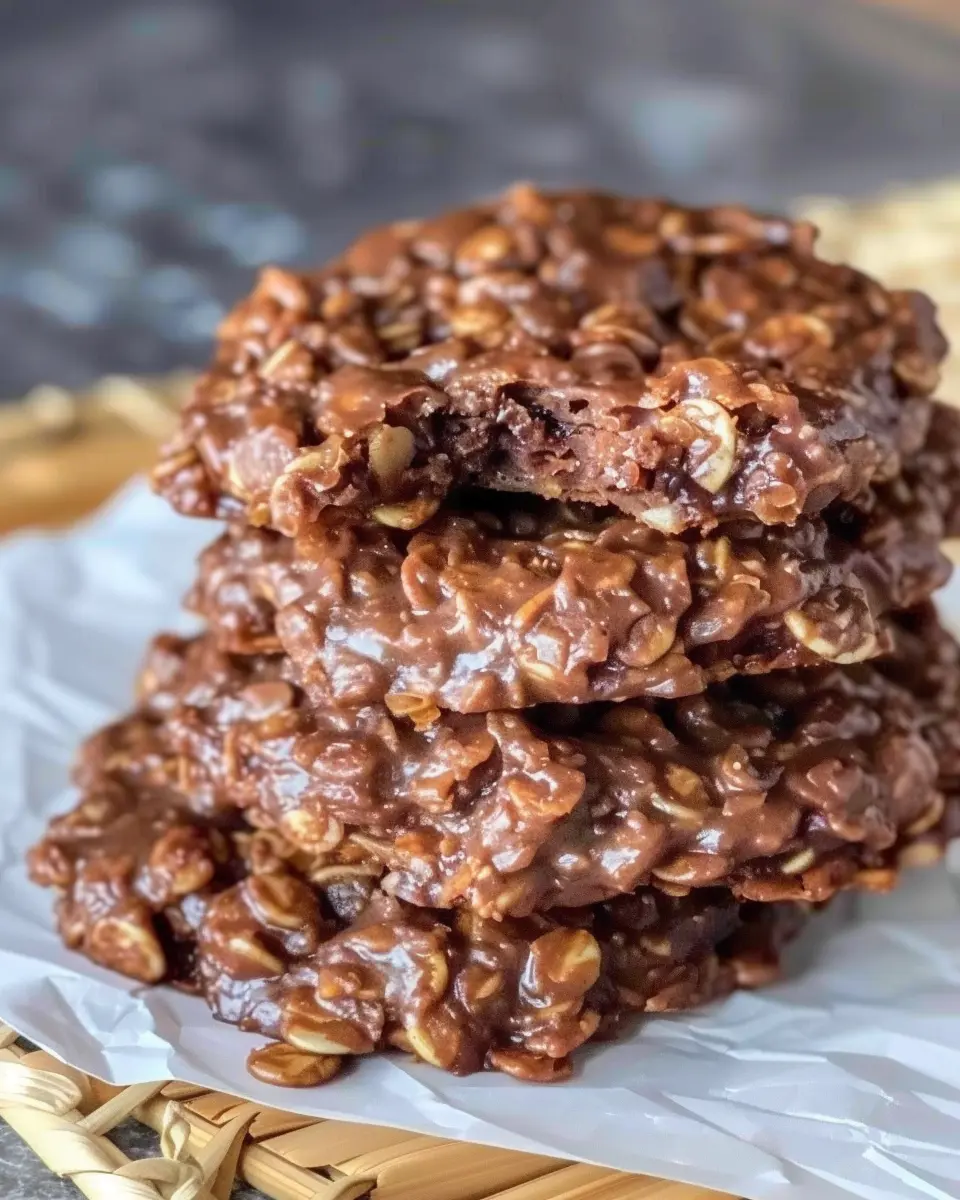
Introduction to Classic No-Bake Cookies
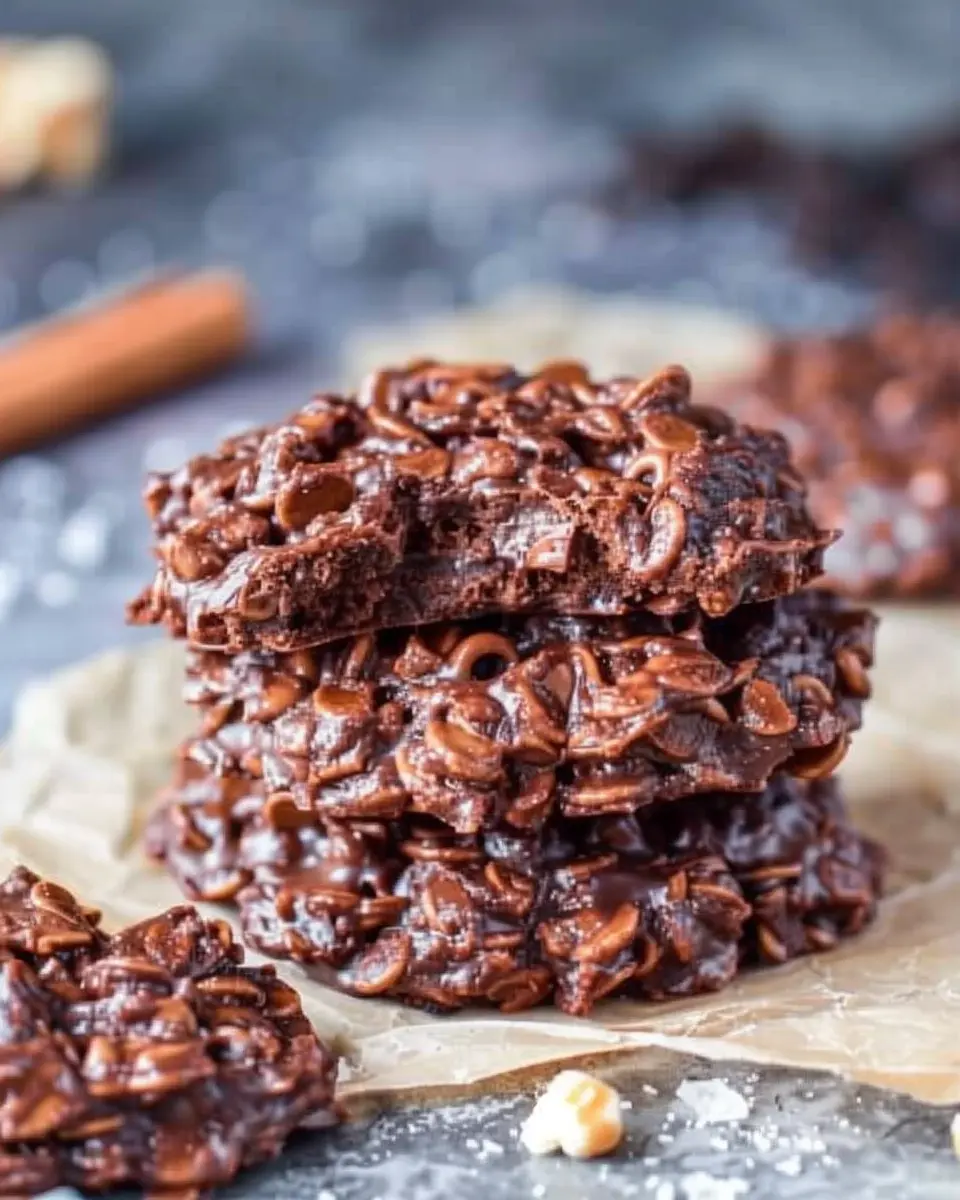
Making classic no-bake cookies is like stepping into a time machine that takes you straight to Grandma’s kitchen. These delightful treats combine simple ingredients in a magical way, producing a chocolaty, chewy goodness without ever touching an oven. The secret lies in the combination of oats, cocoa, and nut butter (like peanut or almond), which come together with just a few steps of melting, mixing, and chilling. It’s a foolproof recipe that brings back the nostalgia of childhood and fills your home with delicious aromas.
But what’s really special about no-bake cookies? They’re incredibly forgiving; you don’t need to be a master chef to whip them up. In fact, the magic behind no-bake cookies lies in their adaptability. You can customize them with your favorite add-ins, such as chopped nuts, dried fruits, or even a sprinkle of sea salt for an extra flavor boost. Plus, they require minimal equipment—just a pot and a bowl, making clean-up a breeze! For those looking for a practical baking experience that is both quick and satisfying, these cookies are a gem.
In today’s rushed world, it’s no wonder that many young professionals are embracing homemade treats. We lead busy lives, often juggling work, social commitments, and self-care. However, baking can be a delightful way to take a breather while crafting a delicious reward at the same time. Studies show that engaging in creative activities like cooking can reduce stress and enhance well-being. Not to mention, making classic no-bake cookies means you can enjoy the satisfaction of creating something from scratch without investing hours in the kitchen.
So, why not treat yourself or surprise a friend with a batch of these cookies? You’ll not only enjoy a tasty reward but also share a little piece of that warmth and love that comes from baking—just like Grandma used to make. For more tips on cooking and baking, check out resources like the American Culinary Federation or Food52 for inspiration. Whether you’re a veteran cook or a novice, there’s something irresistible about homemade goodness waiting to be shared.
Ingredients for Classic No-Bake Cookies
When it comes to preparing classic no-bake cookies, a handful of essential ingredients is all you need. These delightful treats are quick to whip up, making them perfect for last-minute gatherings or a cozy night in. Here’s what you’ll want to gather for this nostalgic recipe:
Essential ingredients you need
- Oats: Rolled oats provide texture and chewiness that are signature to these cookies.
- Nut Butter: Creamy peanut butter is a favorite, but feel free to substitute with almond or sunflower seed butter.
- Sweetener: Granulated sugar combined with brown sugar adds that classic sweetness, while honey or maple syrup can be great alternatives.
- Butter: Use regular or plant-based butter for that rich flavor.
- Cocoa Powder: Unsweetened cocoa powder is crucial for that beloved chocolatey taste.
- Milk: Choose your preferred milk—dairy or non-dairy works beautifully here.
- Vanilla Extract: A splash for flavor enhancement that brightens the overall taste.
Optional tweaks for personalization
Want to make these classic no-bake cookies your own? Consider adding:
- Chopped Nuts: Almonds, walnuts, or even pecans for an extra crunch.
- Chocolate Chips: Sneaking in some semi-sweet or dark chocolate can elevate the sweetness.
- Dried Fruits: Cranberries or raisins introduce a delightful chewy texture and a hint of tartness.
Feel free to experiment with your favorite flavors! Check out this helpful guide on ingredient substitutions for added inspiration.
By gathering these simple ingredients, you’re well on your way to creating a batch of unforgettable classic no-bake cookies that taste just like Grandma used to make. Happy baking!
Preparing Classic No-Bake Cookies
Making classic no-bake cookies is a delightful journey, perfect for those impulsive dessert cravings that strike out of nowhere. You know those moments when the sweet tooth calls but time and effort seem to be in short supply? These cookies are the answer! Let’s get into the steps that will help you prepare these delicious treats, reminiscent of Grandma’s kitchen.
Gather Your Ingredients
First things first, let’s make sure we have everything we need. The beauty of classic no-bake cookies lies in their simplicity. Here’s your ingredient list:
- 1 cup granulated sugar
- 1/2 cup unsalted butter
- 1/4 cup milk (whole milk or plant-based varies are good)
- 1/2 cup unsweetened cocoa powder
- 1/2 cup peanut butter (creamy or crunchy, your choice)
- 3 cups quick-cooking oats
- 1 teaspoon vanilla extract
- A pinch of salt
Make sure you have all these on hand before diving in! Pro Tip: Measure everything out ahead of time to speed up the process, especially if you’re already chin-deep in a busy day.
Prepare Your Baking Sheet
Next, let’s make your workspace ready. You’ll need a cookie sheet lined with parchment paper or wax paper. This is where the magic will happen! Lay out the paper for easy cleanup and to prevent the cookies from sticking.
Since no-bake cookies are soft initially, having the sheet prepared can help them set perfectly without a fuss. Feeling ambitious? Try using a silicone baking mat for easy release and reusable goodness!
Combine Base Ingredients in a Saucepan
Now, grab a medium saucepan and combine your first set of ingredients: sugar, butter, milk, and cocoa powder. Mix them well over medium heat. As you stir the pot, imagine yourself in Grandma’s cozy kitchen filled with the aroma of melting chocolate. It’s all about that warm, nostalgic feeling!
Boil and Master the Timing
Bring that luscious mixture to a rolling boil. You’ll want to let it bubble (but not too aggressively) for a full minute. Here’s where timing can make or break your cookies. For ideal texture, ensure you don’t skimp on this timing. A minute is just right; anything less can leave you with overly gooey cookies, while too long can lead to a dry batch.
Mix in Cocoa and Peanut Butter
After achieving that perfect boiling time, remove your saucepan from the heat and stir in the creamy goodness of peanut butter and the fragrant vanilla extract. This step should make your mixture look and smell divine. Trust me, you’ll want to take a moment just to enjoy how amazing it is!
Stir in the Oats and Form Cookies
Once the peanut butter has melted and combined beautifully with your chocolaty base, it’s time to mix in the oats. Stir gently but thoroughly until everything is well-incorporated. Using a spoon, drop dollops of the mixture onto your prepared baking sheet. Aim for about 2 tablespoons per cookie to ensure they’re deliciously bite-sized.
Let Them Set and Cool
Now, patience is key. Allow your classic no-bake cookies to cool at room temperature until they are firm to the touch. This usually takes about 30 minutes. During this time, try not to nibble too much off the sheet.
Once set, you’ll find yourself staring at a plate of irresistible treats. Serve them up with a glass of cold milk or perhaps a caffeine kick from your favorite coffee alternative.
There you have it—a simple guide to preparing classic no-bake cookies. Whether you’re having a productive evening or enjoying a spontaneous get-together, these treats bring warmth and sweetness to any occasion. Happy baking!
Variations on Classic No-Bake Cookies
When it comes to making classic no-bake cookies, the sky’s the limit when it comes to unique twists and flavors! If you’re ready to take the traditional recipe up a notch, here are some fun variations that’ll tickle your taste buds.
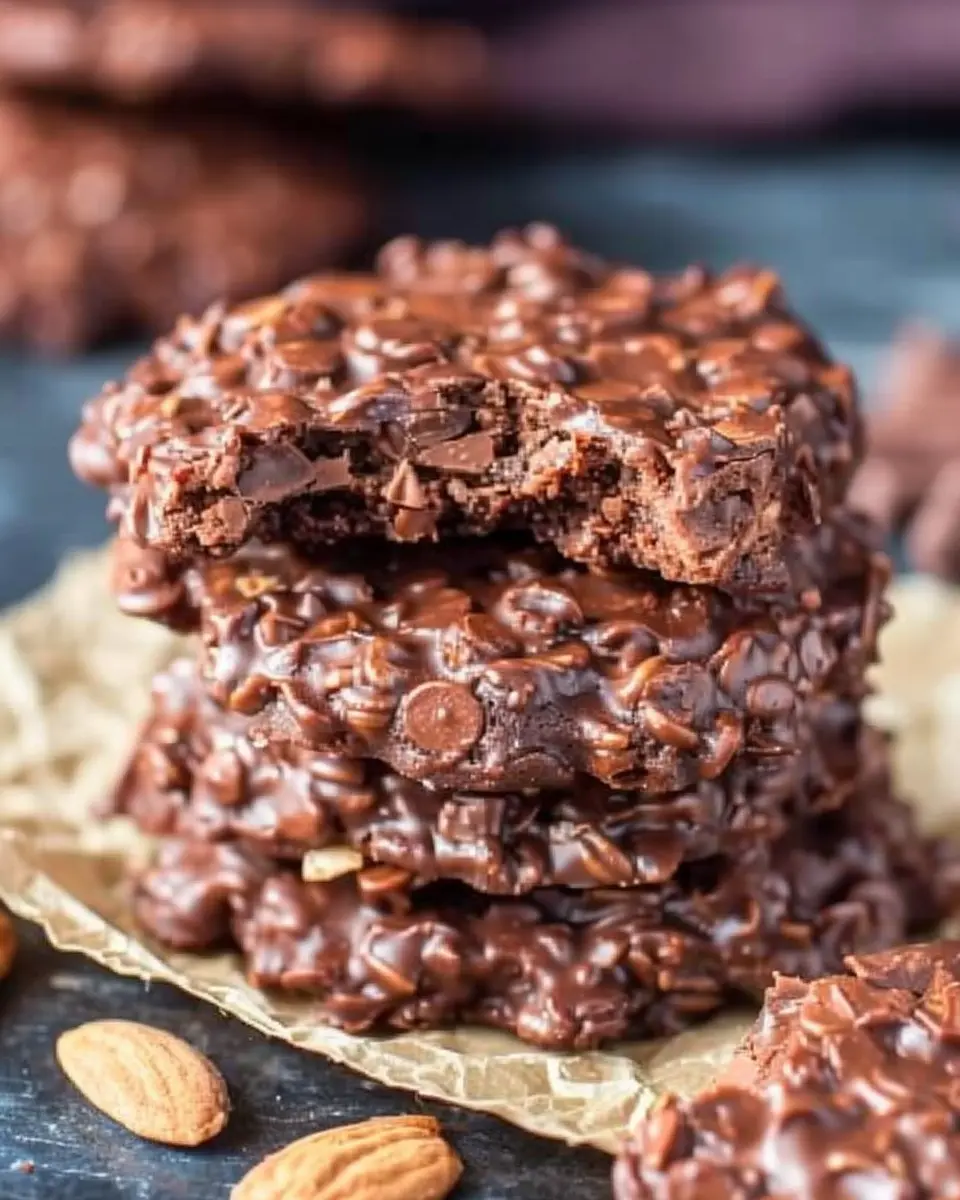
Nutty Chocolate Variations
Add a satisfying crunch by incorporating your favorite nuts. Walnuts, pecans, or almond slivers blend perfectly with the chocolatey goodness of classic no-bake cookies. Toast the nuts beforehand for an extra layer of flavor. You can also swap in chocolate-flavored protein powder for a superfood kick!
Healthier Alternatives: Using Natural Sweeteners
Trying to cut down on refined sugars? Replace the granulated sugar in your classic no-bake cookies with natural sweeteners like maple syrup or honey. Not only do these options add a delightful flavor, but they also bring a nutritious edge. For instance, using coconut sugar can provide a lower glycemic index, making it a thoughtful choice for those mindful of their blood sugar levels.
Adding Dried Fruits or Coconut for a Tropical Twist
Ready for a mini vacation in each bite? Toss in some dried tropical fruits such as pineapple or mango for a vibrant flavor explosion. You can also sprinkle in unsweetened shredded coconut to evoke that beachy feel. Incorporating these ingredients turns your classic no-bake cookies into a refreshing treat that’s perfect for summer gatherings or cozy evenings at home.
So, whether you’re a chocolate lover or looking for a healthier option, these variations add creativity and personal flair to your no-bake creation. Which twist will you try first? Share your delicious experiments with your friends and family! For more inspiration on cookie recipes and tips, check out Food Network or Serious Eats.
Cooking Tips and Notes for Classic No-Bake Cookies
Common Pitfalls and How to Avoid Them
Making classic no-bake cookies is a breeze, but a couple of pitfalls can trip you up. One common issue is not allowing your oatmeal mixture to boil properly. This step is crucial — it activates the ingredients like sugar and butter. If it doesn’t reach a full boil, the cookies may not set up correctly. Always stir for at least a minute to get that thick, gooey goodness!
Another key tip is measuring your ingredients accurately. Too much or too little of a sticky component, like peanut butter, alters the cookie’s consistency. So, use dry measuring cups for solids and liquid measuring cups for syrups or oils for the best results.
Storage Tips to Keep Cookies Fresh
To keep your classic no-bake cookies fresh, store them in an airtight container at room temperature. Stacking them with parchment paper between layers prevents sticking. For longer storage, consider freezing them. Just wrap each cookie in plastic wrap and place them in a freezer-safe bag. They’ll retain their flavor, making them a delightful treat anytime!
For more tips on how to store baked goods, check out this helpful guide by the USDA. Happy cooking!
Serving Suggestions for Classic No-Bake Cookies
Pairing with Beverages for the Perfect Treat
When enjoying classic no-bake cookies, the right beverage pairing can elevate your experience. Try serving these delightful cookies with:
- Coffee: The rich, warm flavors of a good brew complement the chocolatey goodness.
- Milk: A classic combination; nothing beats the nostalgic feeling of dunking a cookie into cold milk.
- Herbal teas: For a lighter option, a calming chamomile or refreshing mint tea adds a lovely contrast.
Great Occasions for Serving These Cookies
Classic no-bake cookies shine during many occasions. Here’s when they truly steal the show:
- Casual gatherings: Whether hosting friends for game night or having a cozy afternoon chat, these cookies are a hit.
- Picnics and potlucks: Their transportability makes them perfect for outdoor fun where you want something sweet and satisfying.
- Kids’ parties: With their fun texture and chocolate flavor, these cookies are sure to be a favorite among little ones.
For more great ideas on pairing treats, check out resources like Epicurious for inspiration!
Time Breakdown for Classic No-Bake Cookies
When you’re craving those nostalgic classic no-bake cookies, it’s essential to know how much time you’ll need. Here’s a quick breakdown:
Preparation time
You can whip up these delightful cookies in just about 10 minutes. Make sure you have all your ingredients ready, so you can move efficiently through this sweet process.
Cooking time
The beauty of no-bake cookies is that there’s really no cooking involved! You’ll be working with heat for about 5 minutes to melt your ingredients together seamlessly.
Total time
In just 15 minutes, you can have a tray of chocolatey goodness ready to chill and enjoy. Once they’re set, you’ll wonder why you didn’t make them sooner!
For more inspiration on easy treats, check out Baking Made Simple’s guide to no-bake desserts here. Happy baking!
Nutritional Facts for Classic No-Bake Cookies
When it comes to enjoying classic no-bake cookies, understanding their nutritional profile can help you indulge mindfully.
Caloric Content
These delightful treats usually contain around 100 calories each, depending on portion size and ingredients. It’s easy to lose track, so moderation is key!
Key Nutritional Highlights
- Fats: Approximately 5 grams per cookie, primarily from nut butter or coconut oil.
- Sugars: With around 7 grams of sugar, these cookies provide a sweet treat, making them perfect for satisfying your cravings.
- Protein: Expect about 2 grams of protein, especially if incorporating protein-rich nut butters.
While enjoying no-bake cookies is fine, balance them with other wholesome foods. For more insights on healthy treats, consider checking out resources like the American Heart Association. Keep in mind the importance of ingredients, as they can significantly affect the overall nutrition.
FAQs about Classic No-Bake Cookies
Can I substitute peanut butter?
Absolutely! While the classic no-bake cookies recipe typically calls for peanut butter, you can easily swap it out for alternatives like almond butter, sunflower seed butter, or even cashew butter. Each of these substitutions will add its own unique flavor, giving your cookies a delightful twist. Just make sure your alternative nut butter is creamy to maintain the right texture. For those with nut allergies, sunflower seed butter is a fantastic option that’s safe for school lunches!
How do I store these cookies for maximum freshness?
To keep your classic no-bake cookies as fresh as possible, store them in an airtight container at room temperature for up to a week. If you want to extend their shelf life, you can pop them in the fridge, where they will stay good for about two weeks. You can also freeze these cookies for up to three months! Just ensure they’re well-wrapped or placed in a freezer-safe container to prevent freezer burn.
What should I do if my cookies don’t set?
If your classic no-bake cookies aren’t setting, don’t worry—there’s a solution! Try placing them in the refrigerator for a little while longer. If that doesn’t help, it might be due to not cooking the mixture long enough. When making no-bake cookies, make sure to bring the mixture to a rolling boil for a couple of minutes before removing it from the heat. If all else fails, remix the ingredients by reheating the mix and adding a touch more oats.
For additional tips and information on no-bake treats, check out Food Network or AllRecipes, where you can find a treasure trove of alternatives and ideas!
Conclusion on Classic No-Bake Cookies
Making classic no-bake cookies can be a delightful experience, bringing back fond memories of baking with loved ones. The simplicity of the recipe allows anyone—even those with a busy schedule—to whip up a tasty treat in no time. The joy of mixing ingredients and watching them come together is truly fulfilling.
Don’t hesitate to experiment! Whether you add your favorite nuts, switch to peanut butter, or try out oatmeal instead of cocoa, each variation can lead to a uniquely delicious batch. Embrace the creative process; after all, that’s what baking is all about! Ready to make your kitchen sweet? Happy baking!
For more delicious inspiration, check out Serious Eats for creative variations and tips!
PrintClassic No-Bake Cookies: Indulgent Treats Like Grandma Made
Classic No-Bake Cookies are a delicious treat that brings back memories of Grandma’s kitchen.
- Prep Time: 15 minutes
- Cook Time: 10 minutes
- Total Time: 25 minutes
- Yield: 24 cookies 1x
- Category: Dessert
- Method: No-Bake
- Cuisine: American
- Diet: Vegetarian
Ingredients
- 2 cups granulated sugar
- 1/2 cup milk
- 1/2 cup unsweetened cocoa powder
- 1/2 cup butter
- 3 cups quick-cooking oats
- 1 cup peanut butter
- 1 teaspoon vanilla extract
Instructions
- In a saucepan, combine sugar, milk, cocoa powder, and butter. Bring to a boil over medium heat, stirring frequently.
- Once boiling, let it cook for 1 minute and remove from heat.
- Stir in the oats, peanut butter, and vanilla until well combined.
- Drop spoonfuls onto wax paper and let cool until set.
Notes
- For a chewier cookie, add a bit more peanut butter.
- Allow cookies to set at room temperature for best texture.
Nutrition
- Serving Size: 1 cookie
- Calories: 120
- Sugar: 15g
- Sodium: 50mg
- Fat: 5g
- Saturated Fat: 2.5g
- Unsaturated Fat: 2.5g
- Trans Fat: 0g
- Carbohydrates: 17g
- Fiber: 2g
- Protein: 3g
- Cholesterol: 10mg
Keywords: No-Bake Cookies, Grandma, Classic Cookies, Dessert