Introduction to Homemade Cereal Bars
Why Homemade Cereal Bars?
Have you ever grabbed a cereal bar on the go, only to discover it’s full of ingredients you can’t quite pronounce? We’ve all been there, and that’s why making your own cereal bars at home can be a game-changer. Not only do these homemade treats offer you complete control over the ingredients, but they also provide a delicious and nutritious alternative that can fit any dietary need.
When you whip up a batch of homemade cereal bars, you’re not just creating a snack; you’re crafting something that’s tailored specifically to your tastes. Think about it: you can pick your favorite oats, add in nuts, fruits, and even sweeteners that align with your diet. Interested in making them gluten-free? No problem! Want to incorporate protein powder for an extra boost? Go for it! The possibilities are virtually endless.
Not only are homemade cereal bars better for your health, but they are also more cost-effective. Store-bought bars can cost anywhere from $1 to $3 each, while making them at home allows you to enjoy the same nutritious flavors for a fraction of the price. Plus, it’s a fun activity you can do with friends or family. You can easily turn this into a quality bonding moment, experimenting with different combinations to find your perfect flavor match.
In addition, making cereal bars at home can be an ideal solution for busy professionals seeking quick snacks between meetings. With a little advance planning and meal prep, you’ll always have a grab-and-go option that can keep your energy levels up throughout the day. Research shows that consuming whole grains like oats can help improve concentration and reduce the risk of heart disease. So, you’re not just satisfying your cravings; you’re also fueling your productivity!
Ready to dive into the world of homemade cereal bars? Let’s explore the incredible recipes that you can easily whip up in your kitchen. Trust us, once you try them, you’ll never want to go back to store-bought options!
Ingredients for Homemade Cereal Bars
When it comes to whipping up cereal bars in your kitchen, knowing what to include makes all the difference. Not only can you customize flavors to your liking, but you also avoid the additives often found in store-bought options. Here’s what you need to get started:
-
Base Ingredients:
-
2 cups rolled oats (a wholesome foundation)
-
1 cup nut butter (think almond or peanut for creaminess)
-
1/3 cup honey or maple syrup (for natural sweetness)
-
Mix-ins:
-
1/2 cup chopped nuts (for that satisfying crunch)
-
1/2 cup dried fruit (raisins, cranberries, or chopped apricots work wonderfully)
-
1/2 cup dark chocolate chips (optional, but who can resist?)
-
Flavor Boosters:
-
1 teaspoon vanilla extract (how about a splash of flavor?)
-
A pinch of salt (to balance out the sweetness)
Choosing quality ingredients is crucial—opt for organic when possible. For an interesting twist, check out expert recipes on sites like America’s Test Kitchen for more ideas. Now that you’re stocked up, let’s dive into the fun part: crafting your delicious cereal bars!
Preparing Homemade Cereal Bars
Making your own cereal bars at home is not only a fun culinary project, but it also gives you the opportunity to customize flavors and ingredients to suit your personal taste and dietary preferences. Plus, they make for a healthier snack compared to store-bought options, which can be loaded with added sugars and preservatives. Let’s dive into this simple, delightful process!
Gather Your Ingredients
Before we get our hands sticky, let’s make sure we have everything we need right at our fingertips. Here’s a straightforward list of ingredients that you will want to gather:
- 3 cups of rolled oats: This is the main base for your bars, providing fiber and complex carbohydrates.
- 1/2 cup of nut butter: Almond, peanut, or even sunflower seed butter work beautifully. Just ensure you check for any nut allergies if you’re sharing.
- 1/3 cup of honey or maple syrup: This acts as the sweetener and also helps bind the ingredients.
- 1/2 cup of mix-ins: Think chocolate chips, dried fruits, or seeds. You can customize this part based on your cravings or pantry items.
- Optional: A pinch of salt and a teaspoon of vanilla extract for extra flavor.
Make sure to have a mixing bowl and a baking pan (8×8 inches works perfectly) at the ready.
Mix the Base Ingredients
Now for the exciting part — mixing! In a large mixing bowl, combine your rolled oats and any additional dry ingredients, like a pinch of salt or optional add-ins. In a separate bowl, mix your nut butter with honey or maple syrup until it’s creamy. This typically takes about 30 seconds to 1 minute.
Next, pour the wet mixture over the oats and stir until everything is thoroughly combined. It might feel a bit sticky, but that’s a good sign! You want the oats well-coated to ensure that your cereal bars hold together once baked.
Press into the Pan
Once your ingredients are nicely mixed, you’re going to want to transfer them into your baking pan. It’s key to distribute the mixture evenly across the surface. Using a spatula or your clean hands, press down firmly to compact the mixture. The harder you press, the more solid your cereal bars will be once they cool — think of it as forming a delightful, edible brick.
Chill the Mixture
The next step is crucial for achieving that perfect texture. Place your packed pan into the refrigerator for at least 1 hour. This chilling time allows the cereal bars to set properly, making them easier to cut later. While you wait, why not check out some healthy snack options (like smoothies!) on websites such as Healthline?
Cut and Store
Once your cereal bars have chilled and set, it’s time to cut them into squares or rectangles, depending on your preference. If they’ve stuck a bit, you might want to run a knife along the edges before lifting them out of the pan. Store your bars in an airtight container — they can last up to one week in the fridge!
And there you have it: a simple, fun way to create your own homemade cereal bars. They’re perfect for a quick breakfast or a satisfying snack throughout the day. The beauty of this recipe lies in its versatility, so feel free to experiment with different flavors and textures that fit your palate. Happy snacking!
Variations on Homemade Cereal Bars
Homemade cereal bars are a fantastic way to enjoy a quick, nutritious snack. But why stick to just one flavor when you can explore a world of delicious variations? Here are a few ideas to jazz up your cereal bar game.
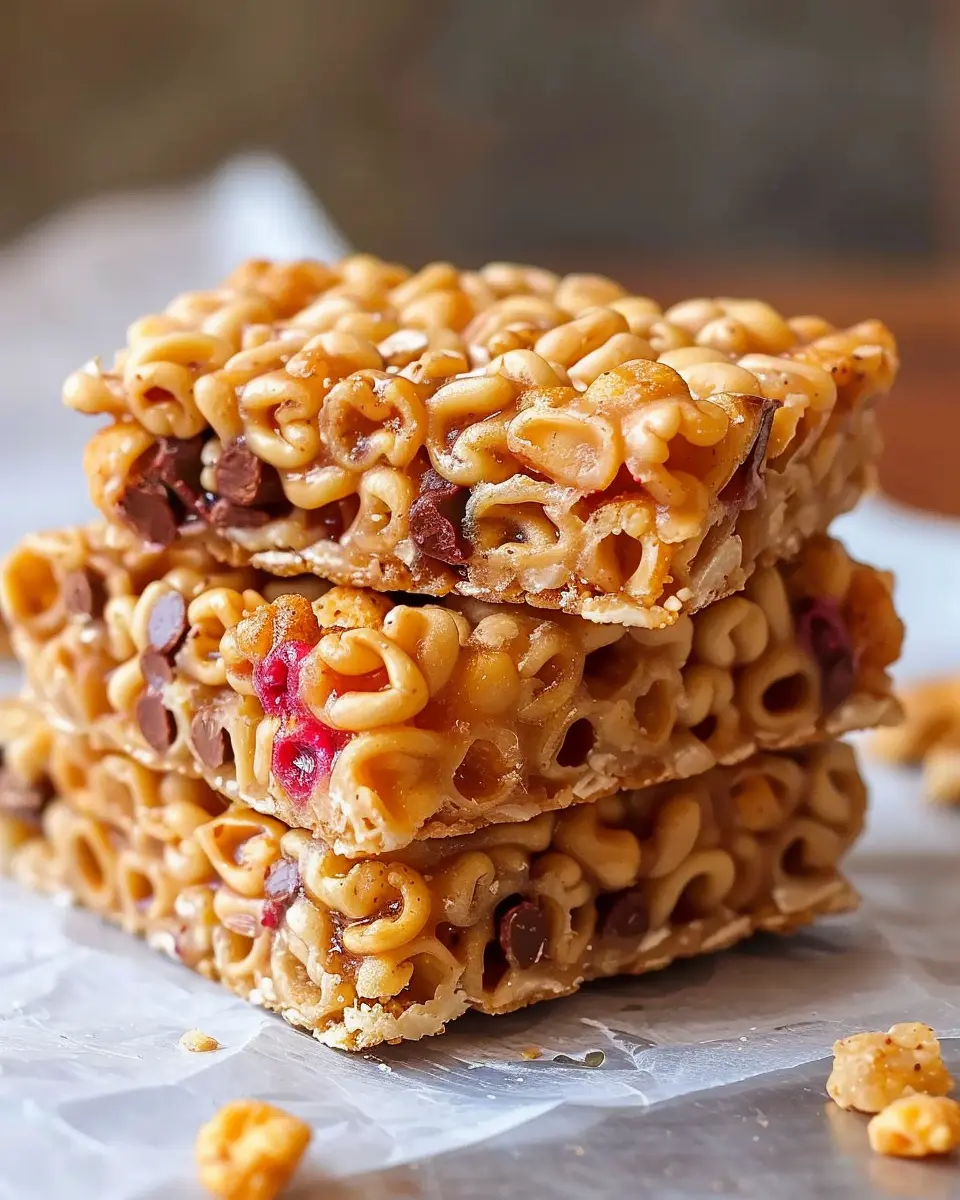
Nutty Chocolate Cereal Bars
If you can’t resist the combination of sweet and savory, these Nutty Chocolate Cereal Bars will be your new favorite. Start by mixing rolled oats, chopped nuts (almonds or walnuts work beautifully), and a drizzle of melted dark chocolate. Combine these with a bit of peanut or almond butter for added richness. Don’t forget to sprinkle some sea salt on top for that delightful contrast. They not only satiate your chocolate cravings but also provide a great energy boost.
Fruity Cereal Bars
For a refreshing twist, fruity cereal bars are a delightful option. Use a mix of dried fruits like cranberries, apricots, and banana chips, paired with your base of oats. Feeling adventurous? Toss in some chia seeds or flaxseeds for added texture and nutrition. Sweeten the mixture with honey or agave syrup, and voilà! You’ve got a vibrant, chewy treat that’s perfect for a mid-afternoon pick-me-up. Plus, you can mix and match fruits based on what’s in season for an even fresher taste.
Protein-Packed Cereal Bars
For those hitting the gym or needing extra energy for an intense workday, protein-packed cereal bars are just what you need. Incorporate your favorite protein powder into the mixture, along with oats, nut butter, and a few chocolate chips for flavor. Adding ingredients like sunflower seeds or roasted chickpeas can also enhance the protein factor while providing satisfying crunch. These bars are not just a snack but a convenient meal replacement on those busy days.
By experimenting with these variations, you can keep your homemade cereal bars exciting and packed with flavor. Who doesn’t want a snack that’s both tasty and healthy? Happy snacking! For more ideas on healthy snacks, check out credible sources like Healthline for inspiration!
Cooking Tips and Notes for Homemade Cereal Bars
Creating your own cereal bars at home is not only satisfying but also allows you to customize every ingredient to your liking. Here are some helpful tips to elevate your cereal bar game:
Choose Your Base Wisely
The base of your cereal bars is what allows them to hold together. Classic options include rolled oats, puffed rice, or even crushed nuts. For a delicious twist, consider adding some quinoa or buckwheat for added texture and nutrition.
Sweetness Factor
When it comes to sweeteners, honey and maple syrup are great choices that add moisture while providing a delightful stickiness. If you prefer an alternative, agave nectar works well too. Just remember, too much sweetness can overwhelm your flavors.
Customize with Mix-Ins
Feel free to play with mix-ins! Dried fruits, seeds, nuts, and even dark chocolate chips are fantastic additions that provide both flavor and nutrition. A personal favorite is the combination of almond slices and cranberries—which gives the bars a chewy and crunchy texture.
Storage Tips
Store your cereal bars in an airtight container for up to a week, or wrap them individually for on-the-go snacks. For longer storage, you can freeze them—just make sure they’re fully cooled before wrapping.
By following these tips, you can create delicious, nutritious, and delightful cereal bars that will keep you satisfied throughout your busy day! Check out some related resources on How to Make Nutritious Snacks for more inspiration.
Serving Suggestions for Homemade Cereal Bars
When it comes to enjoying your delicious homemade cereal bars, the possibilities are endless! Whether you’re looking for a quick breakfast on the go or a wholesome snack during your workday, these bars fit right in.
Here are a few serving suggestions:
-
Pair with a Beverage: Enjoy your cereal bars with a refreshing smoothie or a cup of herbal tea. The combination enhances the flavors and makes for a delightful mid-morning boost.
-
Add Fresh Fruits: Top your bars with sliced bananas or berries for an extra touch of sweetness and nutrition. Fruits can elevate the taste and provide additional fiber.
-
Portable Snack Packs: Crumble your bars and mix them with yogurt for a handy snack option. This not only increases protein intake but also adds a creamy texture that many love.
-
Make it Fun for Kids: If you have little ones, let them customize their cereal bars by adding their favorite toppings—like honey or nut butter—turning snack time into an exciting activity.
Be sure to check out this resource on snacking healthily for more inspiration!
Time Breakdown for Homemade Cereal Bars
Preparation Time
Getting started on your cereal bars is half the fun! You’ll need about 15 minutes to gather your ingredients and put everything together. This is the perfect time to throw on your favorite playlist or podcast, making the process feel less like prep and more like a mini event.
Chilling Time
Once you’ve mixed your ingredients and pressed them into a pan, it’s time for some patience. Let your cereal bars chill in the fridge for about 30 minutes. This step is crucial as it helps the bars set and come together, making them easier to cut later on.
Total Time
In just under an hour, you can have homemade cereal bars ready to enjoy! With a total time of about 45 minutes, including preparation and chilling, you can whip these up during a weekend brunch or after work for a tasty snack to keep you energized throughout the week.
For more tips on making these bars extra crispy and nutritious, check out resources like EatingWell and Healthline. You’ve got this!
Nutritional Facts for Homemade Cereal Bars
When you whip up a batch of homemade cereal bars, you’re not just crafting a delicious snack; you’re creating a healthy option tailored to your tastes. Let’s break down the nutritional facts to understand just how good these bars can be.
Calories
Depending on the ingredients, each homemade cereal bar typically ranges from 150 to 200 calories. This makes them a satisfying option that won’t break your daily caloric intake. Tailor them with low-calorie sweeteners or extra fruit for a lighter snack.
Protein
Adding nuts or seeds can boost the protein content of your cereal bars, providing anywhere from 3 to 7 grams per serving. This is beneficial for muscle repair and keeping you full longer—perfect for busy afternoons or post-workout munchies.
Fiber
Packed with whole grains, your homemade cereal bars can deliver about 2 to 5 grams of fiber per bar. Fiber is essential for digestive health, helping you feel satisfied and energized throughout the day. For an extra fiber punch, consider incorporating ingredients like chia seeds or oats.
By understanding these nutritional benefits, you can enjoy your cereal bars guilt-free! For more tips on healthy snacking, check out resources from the American Heart Association and Harvard Health Publishing.
FAQs about Homemade Cereal Bars
Creating homemade cereal bars can be a delightful experience, but you might have a few questions along the way. Let’s dive into some common FAQs to help you master your cereal bar game.
How can I make my cereal bars less sticky?
If your cereal bars are turning out a bit too sticky, here are a few easy adjustments you can try:
- Add More Dry Ingredients: Boost the amount of oats or rice cereal to absorb moisture.
- Use Parchment Paper: Lining your pan with parchment paper helps reduce stickiness when cutting them into squares.
- Cool Down: Allow your bars to cool completely before slicing, as this helps them set properly.
You can find more tips on reducing stickiness in homemade snacks over at Serious Eats.
Can I use different types of nut butter?
Absolutely! The beauty of homemade cereal bars lies in their versatility. Whether you prefer peanut butter, almond butter, or even sunflower seed butter, feel free to swap it out. Just keep in mind that different nut butters can alter the taste and texture slightly. For a more indulgent flavor, try using hazelnut butter for a chocolatey twist.
How should I store my cereal bars?
Proper storage is key to enjoying your cereal bars for a longer time:
- Keep in an Airtight Container: This helps maintain freshness and prevents them from drying out.
- Refrigerate for Longer Shelf Life: If you plan to keep them for more than a week, storing them in the fridge can extend their life.
- Wrap Individually: Consider wrapping them individually in plastic wrap for easy grab-and-go snacks.
Storing your cereal bars correctly ensures they stay delicious and ready for your next snack attack. Want to take a deeper dive into storage methods? Check out Food Storage Guidelines.
By following these tips, you’ll master the art of making and enjoying homemade cereal bars in no time!
Conclusion on Homemade Cereal Bars
In summary, making your own cereal bars is not only an enjoyable kitchen project but also a great way to ensure you’re snacking on wholesome ingredients tailored to your taste. By experimenting with various nuts, fruits, and sweeteners, you can create a unique blend that fuels your day, whether you’re rushing to a meeting or enjoying a mid-afternoon pick-me-up. Have you tried adding ingredients like peanut butter or honey for extra flavor? If you haven’t, now’s the time! Check out resources like The Kitchn for inspiration. Now it’s your turn—grab those ingredients and get creative with your cereal bar magic!
PrintCereal Bars: Easy Homemade Treats to Satisfy Your Cravings
Discover how to make delicious and easy homemade cereal bars that will satisfy your cravings.
- Prep Time: 10 minutes
- Cook Time: 20 minutes
- Total Time: 30 minutes
- Yield: 12 bars 1x
- Category: Snacks
- Method: Baking
- Cuisine: American
- Diet: Vegetarian
Ingredients
- 2 cups rolled oats
- 1 cup honey
- 1/2 cup nut butter
- 1/2 cup mini chocolate chips
- 1/2 cup dried fruit
Instructions
- Preheat your oven to 350°F (175°C).
- Mix the rolled oats, honey, and nut butter in a large bowl until well combined.
- Add the chocolate chips and dried fruit, stirring to incorporate.
- Press the mixture into a greased baking pan evenly.
- Bake for 15-20 minutes until golden brown.
- Allow to cool before cutting into bars.
Notes
- For added flavor, consider adding vanilla extract.
- Store bars in an airtight container for freshness.
Nutrition
- Serving Size: 1 bar
- Calories: 150
- Sugar: 10g
- Sodium: 50mg
- Fat: 6g
- Saturated Fat: 1g
- Unsaturated Fat: 4g
- Trans Fat: 0g
- Carbohydrates: 23g
- Fiber: 2g
- Protein: 3g
- Cholesterol: 0mg
Keywords: Cereal Bars, Homemade Snacks, Easy Treats