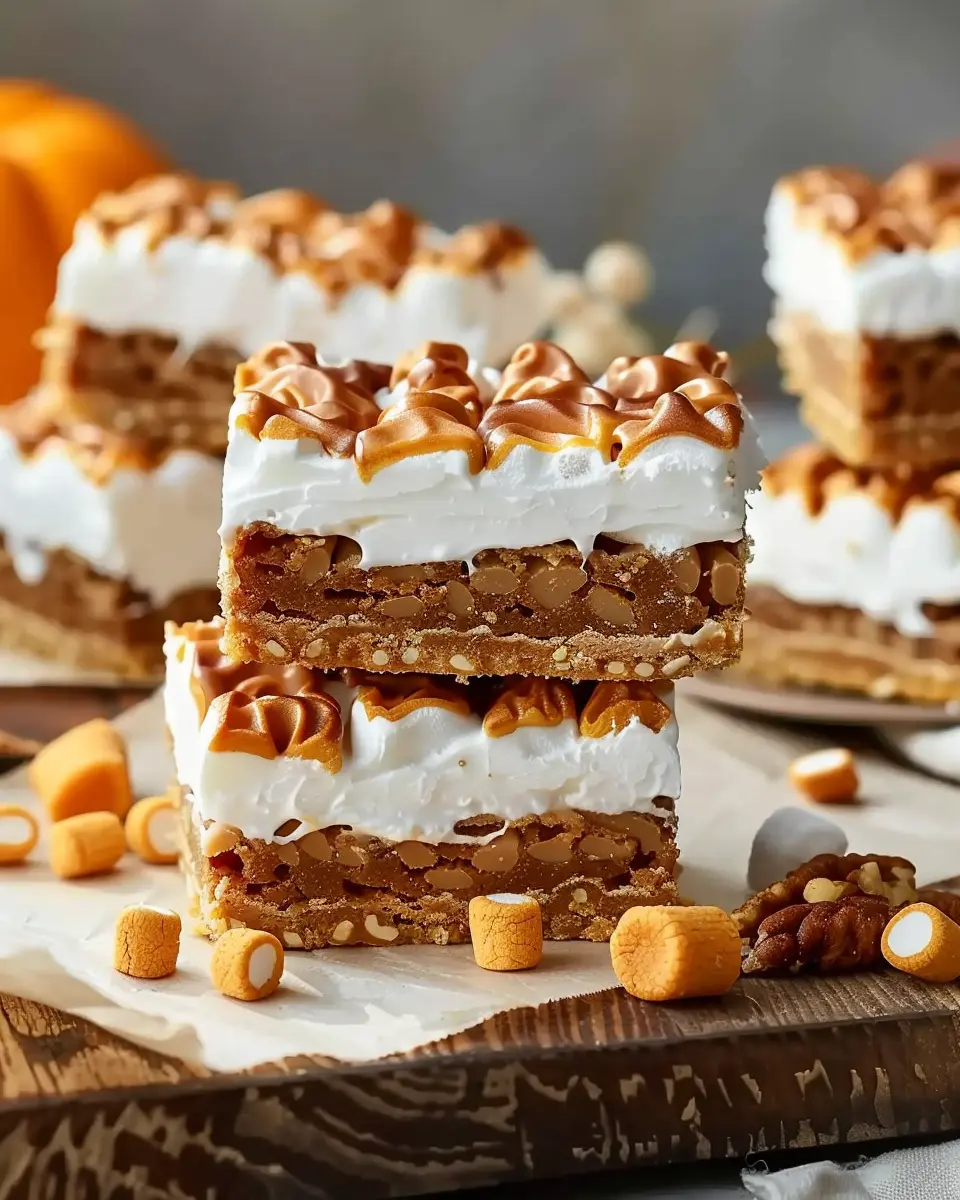
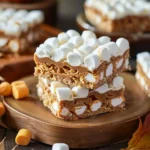
Introduction to Harvest Marshmallow Bars
As the leaves turn and the air gets crisper, it’s the perfect time to whip up something comforting. That’s where Harvest Marshmallow Bars come into play. Radically versatile, these delightful treats combine the sweetness of marshmallows with the warmth of seasonal flavors, making them an ideal snack for fall gatherings, cozy nights in, or even as a uniquely thoughtful gift.
Why Harvest Marshmallow Bars are the Perfect Fall Treat
Imagine crunching into a soft, chewy bar that transports you directly to an autumn orchard! That’s the magic of Harvest Marshmallow Bars. They not only taste fantastic but also evoke the cozy essence of fall with a mix of flavors like cinnamon, pumpkin spice, and caramel. You might even find yourself reminiscing about those classic pumpkin patches or hayrides.
What makes these bars stand out?
- Nostalgic Flavors: A fusion of marshmallows, nuts, and autumn spices creates a taste that’s simply irresistible.
- Easy to Make: These bars don’t require intricate baking skills or a long list of ingredients. Even if you’re busy as a young professional, you can whip these up in no time!
- Family-Friendly: Perfect for sharing, which makes them a hit at family gatherings. Kids and adults alike will find joy in these simple treats.
Plus, if you’re curious about nutritional content or how these flavors come together, several reputable sources delve deeply into the components of seasonal cooking. For example, the USDA’s FoodData Central can provide insights into the nutritional benefits of using natural ingredients.
If you’re thinking about hosting a get-together, why not prepare a batch of these delicious Harvest Marshmallow Bars? They serve as great conversation starters and complements to an autumnal feast, perhaps alongside a warm cup of apple cider or a spiced herbal tea.
So, roll up your sleeves! It’s time to embrace the harvest season with a sweet twist. In the upcoming sections, you’ll discover how to make these bars effortlessly, ensuring they’re a staple of your fall menu!
Ingredients for Harvest Marshmallow Bars
Creating the perfect batch of Harvest Marshmallow Bars is not just about following a recipe; it’s all about welcoming the cozy flavors of the season! To kick off your culinary adventure, let’s gather the essential ingredients that will transform ordinary pantry staples into a delightful treat.
Essential Ingredients
- 3 cups of crispy rice cereal: This will provide that crunchy texture and delightful base.
- 1 package (10 oz) of mini marshmallows: The star of the show! They melt beautifully and give that gooey marshmallow goodness.
- 3 tablespoons of unsalted butter: A little bit of butter goes a long way in adding richness to the bars.
- ½ cup of peanut butter: Looking for a nutty twist? Use smooth peanut butter or almond butter for a gourmet upgrade.
- ½ cup of chocolate chips: To indulge your sweet tooth, choose semi-sweet or dark chocolate chips for a richer flavor.
- 1 cup of fall-themed sprinkles: These add a charming visual touch, making your bars festive and appealing.
With these ingredients, you’re ready to make some unforgettable Harvest Marshmallow Bars! If you’re curious about exploring substitutes or variations, check out this article on The Benefits of Using Nut Butters for more inspiration.
Now, who’s hungry?
Preparing Harvest Marshmallow Bars
Creating Harvest Marshmallow Bars is an enjoyable process that’s sure to bring warmth and laughter to your kitchen. With a delightful mix of oats and marshmallows, these bars are perfect for fall gatherings or cozy nights in. Let’s dive into the step-by-step approach to making these tasty treats.
Start with Preheating and Pan Preparation
First things first, you’ll want to preheat your oven to 350°F (175°C). This ensures that your bars cook evenly and achieve that perfect golden color. While the oven warms up, take a moment to prepare your baking pan. Line a 9×13-inch pan with parchment paper, leaving some overhang for easy removal later. Lightly spray the parchment paper with non-stick spray or grease it with butter to make sure your Harvest Marshmallow Bars come out easily.
Elevate Flavor by Browning the Butter
Next, let’s talk about browning the butter. It might seem like a simple step, but it adds a nutty depth that elevates your bars to a new level. In a saucepan over medium heat, melt one cup of unsalted butter. Keep an eye on it as it foams and then begins to brown. Stir frequently until the butter turns a golden-brown color and gives off a deliciously toasty aroma. If you’re unsure, check out this detailed guide on how to brown butter to master this essential skill.
Blend Your Dry Ingredients
While the butter is browning, take this opportunity to combine the dry ingredients. In a large mixing bowl, whisk together:
- 2 cups of rolled oats
- 1 cup of all-purpose flour
- 1 teaspoon of baking soda
- 1 teaspoon of salt
- 1 teaspoon of cinnamon for a warm, spicy touch
Mixing these dry components ensures that they’re evenly distributed, setting a solid foundation for your Harvest Marshmallow Bars.
Incorporate the Browned Butter
Once your butter has reached that perfect golden hue, it’s time to mix it into your dry ingredients. Pour the brown butter over the dry mixture and stir gently until fully combined. The warm butter will help to hydrate the oats and flour, bringing everything together in a delightful dough.
Crafting the Oat Base
Now it’s time to create the oat base. Reserve about 1 cup of your mixture to sprinkle on top later. Press the remaining mixture into the bottom of your prepared pan evenly. This layer should be firm and uniform, as it will serve as the backbone for your Harvest Marshmallow Bars.
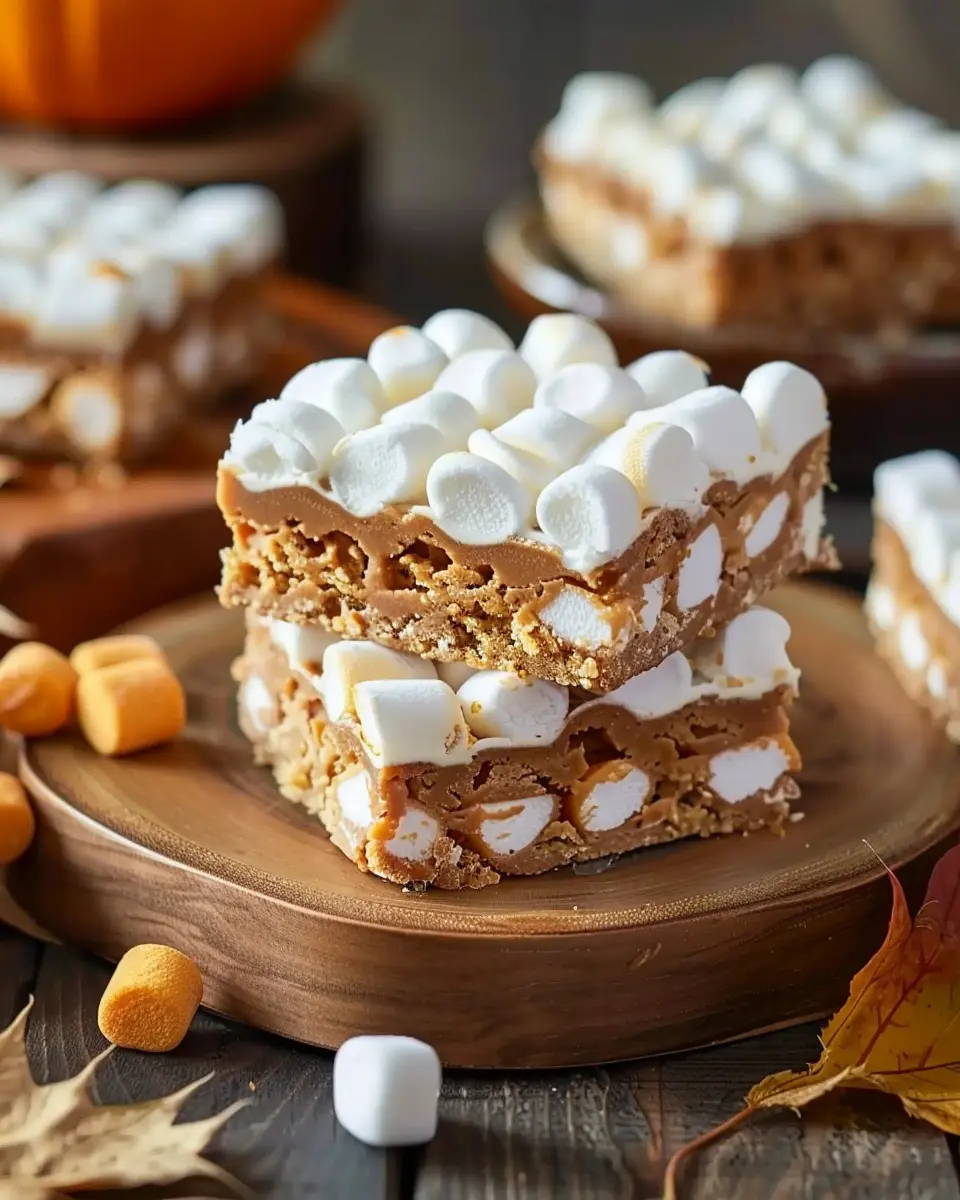
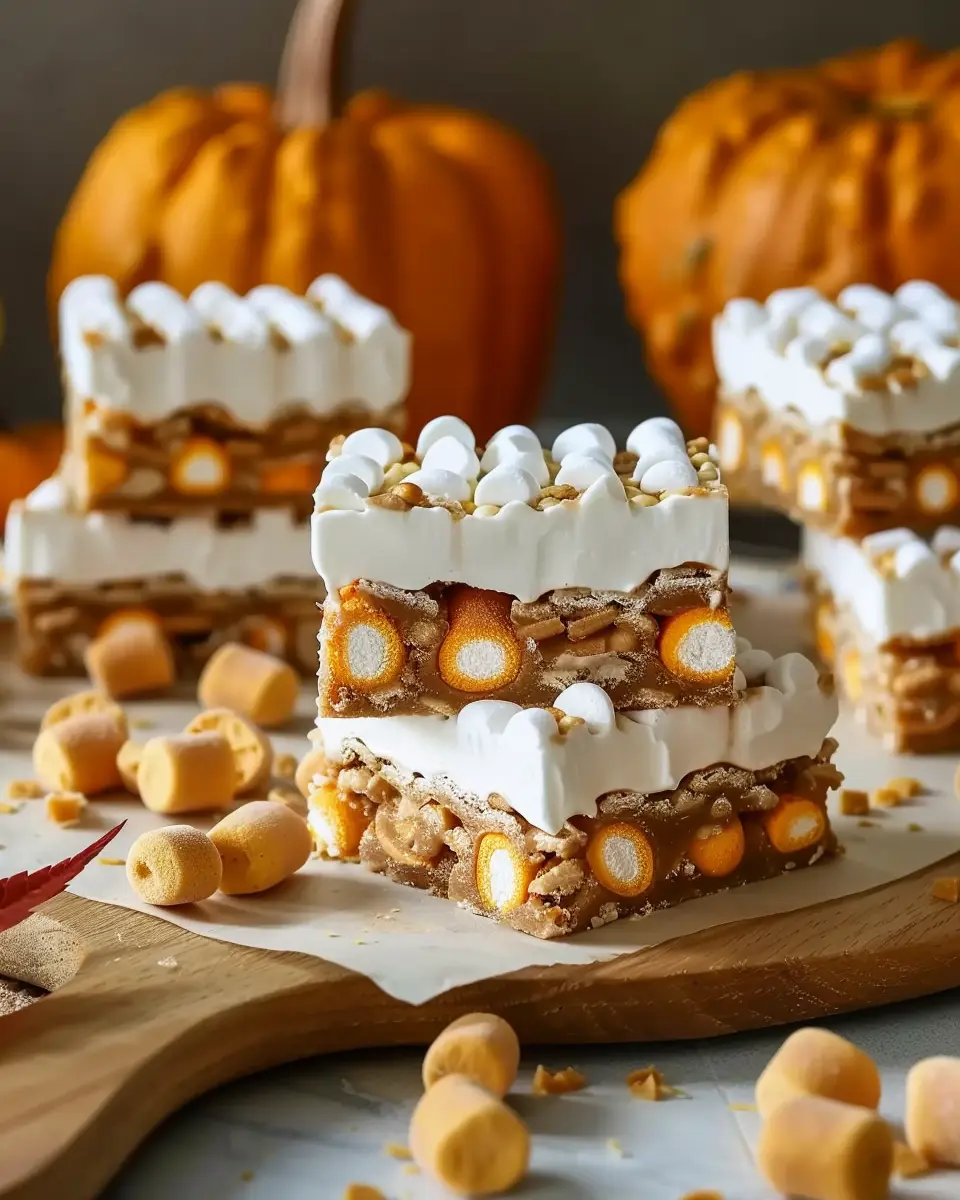
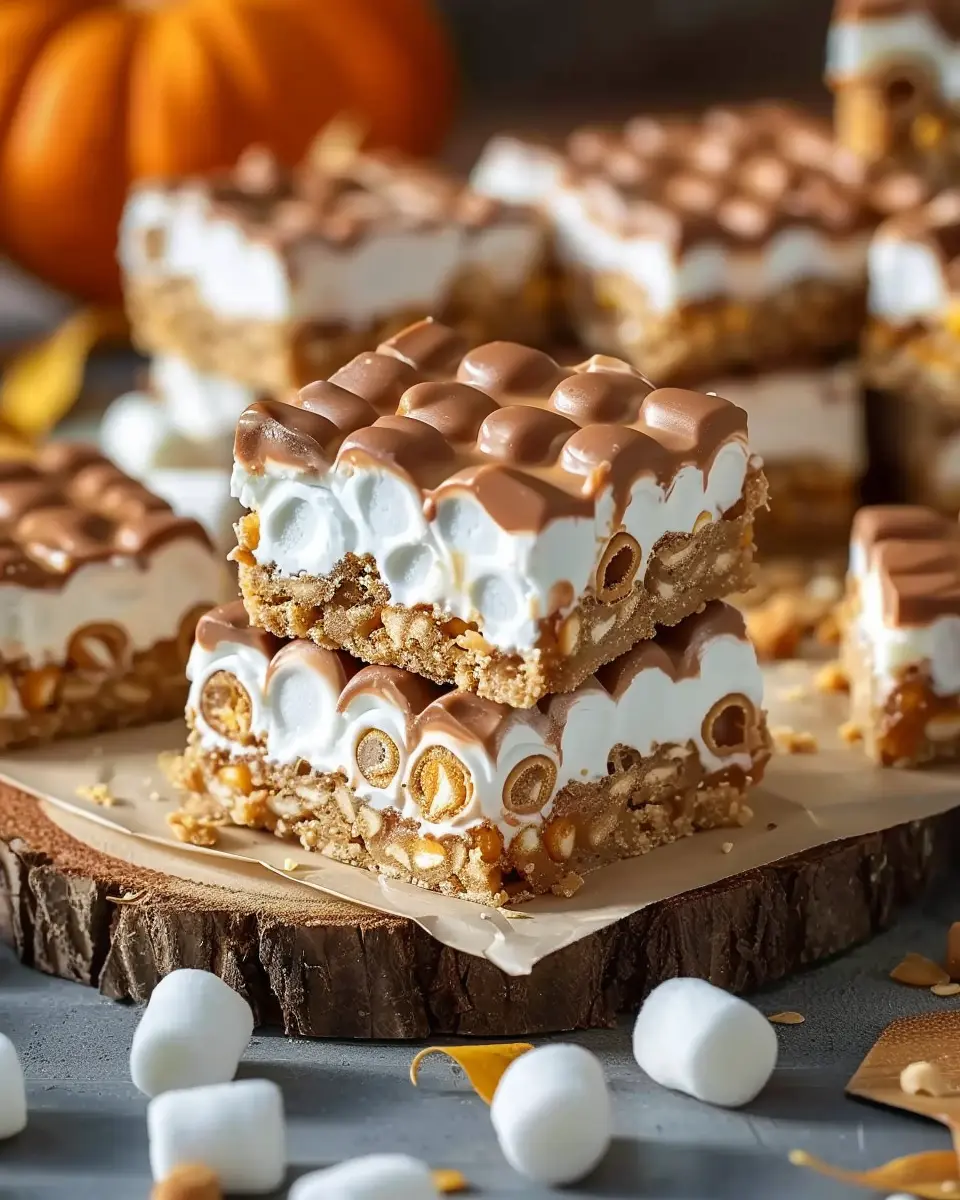
Marshmallow Magic and a Final Oat Layer
Next comes the fun part—adding those fluffy marshmallows! Spread a generous layer of mini marshmallows (about 2 cups) over the oat base. Feel free to mix in some chocolate chips or dried fruits if you’re feeling adventurous! After adding the marshmallows, crumble the reserved oat mixture on top for a crumbly, baked topping that adds texture and flavor.
Baking to Perfection
With everything in place, pop your pan in the preheated oven. Bake for 20-25 minutes, or until the top is a lovely golden brown and the marshmallows are gooey and melted. Keep an eye on them towards the end to prevent over-browning. Once done, take them out and let them cool in the pan for about 10-15 minutes before lifting them out using the parchment overhang. Slice them into bars and enjoy your homemade Harvest Marshmallow Bars warm or at room temperature.
These bars are not just delicious; they are also perfect for sharing. Your friends and family will love the inviting aroma that fills your kitchen, and they will undoubtedly appreciate the effort you put into making these wonderful treats!
Variations on Harvest Marshmallow Bars
When it comes to Harvest Marshmallow Bars, the possibilities are endless! Let’s explore a couple of delightful variations that can take your treat game to the next level.
Adding Chocolate or Nuts
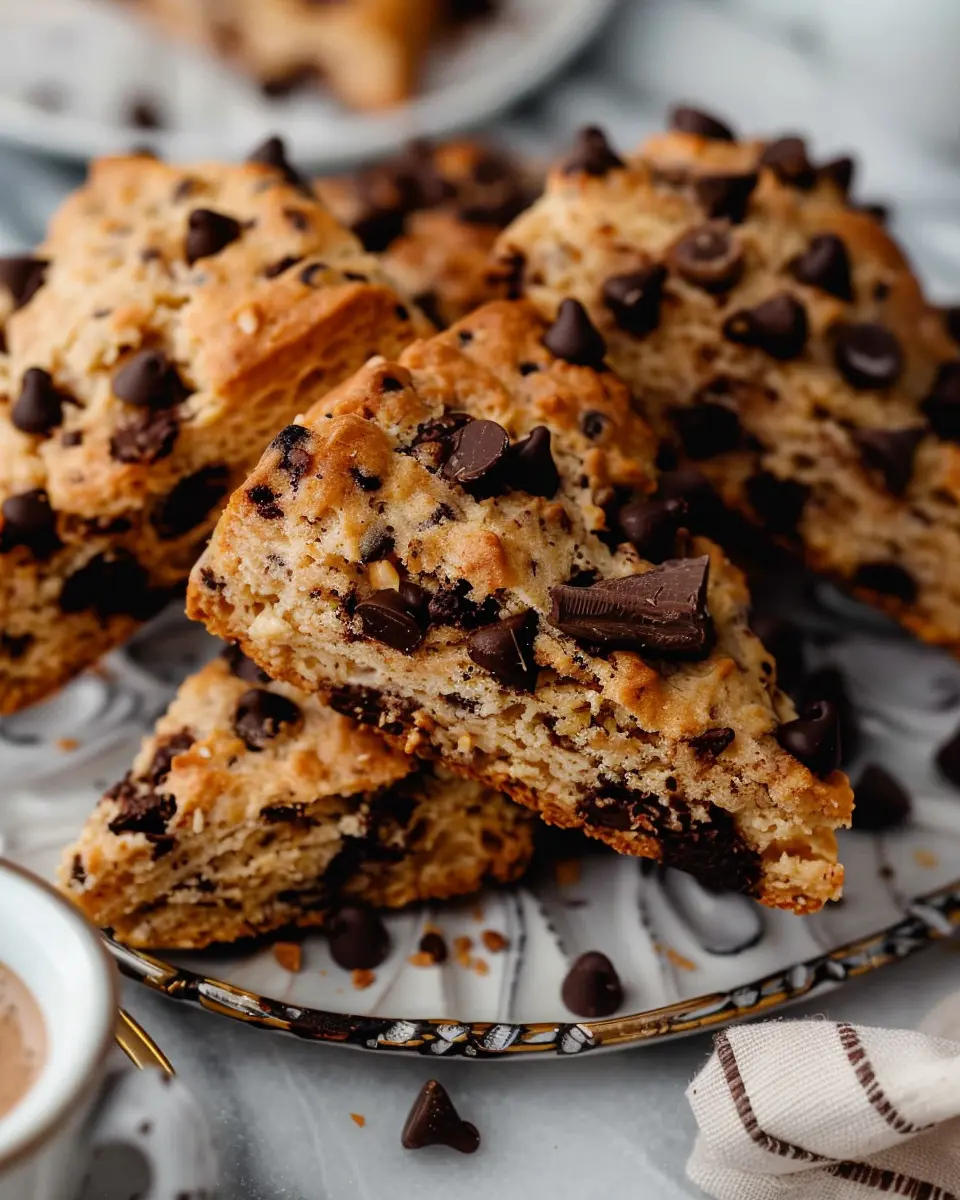
Why not elevate your Harvest Marshmallow Bars by incorporating chocolate or nuts? Both additions provide a wonderful texture and flavor contrast to the gooey marshmallows and chewy base.
- Chocolate Options: Drizzle melted chocolate on top, or mix in chocolate chips before setting. Dark, milk, or even white chocolate can add a rich depth.
- Nutty Goodness: Chopped pecans, walnuts, or almonds can add a satisfying crunch. Simply fold a cup of nuts into your mixture before pressing it into the pan.
If you’re feeling adventurous, consider combining both chocolate and nuts for a decadent twist.
Creating a Spiced Version
For those who love seasonal flavors, a spiced version of Harvest Marshmallow Bars is a must-try! Adding spices can warm up the profile and create a cozy dessert.
- Cinnamon and Nutmeg: Add a teaspoon of ground cinnamon and a pinch of nutmeg to the base for that warm, autumnal flavor.
- Ginger or Cloves: For a more spirited taste, a sprinkle of ginger or ground cloves can add a zing that complements the sweetness.
Setting the scene can be just as fun—imagine cozy evenings with spiced bars paired with a hot cup of apple cider! Check this source for more autumn-inspired recipes that pair well.
Conclusion
Experimenting with these variations not only enhances your Harvest Marshmallow Bars but also provides a wonderful opportunity to share your creations with family and friends. So, get creative in the kitchen, and enjoy the process!
Baking Notes for Harvest Marshmallow Bars
Baking should be a delightful experience, and the Harvest Marshmallow Bars are no exception! As you prepare to make these delicious treats, it’s helpful to keep a few notes in mind to ensure your bars turn out perfectly.
-
Use Quality Ingredients: The flavor of your Harvest Marshmallow Bars will greatly depend on the ingredients. Opt for fresh, high-quality marshmallows and a good brand of chocolate. It makes all the difference!
-
Stay Mindful of Temperature: When melting marshmallows, low heat is your friend. Too high of a temperature can lead to a sticky mess rather than a smooth and creamy base.
-
Customize Your Mix-Ins: Feel free to tailor your Harvest Marshmallow Bars to your liking! Consider adding crushed nuts or a sprinkle of cinnamon for that autumn touch.
-
Grease Your Pan: To avoid any sticky situations, remember to grease your baking pan generously. This ensures easy removal of your bars once they cool.
For more tips on achieving the perfect texture, visit Cooking Light or Taste of Home. Happy baking!
Serving Suggestions for Harvest Marshmallow Bars
When it comes to showcasing your delicious Harvest Marshmallow Bars, the serving options are endless! These treats are not just for dessert; they can also be elegantly incorporated into various settings. Here are some delightful serving suggestions:
Pair with Seasonal Fruits
The sweetness of Harvest Marshmallow Bars harmonizes beautifully with the tartness of seasonal fruits. Serve them alongside fresh apple slices or ripe pears for a refreshing contrast. Not only does this enhance the presentation, but it also adds nutritional value to your snack spread.
Perfect for Gatherings
Whether it’s a cozy fall get-together or a festive holiday party, these bars are crowd-pleasers. Consider presenting them on a decorative platter, topped with chopped nuts or drizzled with caramel sauce for extra flair. A sprinkle of sea salt can elevate the flavors, leaving your guests wanting more.
Complement Caffeine
Why not serve your Harvest Marshmallow Bars with a warm beverage? Hot apple cider or a rich hot chocolate can create a cozy pairing, making your dessert feel even more indulgent. Imagine the comforting ambiance as friends gather around, sharing stories over a sweet treat and a warm drink!
Have you tried these bars at your gatherings? Let us know how you serve them! For more tips on maximizing taste and presentation, check out resources like Epicurious or Bon Appétit.
Tips for Making Perfect Harvest Marshmallow Bars
Creating the perfect Harvest Marshmallow Bars is as much about technique as it is about the ingredients. Here’s how you can elevate your bar-making game:
Choose Fresh Ingredients
Start with high-quality marshmallows and crisp rice cereal. Freshness plays a huge role in the final flavor and texture. Organic or artisanal brands can make a delightful difference. For a truly unique twist, consider adding seasonal flavors like pumpkin spice or maple syrup. Check out sources like Food52 for inspiration on flavor combinations.
Timing is Key
The melting point of marshmallows is crucial. Heat them gently to avoid burning, which can ruin the entire batch. Use a double boiler or a microwave on low power, stirring frequently. Remember, the goal is a smooth, gooey mixture.
Mix it Up
When combining your ingredients, be quick! Pour the cereal into the marshmallow mixture while it’s still warm and stir with vigor. This not only ensures an even coating but also helps achieve that perfect chewy texture. Incorporate your favorite mix-ins—think nuts or dried fruits—for added flavor and crunch.
Patience Pays Off
Once you’ve poured the mixture into your pan, resist the urge to dig in right away. Let your Harvest Marshmallow Bars cool completely before cutting them into squares. This allows them to set properly, ensuring perfect, clean edges.
Sticking to these tips will make your Harvest Marshmallow Bars a hit among family and friends! If you want to dive deeper into texture techniques, check out this guide to marshmallow-making for expert insights.
Time Breakdown for Harvest Marshmallow Bars
When you’re ready to whip up some delightful Harvest Marshmallow Bars, understanding the time commitment can make the process a breeze. Here’s how you can break it down:
Preparation Time
You’ll need approximately 15 minutes to gather your ingredients and prepare everything for these scrumptious bars. This is the fun part where you get to infuse your kitchen with festive autumn aromas.
Cooking Time
Once prepped, it takes about 20 minutes to bake and set your Harvest Marshmallow Bars. Keep an eye on them to ensure they achieve that perfect, gooey consistency.
Total Time
In just 35 minutes, you’ll have delicious bars ready to impress your friends and family. Quick, right? Now you can focus on enjoying every sweet bite.
Searching for more tips on bar recipes? Check out this fantastic guide on Making the Perfect Treat Bars. Happy cooking!
Nutritional Information for Harvest Marshmallow Bars
When indulging in these delightful Harvest Marshmallow Bars, it’s essential to understand what you’re enjoying. Here’s a quick breakdown of the nutritional profile to help you balance taste with health.
Calories
Each serving of Harvest Marshmallow Bars contains approximately 160 calories. This makes them a sweet treat that you can include in your day without the guilt.
Protein
These bars offer around 2 grams of protein per serving. While they won’t contribute significantly to your daily intake, pairing them with a protein-rich snack can help keep you satisfied longer.
Sodium
With just 20 mg of sodium, Harvest Marshmallow Bars are a low-sodium option for those watching their salt intake. For more information on sodium intake recommendations, check out the CDC’s guidelines on sodium here.
Enjoy these bars as part of a balanced diet, and remember, moderation is key! Whether as a snack or a dessert, they’re sure to bring a delightful touch to your day.
FAQs About Harvest Marshmallow Bars
Can I Use Regular Marshmallows Instead of Mini Marshmallows?
Absolutely! While mini marshmallows are great for keeping your Harvest Marshmallow Bars light and chewy, regular marshmallows can work just fine, too. Just cut them into smaller pieces for even distribution. Keep in mind that the texture might be a bit different, and you may have to adjust the melting time slightly. But hey, who doesn’t love a little improvisation in the kitchen?
How Long Do the Bars Last?
Once you’ve made your delicious Harvest Marshmallow Bars, you’ll want to know how long they can last! If stored in an airtight container, these treats can typically stay fresh for about 5 to 7 days at room temperature. However, if you do manage to stash some away (they’re pretty moreish!), just check for any signs of staleness before enjoying them.
Can I Freeze Harvest Marshmallow Bars?
Yes, you can definitely freeze your Harvest Marshmallow Bars! Just slice them up and place the pieces in an airtight container or wrap them individually. They can last up to 3 months in the freezer. When you’re ready to enjoy, simply let them thaw at room temperature for a few hours. Freezing is a fantastic option if you’re looking to prepare these bars ahead of time for gatherings or busy weekdays.
For more tips on food storage and safety, check out the USDA’s Food Safety Guidelines for helpful advice. Enjoy your baking!
Conclusion on Harvest Marshmallow Bars
In closing, Harvest Marshmallow Bars are the perfect autumn treat, bringing a warm, cozy feeling to any gathering. Whether you’re enjoying a crisp fall night with friends or looking for something sweet to brighten your day, these bars strike the right balance between crunchy and gooey. Plus, they’re easy to make, which is always a win for busy young professionals!
Don’t forget to experiment with different mix-ins and toppings to personalize your bars! For some inspiration, check out sites like Wellness Mama for healthy twist ideas. Gather your ingredients, embrace the harvest season, and let these bars become a staple in your culinary repertoire!
PrintHarvest Marshmallow Bars: Easy No-Bake Recipe for Family Fun
Enjoy making these delightful Harvest Marshmallow Bars with your family. They are fun to prepare and perfect for gatherings!
- Prep Time: 10 minutes
- Cook Time: 5 minutes
- Total Time: 15 minutes
- Yield: 12 bars 1x
- Category: Dessert
- Method: No-Bake
- Cuisine: American
- Diet: Vegetarian
Ingredients
- 3 cups mini marshmallows
- 4 tablespoons unsalted butter
- 6 cups rice cereal
- 1 cup pumpkin puree
- 1 teaspoon vanilla extract
- 1 teaspoon cinnamon
- 1/2 teaspoon nutmeg
- 1/2 cup chocolate chips
Instructions
- In a large pot, melt the butter over low heat.
- Add the mini marshmallows and stir until fully melted.
- Remove from heat and mix in the pumpkin puree, vanilla, cinnamon, and nutmeg.
- Gradually fold in the rice cereal until completely coated.
- Press the mixture into a greased pan and top with chocolate chips.
- Allow to cool completely before cutting into bars.
Notes
- For added flavor, consider mixing in chopped nuts or dried fruit.
- Store leftovers in an airtight container.
Nutrition
- Serving Size: 1 bar
- Calories: 150
- Sugar: 12g
- Sodium: 50mg
- Fat: 5g
- Saturated Fat: 3g
- Unsaturated Fat: 2g
- Trans Fat: 0g
- Carbohydrates: 22g
- Fiber: 1g
- Protein: 2g
- Cholesterol: 10mg
Keywords: Harvest Marshmallow Bars, No-Bake Recipe, Family Fun