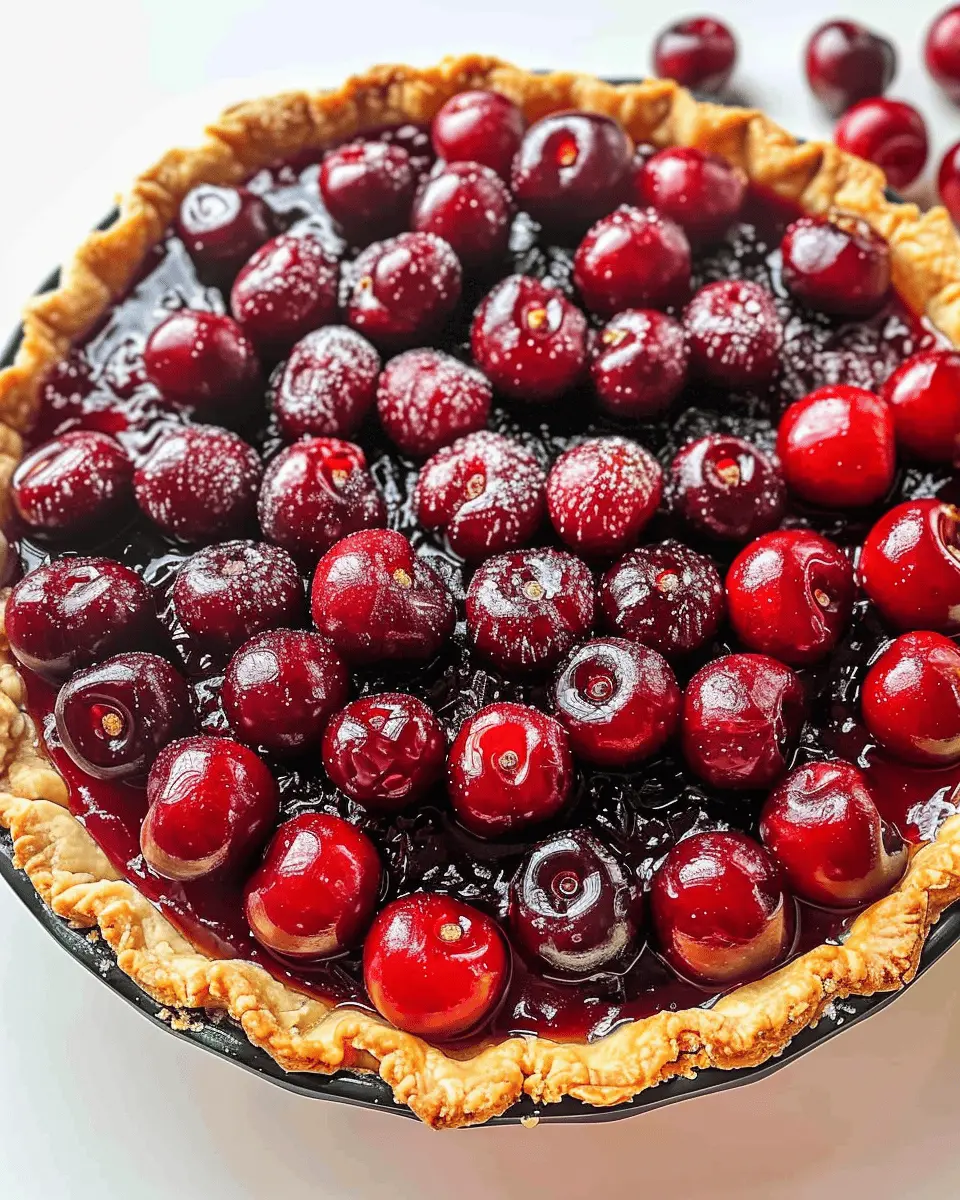
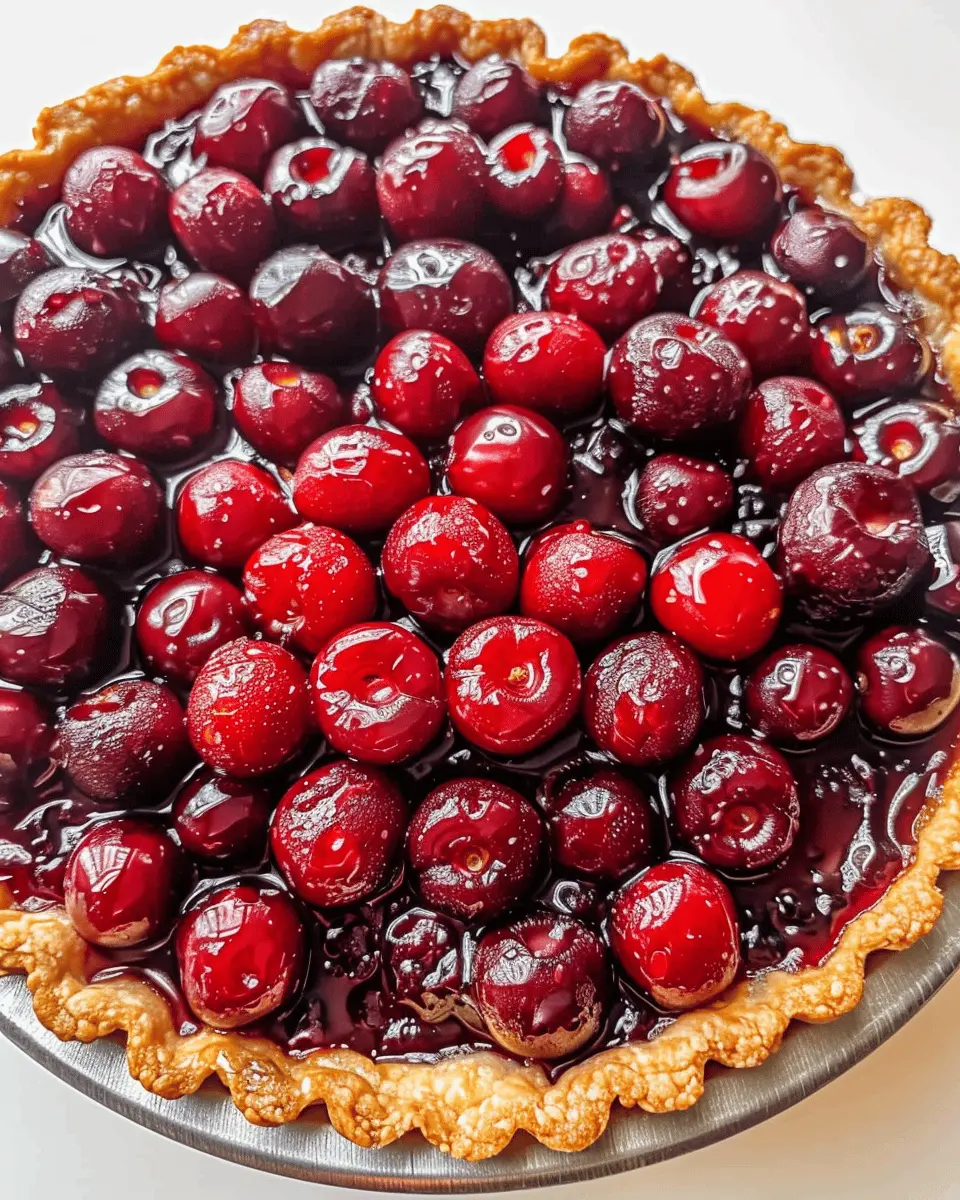
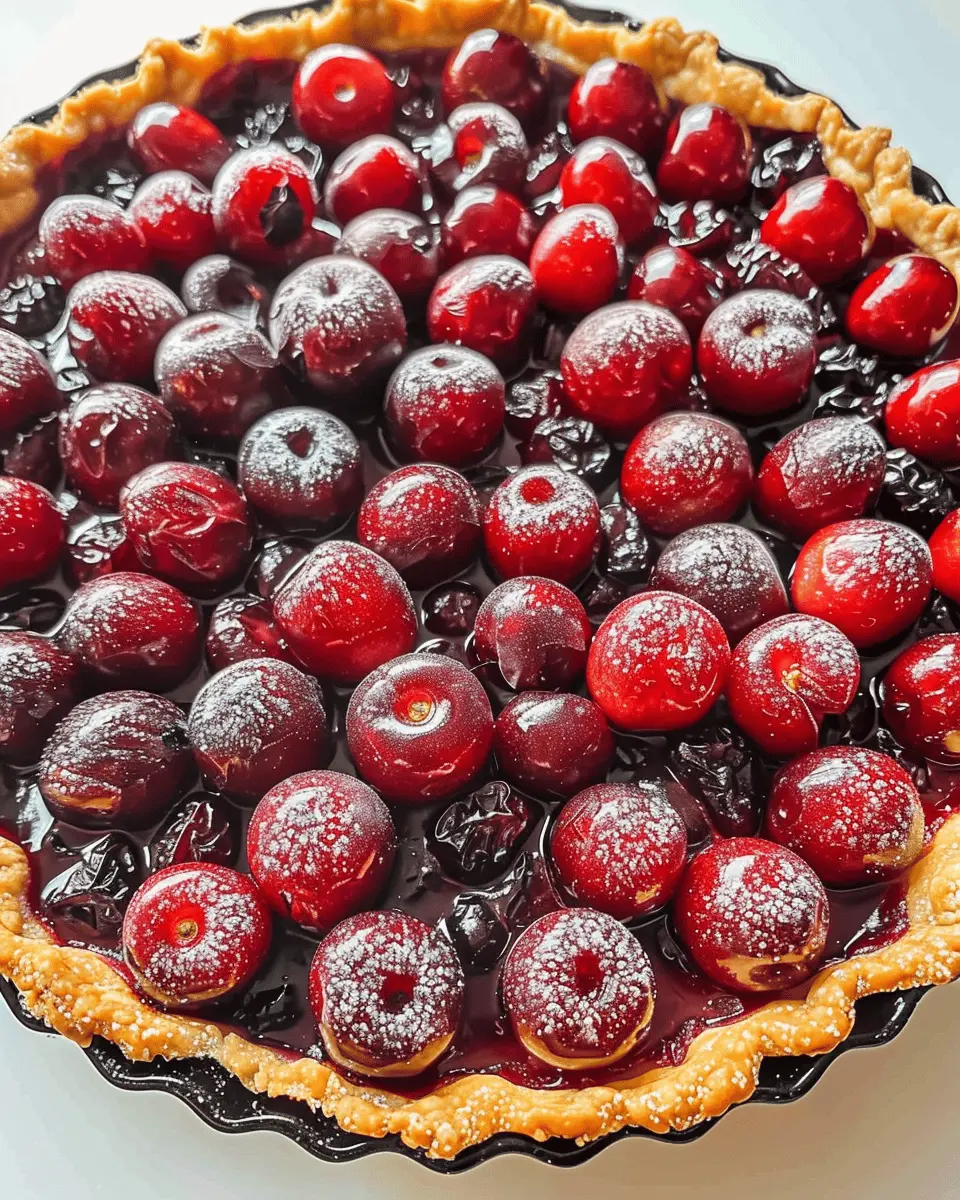
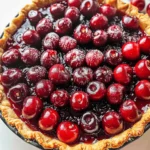
Introduction to Cherry Tart
If you’re looking for an exquisite dessert that combines tangy sweetness and a sprinkle of nostalgia, then a Cherry Tart is a must-try for your homemade dessert repertoire. Picture this: a flaky, buttery crust cradling a luscious cherry filling that’s both vibrant and comforting. It’s not just any dessert; it’s a slice of childhood memories, family gatherings, and summer picnics rolled into one delicious treat.
Why Cherry Tart is a Must-Try for Homemade Desserts?
There’s something truly magical about a Cherry Tart. For starters, the burst of juicy cherries creates a delightful contrast to the richness of the crust. Using fresh or even frozen cherries allows you to whip this delectable dish up year-round, making it a go-to option for any occasion. Did you know that cherries are packed with antioxidants, vitamins, and minerals? Incorporating them into your dessert not only elevates your taste buds but also your health!
Making your own tart can be a therapeutic experience. The act of rolling out dough, pitting cherries, and watching the tart come together can be deeply satisfying. Plus, there’s an undeniable joy in slicing into the pie and revealing that glistening ruby-red filling.
From a beginner cook to a seasoned baker, the Cherry Tart is adaptable for every skill level. There are countless variations to try, such as adding almond extract or a sprinkle of cinnamon for an aromatic twist. If you’re feeling adventurous, consider pairing your slice with a scoop of vanilla ice cream or a dollop of freshly whipped cream. These additions provide a wonderful contrast to the tartness of the cherries and take the dessert to new heights.
For those looking for more inspiration, you can check out this comprehensive guide on dessert making, which covers various styles and techniques.
In a world brimming with dessert options, don’t miss out on the joy of creating and enjoying a Cherry Tart. Whether for a casual weeknight treat or a special celebration, it’s sure to impress anyone who has the pleasure of indulging in it. So, grab your apron and let’s dive into the lovely world of cherry tarts together!

Ingredients for Cherry Tart
Creating a delightful Cherry Tart starts with gathering the right ingredients. Let’s dive into what you’ll need for a mouthwatering dessert that’ll impress your friends and family.
Necessary ingredients for a delicious Cherry Tart
- Fresh Cherries: About 2 cups of pitted, sweet cherries are crucial. They’ll provide that juicy burst of flavor that makes Cherry Tart unforgettable.
- Sugar: You’ll need around 3/4 cup of granulated sugar to balance the tartness of the cherries. Feel free to adjust based on your sweetness preference.
- Flour: About 1/4 cup of all-purpose flour acts as a thickener, ensuring your tart filling has a perfect consistency.
- Butter: 1/2 cup of unsalted butter is essential for a flaky, rich pastry crust.
- Eggs: One egg helps bind everything together while adding richness.
- Lemon Juice: A tablespoon of fresh lemon juice brightens up the flavors and complements the cherries beautifully.
Accentuate your Cherry Tart by using high-quality ingredients. For tips on selecting the best cherries, check this guide on cherry varieties. Happy baking!
Preparing Cherry Tart
Creating a luscious Cherry Tart is a delightful way to impress friends and family, plus it brings the joy of baking to your kitchen. Let’s dive into the steps to bring this scrumptious dessert to life!
Gather Your Ingredients
Before we start baking, it’s essential to load up your kitchen with the right ingredients. Here’s what you’ll need:
-
For the almond tart crust:
-
1 1/4 cups all-purpose flour
-
1/2 cup almond flour
-
1/2 cup unsalted butter (cold and cubed)
-
1/3 cup powdered sugar
-
1 egg yolk
-
1/4 teaspoon salt
-
For the cherry filling:
-
3 cups fresh or frozen cherries (pitted)
-
3/4 cup granulated sugar
-
2 tablespoons cornstarch
-
1 tablespoon lemon juice
-
1 teaspoon vanilla extract
Make sure you have all your ingredients measured out and ready. Trust me, it’s a game-changer when you’re in the zone to whip up something delicious!
Prepare the Almond Tart Crust
To create the perfect crust, start by mixing the all-purpose flour, almond flour, and salt in a large bowl. Incorporate the cold, cubed butter, using your fingers or a pastry cutter to blend until the mixture resembles coarse crumbs. Then, add the powdered sugar and egg yolk, mixing gently until it forms a dough.
Once your dough comes together, wrap it in plastic wrap and chill for about 30 minutes. Chilling helps to make the crust flaky and easy to roll out later.
Prepare the Cherries
If you’re using fresh cherries, wash and pit them carefully. For frozen cherries, give them a quick rinse under cold water and let them drain. In either case, it’s key to keep the cherries as dry as possible to avoid a soggy tart!
Combine the cherries with sugar, cornstarch, lemon juice, and vanilla extract in a large bowl. This mixture should sit for about 10 minutes to let the juices mingle and create that luscious filling we all adore.
Blind Bake the Crust
Once your dough is chilled, roll it out on a lightly floured surface to about 1/8-inch thickness. Carefully transfer your rolled dough to a tart pan, pressing it into the corners. Trim any excess from the edges.
Next, you’ll want to blind bake the crust for about 15-20 minutes at 350°F (175°C). Place parchment paper on top of the dough and add pie weights (or dried beans) to prevent bubbling up during baking. This initial step ensures a firm foundation for your Cherry Tart.
Combine Cherry Filling Ingredients
With the crust baking, give your cherry mixture a final stir. The sugar and cornstarch should meld beautifully, creating a sticky, sweet filling. It’s almost time to assemble everything, but make sure to taste your cherries. Does it need a sprinkle more sugar? Sometimes, our cherries can be a bit tart, so feel free to adjust!
Assemble and Bake Your Cherry Tart
Once the crust has baked to a beautiful golden color, it’s time to bring your Cherry Tart to life! Remove the parchment and pie weights, and let it cool slightly. Pour the cherry filling into the prepared crust, spreading it evenly.
Pop your tart back into the oven and bake for an additional 25-30 minutes, until the filling is bubbly and the edges of the crust turn a deep golden brown.
Let the tart cool before slicing into it; patience pays off! Serve your Cherry Tart with a dollop of whipped cream or a scoop of vanilla ice cream for an extra special treat.
Now that you’re armed with this detailed guide, gather your ingredients and get ready to impress! Enjoy the delightful journey of baking your Cherry Tart.
Variations on Cherry Tart
Cherry tarts are a timeless classic, but if you’re eager to mix it up a bit, there are several delightful variations to explore. Each offers a unique twist, ensuring you never tire of this sweet treat. Let’s dive into a couple of my favorites!
Chocolate-covered Cherry Tart
Imagine a luscious cherry tart enveloped in rich chocolate—sounds tempting, right? For this variation, simply prepare your favorite tart crust, topping it with a fresh cherry filling. Once it’s baked and cooled, melt high-quality dark chocolate and pour it over the top, letting it set before slicing.
- Tip: Choose a chocolate with a cocoa content of at least 70% for a more sophisticated flavor.
- Serving Suggestion: Pair this tart with a dollop of freshly whipped cream infused with vanilla for an indulgent experience.
For a deeper dive into the world of chocolate, check out this article on the health benefits of dark chocolate from Healthline.
Spiced Cherry Tart with Nutmeg
If you’re looking to evoke cozy feelings, try the spiced cherry tart with nutmeg. This variation incorporates ground nutmeg and cinnamon into the cherry filling, giving it a warm, aromatic essence perfect for cooler months.
- Ingredient Swap: Consider using a combination of fresh and dried cherries for added texture and flavor depth.
- Serving Suggestion: A scoop of vanilla ice cream complements this spiced tart beautifully, balancing the spices perfectly.
Embrace your creativity in the kitchen! With these variations on your cherry tart, you’ll be prepared for any gathering or quiet evening at home. What will you try first?
Cooking Tips and Notes for Cherry Tart
Ensuring the Best Tart Crust
To achieve a deliciously buttery crust for your Cherry Tart, consider these tips:
- Chill your ingredients: Keep your butter cold and let your dough chill in the fridge before rolling. This helps create that perfect flaky texture.
- Blind baking: Pre-bake your crust for about 10-15 minutes. This prevents the crust from getting soggy once you add the juicy cherries.
Working with Fresh vs. Frozen Cherries
Whether you opt for fresh or frozen cherries, each has its charm.
- Fresh cherries: They provide a vibrant flavor. Make sure to pit them carefully; a cherry pitter can be a handy tool.
- Frozen cherries: They are great for convenience and can be a budget-friendly option. Just remember to thaw them and drain excess liquid to avoid a soggy tart.
For more expert insights on baking, check out resources from sites like King Arthur Baking or Serious Eats to enrich your baking experience!
Serving Suggestions for Cherry Tart
Complementing your Cherry Tart with sides
Enhancing your Cherry Tart isn’t just about the dessert itself; it’s about the entire experience! Consider serving it alongside a scoop of vanilla ice cream or a dollop of fresh whipped cream to create a delightful contrast in temperature and texture. For a crunchy element, some crushed nuts like almonds can add a lovely finish. Also, a side of Greek yogurt can provide a tart creaminess that harmonizes beautifully with the sweet cherries.
Pairing Cherry Tart with beverages
When it comes to beverages, the right choice can elevate your Cherry Tart affair. A cup of herbal tea, such as chamomile or peppermint, can balance the sweetness with its soothing flavors. If coffee is more your style, a rich Espresso or creamy latte can create a perfect morning or afternoon treat. Don’t forget the classic sparkling water with a twist of lemon — the fizz refreshes the palate beautifully after each bite of tart.
For more ideas on dessert pairings, check out Serious Eats, where you’ll find tips on how flavors complement one another for a well-rounded meal.
Time Breakdown for Cherry Tart
When you set out to make a delightful Cherry Tart, understanding the time needed will streamline your baking experience.
Preparation time
Getting your ingredients prepped is a breeze! Plan for about 20 minutes to gather, measure, and prepare everything you’ll need. This includes pitting those luscious cherries and mixing up your tart dough.
Cooking time
Once your Cherry Tart is assembled, it’s time for the oven! Bake it for around 35–40 minutes until that crust is golden and the cherries are bubbling with joy.
Total time to enjoy your Cherry Tart
In total, you’re looking at roughly 60 minutes from start to finish before you can dig into your delicious creation. So, why not invite a friend over for a mini baking session? For more tips on making the most out of your cherries, check out resources from the National Cherry Growers Association. Happy baking!
Nutritional Facts for Cherry Tart
When indulging in a delicious cherry tart, it’s important to know what you’re treating yourself to. A typical slice contains approximately 250 calories, making it a sweet yet moderately calorie-dense dessert.
Calories Per Slice
Each slice of this delightful tart satisfies your sweet tooth while keeping the calories in check. Perfect for a delightful dessert without overindulgence!
Breakdown of Macronutrients
- Carbohydrates: About 30g, providing the energy boost you need.
- Protein: Roughly 3g, thanks to the crust and cherries.
- Fat: Approximately 12g, largely from the butter in the crust, which enhances flavor.
Not only does the cherry tart offer a great balance of flavor and nutrition, but it also includes vital vitamins and minerals. Cherries are known for their antioxidant properties and anti-inflammatory benefits. For a deeper look at the health benefits of cherries, check out what the Cherry Marketing Institute has to say!
This delicious treat can serve as a wonderful addition to a well-rounded diet, enjoyed in moderation, of course. So, next time you’re slicing into a cherry tart, relish both the taste and health benefits!
FAQs about Cherry Tart
When baking a Cherry Tart, you might have a couple of questions swirling in your mind. Let’s tackle some common concerns!
How do I prevent my tart crust from getting soggy?
A soggy tart crust can be the bane of a baker’s existence. Here are some effective strategies to keep that crust crisp:
- Blind Baking: Consider blind baking your crust. This means pre-baking it before adding the filling. Poke a few holes with a fork and cover it with parchment and weights to maintain its shape.
- Use a Baking Sheet: Place your filled tart on a baking sheet during baking. This ensures even heat distribution and helps avoid steam build-up.
- Choose the Right Filling Consistency: Ensure that your cherry filling isn’t too runny. You can thicken it with cornstarch or instant tapioca.
For more tips on perfect crusts, check out Serious Eats.
Can I make Cherry Tart ahead of time?
Absolutely! Making your Cherry Tart ahead of time can save you stress, especially if you’re hosting. You can prepare the crust and filling separately:
- Store the Crust: Wrap it tightly in plastic wrap and refrigerate for up to three days or freeze for longer.
- Filling: Make your cherry filling a day in advance and store it in the fridge. Just assemble before serving and bake for that fresh-baked aroma.
What are some good substitutes for almond extract?
If almond extract isn’t available or if you want to mix things up, here are some delicious alternatives to enhance your Cherry Tart:
- Vanilla Extract: A classic and widely liked choice; it adds warmth.
- Hazelnut Extract: This will give your tart a nutty flavor, complementing the cherries beautifully.
- Coconut Extract: For a tropical twist, coconut can bring a subtle sweetness to the mix.
Experimenting with these extracts can make your Cherry Tart even more delightful! Whether you’re a seasoned baker or a newbie, the fun lies in creating something delicious. Happy baking!
Conclusion on Cherry Tart
Final thoughts and encouragement to bake your own Cherry Tart
Making your own Cherry Tart is not just about following a recipe; it’s an experience that brings joy to your kitchen. The sweet and slightly tart flavors of cherries, combined with a flaky crust, create a dessert that will wow your friends and family. Plus, baking can be a wonderful way to unwind after a long day at work.
I encourage you to embrace the process! Whether you’re a seasoned baker or just starting, this delightful treat allows for creativity. So gather those fresh cherries and get baking! For more inspiration, check out resources like The Kitchn or Serious Eats. You’ll be amazed at how rewarding it can be to share your own homemade Cherry Tart.
PrintCherry Tart: The Best Easy Recipe for a Cozy Weekend Treat
A delicious cherry tart recipe that’s perfect for a cozy weekend treat.
- Prep Time: 15 minutes
- Cook Time: 30 minutes
- Total Time: 45 minutes
- Yield: 8 servings 1x
- Category: Desserts
- Method: Baking
- Cuisine: American
- Diet: Vegetarian
Ingredients
- 2 cups fresh cherries
- 1 cup sugar
- 1/4 cup cornstarch
- 1 teaspoon vanilla extract
- 1 pie crust (store-bought or homemade)
- 1 tablespoon lemon juice
Instructions
- Preheat the oven to 375°F (190°C).
- In a bowl, mix cherries, sugar, cornstarch, vanilla, and lemon juice.
- Pour the cherry mixture into the pie crust.
- Bake for 25-30 minutes or until the cherries are bubbly.
- Let it cool before serving.
Notes
- For extra flavor, consider adding almond extract.
- Serve with whipped cream for an indulgent treat.
Nutrition
- Serving Size: 1 slice
- Calories: 250
- Sugar: 25g
- Sodium: 150mg
- Fat: 10g
- Saturated Fat: 3g
- Unsaturated Fat: 5g
- Trans Fat: 0g
- Carbohydrates: 35g
- Fiber: 2g
- Protein: 2g
- Cholesterol: 0mg
Keywords: Cherry Tart, Cozy Treat, Dessert Recipe