Introduction to Homemade Chocolate Turtles
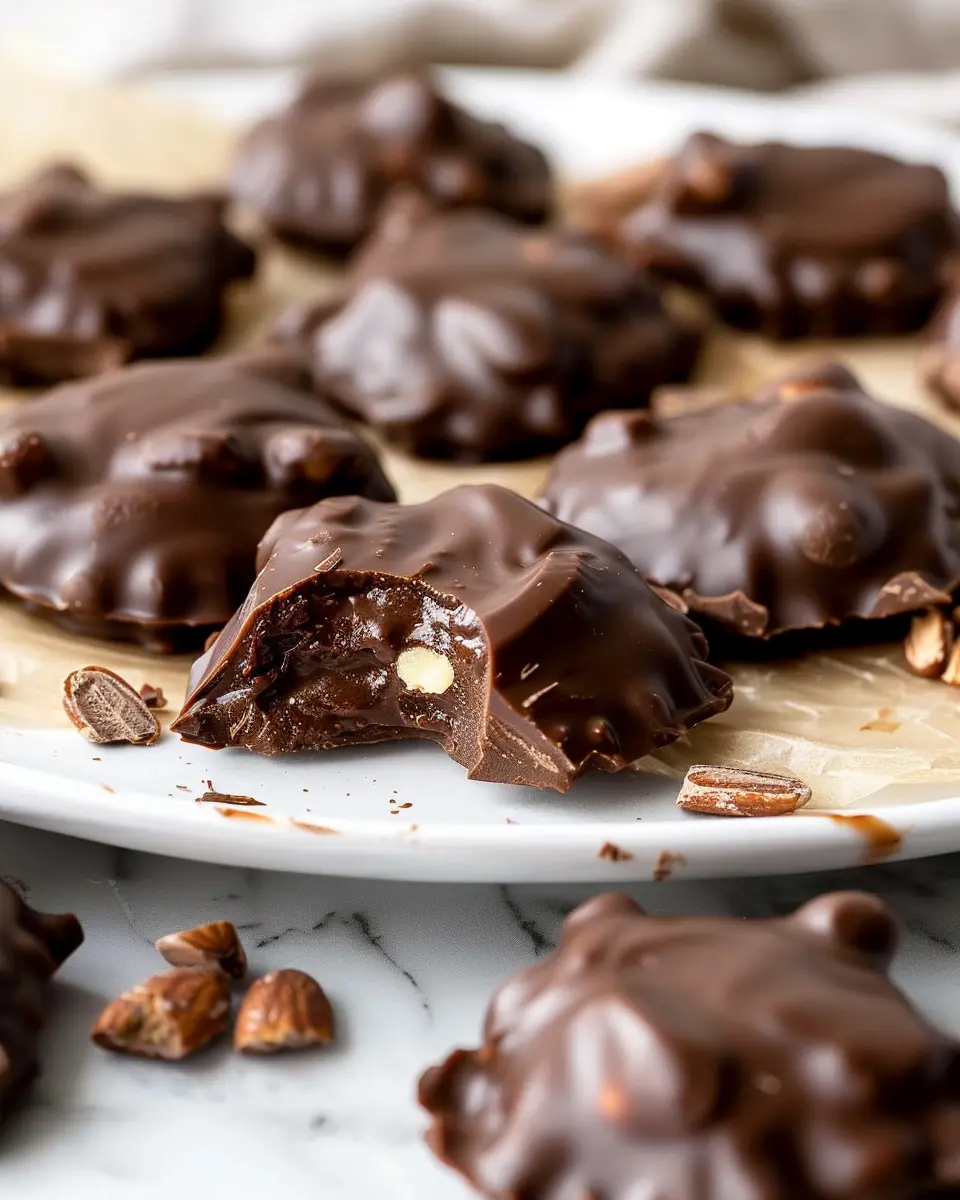
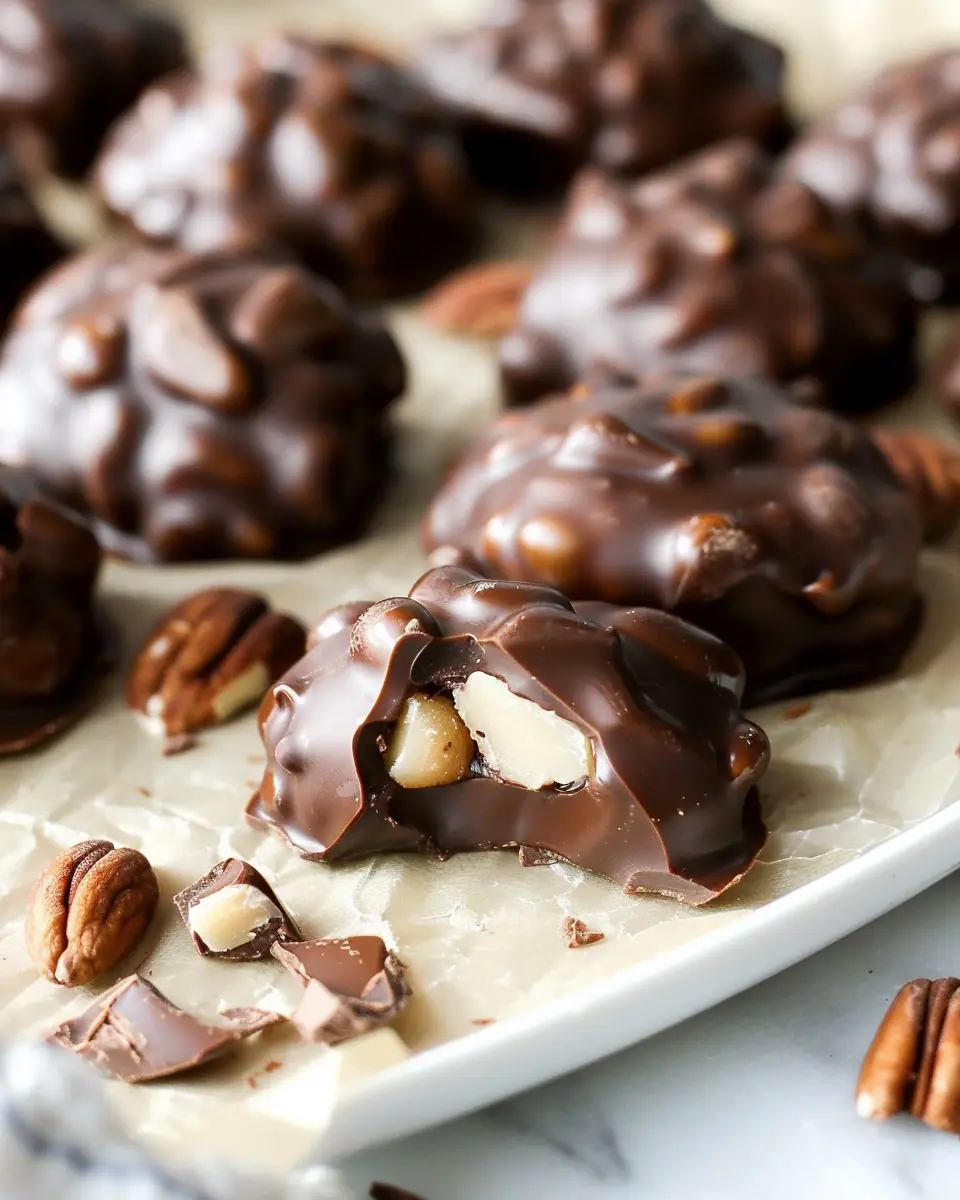
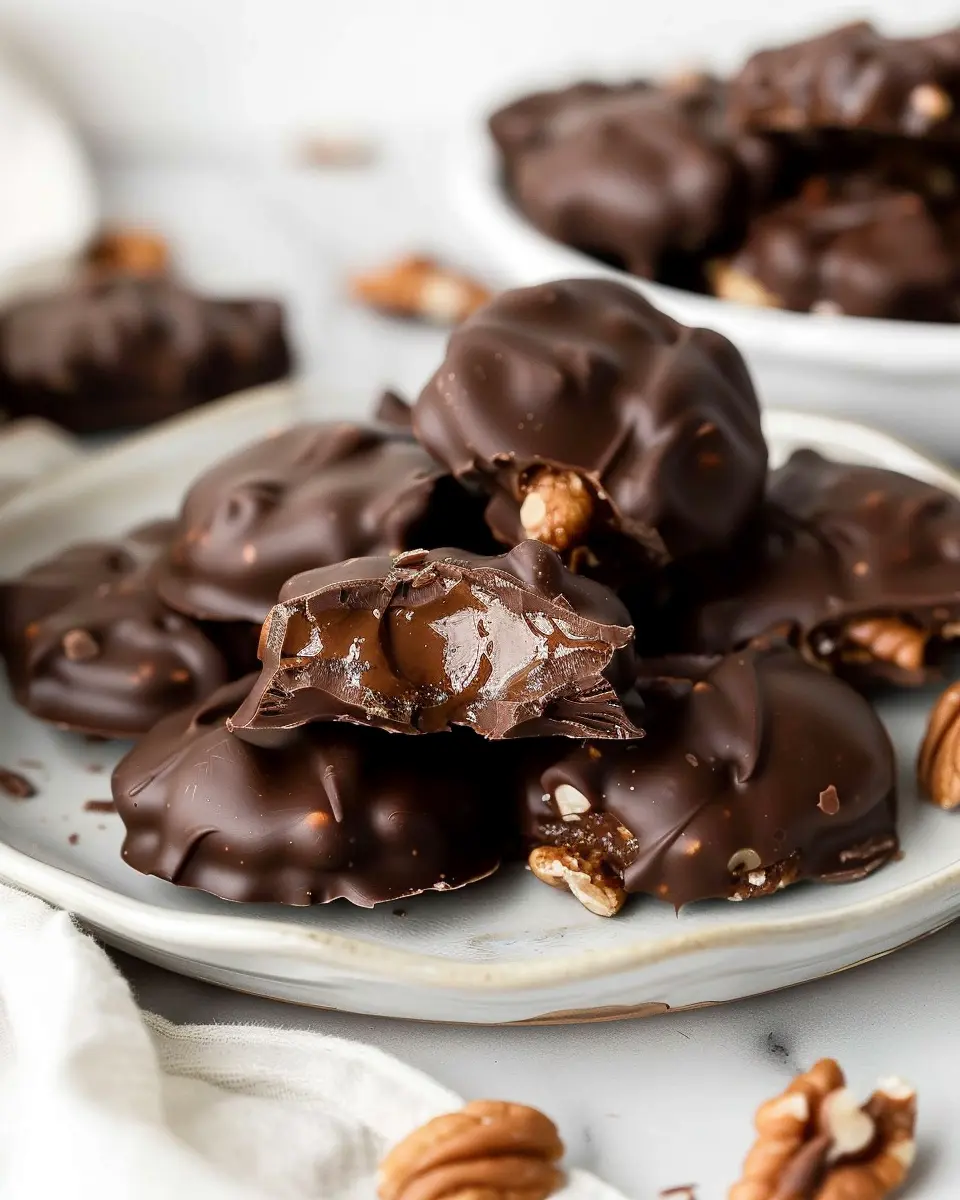
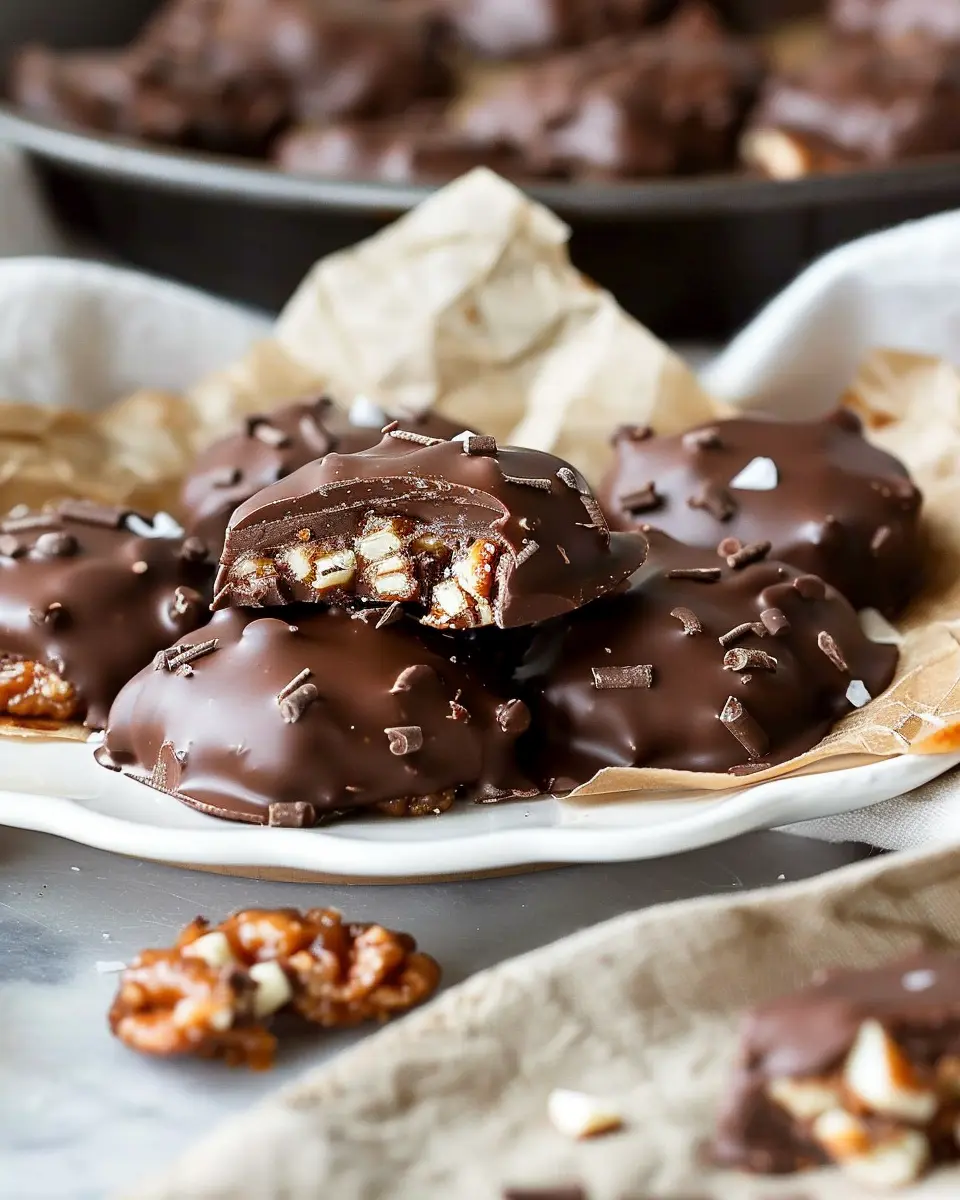
When it comes to sweet treats, there’s something special about biting into a homemade chocolate turtle. Imagine the rich, gooey caramel oozing out, perfectly paired with crunchy pecans and enveloped in smooth, velvety chocolate. These delightful confections take you back to childhood memories of candy shops and special occasions, making them an irresistible indulgence!
Why Homemade Chocolate Turtles are a Delightful Treat
Creating your own homemade chocolate turtles not only allows you to control the ingredients but also offers a chance to personalize them to your tastes. Are you a fan of dark chocolate? Or perhaps you prefer the creamy richness of milk chocolate? The beauty of making your own is that you can experiment to discover your absolute favorite combination!
Moreover, these chocolate turtles make the perfect gift for friends and family — especially around the holidays or at celebrations. Wrapping them up in a cute box or a jar can turn a simple treat into a heartfelt present. Plus, the sheer joy of gifting homemade goodies adds a personal touch that store-bought treats simply can’t match.
Did you know that pecans are not only delicious but also packed with nutrients? According to the American Heart Association, they’re a source of heart-healthy fats, fiber, and protein. So when you indulge in your homemade chocolate turtles, you can feel just a little bit better about your choice!
As for the chocolate, opting for high-quality chocolate not only enhances the flavor but also brings that luxurious texture to your turtles. You can learn more about selecting the best chocolate from resources like Chocolate.org, ensuring your homemade confections achieve that gourmet touch.
So why not roll up your sleeves and dive into the world of chocolate-making joy? With just a few ingredients and a little bit of time, you can whip up a batch of homemade chocolate turtles that will delight your taste buds and perhaps even become a new favorite among friends and family. Let’s unwrap this delightful treat together and get started on a journey full of rich flavors and sweet memories!
Ingredients for Homemade Chocolate Turtles
Creating your own homemade chocolate turtles is a delightful and rewarding experience. Let’s break down what you need to elevate your candy-making game!
Essential ingredients for chocolate turtles
To whip up these delicious treats, you’ll need:
- Pecans: About 2 cups, toasted for that rich, nutty flavor.
- Caramel: Use a quality store-bought caramel or make your own from scratch with just sugar and cream.
- Chocolate: Choose between milk or dark chocolate depending on your preference (consider using high-quality chocolate for the best results).
- Sea Salt: A sprinkle enhances the chocolate and caramel flavors beautifully.
These four simple ingredients create the core of your homemade chocolate turtles.
Optional ingredients to elevate your turtles
Want to take your turtles to the next level? Consider adding:
- Finishing Salt: A touch of flaky sea salt can elevate the flavor to gourmet status.
- Chocolate Drizzle: Use a contrasting chocolate to drizzle over your finished turtles for a decorative touch.
- Flavor Variations: Experiment with different nuts like almonds or hazelnuts, or even mix in some dried fruit for a unique twist.
Adding these optional ingredients can personalize your homemade chocolate turtles while making them extra special for friends and family. For more inspiration on chocolate treats, check out Chocolate.org.
So, are you ready to get started? The sweet aroma of chocolate and caramel will fill your kitchen, and trust me—your taste buds will thank you!
Step-by-step Preparation of Homemade Chocolate Turtles
Creating homemade chocolate turtles in your kitchen is a delightful way to impress friends and family. These sweet treats, generously filled with pecans and luscious caramel, are a perfect intersection of textures and flavors. Let’s walk through the preparation process step-by-step, making sure you have everything you need for a successful indulgence!
Gather your equipment and ingredients
Before we dive into the candy-making magic, it’s important to prepare our workspace. Here’s what you’ll need:
Equipment
- Baking sheet
- Parchment paper
- Microwave-safe bowl
- Spoon or spatula
- Small saucepan (if you prefer the stove over the microwave)
Ingredients
- 1 cup pecan halves
- 1 cup granulated sugar
- 1/2 cup unsalted butter
- 1/4 cup corn syrup
- 1/2 teaspoon vanilla extract
- 1 cup chocolate chips or almond bark (your choice of milk or dark)
Make sure to have everything within reach for a seamless experience. This will also help you avoid any last-minute dashes to the store!
Toast and chop the pecans
A little toast goes a long way! Start by toasting the pecans to enhance their flavor:
- Preheat your oven to 350°F (175°C).
- Spread the pecan halves on a baking sheet in a single layer.
- Toast for about 8-10 minutes, stirring occasionally, until they are golden brown and fragrant.
Once cooled, chop them coarsely, ensuring a mix of larger and smaller pieces for a delightful texture in your homemade chocolate turtles.
Make the microwave caramel
Caramel can seem intimidating, but using the microwave simplifies the process:
- In your microwave-safe bowl, combine the sugar, butter, corn syrup, and a pinch of salt.
- Microwave on high for 4-5 minutes, stopping to stir every minute.
- Once it reaches a rich golden color, carefully add the vanilla extract.
This microwave caramel technique is a game-changer, offering a foolproof way to achieve that delicious gooey texture.
Form the turtle candy mounds
Now comes the fun part!
- Using a spoon, scoop out about a tablespoon of the caramel mixture and dollop it onto the prepared baking sheet lined with parchment paper.
- While the caramel is still warm, place a small mound of chopped pecans on top of each caramel mound, pressing gently to ensure they stick.
This is where you truly start to see your homemade chocolate turtles take shape.
Melt the chocolate or almond bark
Now that your caramel and pecans are ready, let’s get that chocolate ready to dip!
- In a microwave-safe bowl, melt your chocolate chips (or almond bark) in 30-second intervals, stirring in between until smooth.
- Ensure there are no lumps, as a smooth dip is key to a beautiful finish.
Dip and coat the turtles
It’s time to crown your turtles with chocolate!
- Using two forks, carefully dip each caramel-pecan mound into the melted chocolate, ensuring they’re fully coated.
- Gently shake off any excess chocolate before placing them back on the parchment paper.
This step is all about the aesthetics. Perfectly coated turtles simply look irresistible!
Let them set and store properly
Finally, let your delicious creations cool down:
- Allow the chocolate to set at room temperature until firm, which usually takes about 30 minutes.
- For storage, keep your homemade chocolate turtles in an airtight container. They can be stored in a cool, dry place for about two weeks — if you can resist them that long!
And there you have it! By following these steps, you’ll create a delicious treat that’s perfect for sharing or indulging all by yourself. For more great tips and recipes, check out resources on food safety and candy-making techniques.
Happy dipping!
Variations on Homemade Chocolate Turtles
Creating homemade chocolate turtles can be a delightful experience, and there’s plenty of room for creativity! Let’s explore some delicious variations to make these treats uniquely yours.
Chocolate Turtles with Different Nuts
While pecans are the classic choice for traditional homemade chocolate turtles, don’t hesitate to mix it up! Consider using:
- Almonds for a sweeter crunch
- Cashews for a creamy texture
- Hazelnuts for a delightful twist on flavor
Each nut brings its own personality, so why not try a few combinations? You might find a new favorite in the process!
Dairy-Free Chocolate Turtle Options
For those following a dairy-free lifestyle, you can easily substitute traditional ingredients to create scrumptious homemade chocolate turtles.
- Dark chocolate chips: Look for brands that are specifically labeled dairy-free; there are many delicious options available.
- Nut butters: Opt for almond or cashew butter instead of turtle toppings for a smooth, rich alternative.
These tweaks keep the flavors intact while ensuring everyone can enjoy these treats!
Flavor Additions for a Twist on Tradition
Want to elevate your homemade chocolate turtles? Add some unexpected flavors! Here are a few fun ideas:
- Sea salt: A sprinkle on top heightens the sweetness and adds depth.
- Coconut flakes: These give a tropical flair and added texture.
- Fresh fruit: That’s right! A thin slice of dried apricot or a raspberry inside can add a burst of flavor.
Feel free to experiment with spices, too! A dash of sea salt or cinnamon can transform your turtles into something extraordinary.
By utilizing these variations, you can easily personalize your homemade chocolate turtles, making them perfect for any occasion. For additional inspiration, check out Serious Eats for more sweet ideas and techniques!
Cooking Tips and Notes for Homemade Chocolate Turtles
Achieving the perfect caramel texture
Crafting homemade chocolate turtles begins with making that luscious caramel sauce. For the best texture, heat your sugar slowly and gently. This gives you control, preventing the sugar from burning. Use a candy thermometer to reach the ideal temperature of 240°F for a soft, chewy caramel. If you’re unsure, check out resources like the National Confectioners Association for tips on candy making.
Tips for melting chocolate smoothly
To achieve silky smooth chocolate for coating your homemade chocolate turtles, chop it into uniform pieces for even melting. Opt for a double boiler or microwave in short bursts at 30 seconds, stirring in between. This method helps prevent scorching. Dark chocolate, milk chocolate, or even a mix can be used—get creative with your personal favorites!
Storage tips for lasting freshness
Once your chocolate turtles have cooled and set, store them in an airtight container at room temperature for up to two weeks. If you want to enjoy them longer, consider refrigerating or even freezing them. Just remember to separate layers with parchment paper to maintain that delightful crunch!
Serving Suggestions for Homemade Chocolate Turtles
When it comes to enjoying homemade chocolate turtles, the fun doesn’t stop at just the recipe. Think about how you can elevate the experience with some thoughtful serving suggestions!
Ideal Pairing Suggestions
Pair your homemade chocolate turtles with delicious accompaniments for a delightful treat. Here are a few ideas to consider:
- Fresh fruits: Strawberries, raspberries, or apple slices can balance the sweetness.
- Coffee: A rich, dark roast or a creamy latte will enhance the chocolate flavor.
- Nut butters: Serving them with a side of almond or peanut butter adds a savory note.
Creative Serving Ideas for Gatherings
Hosting friends or family? Show off your homemade chocolate turtles in style:
- Dessert platters: Arrange them on a beautiful serving dish alongside other sweets like brownies or cookies.
- Gift boxes: Package a few in decorative boxes for party favors or thoughtful gifts.
- Themed nights: Incorporate them into a movie night or game night with edge-of-your-seat excitement!
As you experiment with these ideas, consider checking out more inspiration from sources like Taste of Home or Food Network for additional pairing and serving ideas. Enjoy the delightful crunch of pecans wrapped in gooey caramel, all draped in rich chocolate!
Time Breakdown for Homemade Chocolate Turtles
Preparation time
Getting started on your homemade chocolate turtles is a breeze! You’ll need about 15 minutes for preparation. This includes gathering your ingredients, measuring out those delicious pecans and caramel, and setting everything up for an efficient workflow.
Cooking time
Once prepped, the cooking will take a bit longer—around 30 minutes. This time accounts for melting the caramel and chocolate to the perfect consistency, so your turtles are rich and decadent.
Total time
In total, expect to spend roughly 45 minutes from start to finish. This means you can whip up your homemade chocolate turtles in no time, making them a perfect last-minute treat or a sweet surprise for friends! For more tips on making tasty confections, feel free to check out The Chocolate Life.
Whether it’s a cozy night in or a gathering with friends, these turtles are sure to impress!
Nutritional Facts for Homemade Chocolate Turtles
Calories per piece
When indulging in homemade chocolate turtles, it’s helpful to know the calorie count. On average, each piece contains around 100-120 calories. This can vary based on the specific ingredients and portion sizes used. Keep this in mind as you enjoy your sweet treat!
Key nutritional highlights
Homemade chocolate turtles pack a delightful combination of flavors and textures, but they also provide some nutritional benefits:
- Nuts: Rich in healthy fats, protein, and fiber, nuts help promote heart health.
- Chocolate: Dark chocolate, used in many recipes, is known for its antioxidant properties.
- Caramel: While sweet, it can add a touch of energy to your snacks.
For a more detailed breakdown of the nutritional benefits of these ingredients, check out the “Nutritional Benefits of Chocolate” by the National Institutes of Health. Remember, moderation is key to enjoying these delicious treats!
FAQs about Homemade Chocolate Turtles
Making homemade chocolate turtles can be a delightful experience, and you likely have some questions that can help enhance your culinary adventure. Let’s dive into the frequently asked questions!
Can I make these turtles in advance?
Absolutely! One of the best things about homemade chocolate turtles is that they store well. You can prepare them a few days ahead. Just keep them in an airtight container in the fridge. Make sure your turtles are set completely before storing to avoid any mess. If you’d like to indulge even further, consider gifting them to friends or family—all while impressing them with your culinary prowess!
What can I substitute for pecans?
If pecans aren’t your preference or you have a nut allergy, don’t worry! You can use a variety of alternatives. Walnuts or almonds make excellent substitutes, providing a similar crunch and flavor profile. If you’d prefer to go nut-free, try using crushed cereal or toffee bits for that desirable crunch. Each alternative brings a unique twist to your homemade chocolate turtles, so feel free to experiment!
How do I store leftovers properly?
To keep your homemade chocolate turtles fresh, store them in a cool, dry place, preferably in an airtight container. If it’s warm or humid, the fridge is your best bet. Just remember to separate layers with parchment paper to prevent sticking. They can last up to two weeks if stored correctly, but let’s be honest—will there really be leftovers?
For more information on proper food storage, check out this guide from the USDA. Enjoy your chocolate creations!
Conclusion on Homemade Chocolate Turtles
Why you’ll love making chocolate turtles at home
Making homemade chocolate turtles adds a delightful twist to traditional candies, and it’s an experience you’ll cherish. You’ll appreciate the freedom to customize your ingredients—choose your favorite nuts, tweak the sweetness, or explore different types of chocolate. Plus, there’s nothing quite like the satisfaction of creating something delicious from scratch!
These little bites of joy are perfect for gifting or satisfying your sweet tooth after a busy week. By crafting your own, you’ll not only save money but also know exactly what’s going into your treats. Why not give it a try? For more inspiration, check out Food52 and Serious Eats for exciting variations!
PrintHomemade Chocolate Turtles: The Best Indulgent Treat to Make
Indulge in the rich, gooey goodness of homemade chocolate turtles, a delightful treat perfect for any occasion!
- Prep Time: 20 minutes
- Cook Time: 15 minutes
- Total Time: 35 minutes
- Yield: 12 servings 1x
- Category: Desserts
- Method: Baking
- Cuisine: American
- Diet: Vegetarian
Ingredients
- 1 cup pecans
- 1 cup caramel candies
- 1 cup dark chocolate chips
- 1 tablespoon butter
Instructions
- Preheat your oven to 350°F (175°C).
- Spread the pecans on a baking sheet and toast for 8-10 minutes.
- Melt the caramel candies with butter in a saucepan over low heat.
- Arrange the toasted pecans on a parchment-lined tray.
- Pour the melted caramel over the pecans.
- In a microwave, melt the dark chocolate chips in 30-second intervals, stirring in between.
- Drizzle the melted chocolate over the caramel-coated pecans.
- Allow the turtles to set at room temperature or refrigerate for faster setting.
Notes
- For a more decadent flavor, use sea salt on top of the chocolate.
- Make sure to allow the turtles to cool completely before serving.
Nutrition
- Serving Size: 2 turtles
- Calories: 150
- Sugar: 12g
- Sodium: 50mg
- Fat: 8g
- Saturated Fat: 4g
- Unsaturated Fat: 3g
- Trans Fat: 0g
- Carbohydrates: 18g
- Fiber: 1g
- Protein: 2g
- Cholesterol: 10mg
Keywords: Homemade Chocolate Turtles, chocolate treats, indulgent desserts